How to make your newsletter form functional and visually-appealing?
Some Publii themes such as QF Fashion and Technews include a newsletter form in their design. In this article we’ll cover how you can add Mailchimp form or your own from a third-party service to a theme, and how you can fix up it’s styling to look good visually.
It’s important for us that our themes don’t just look good, but also comply with GDPR rules, so before getting started you should take a minute to read up on how to create an email newsletter subscription form with GDPR compliance on our blog, which will make sure that your newsletter form meets the requirements of the GDPR.
How do we add a newsletter form to Publii theme?
Adding a newsletter form to our themes is as easy as can be; you can simply copy your form code and paste it into your theme code via the Theme settings section of Publii.
However, if you use a popular newsletter service you’ll probably notice that the code generated by them to add such a form to your site is a bit “dirty”, so to make sure that we have nice, clean HTML code we should modify it a bit.
In this example, we'll show you how to do so using Mailchimp (one of the most popular newsletter services available).
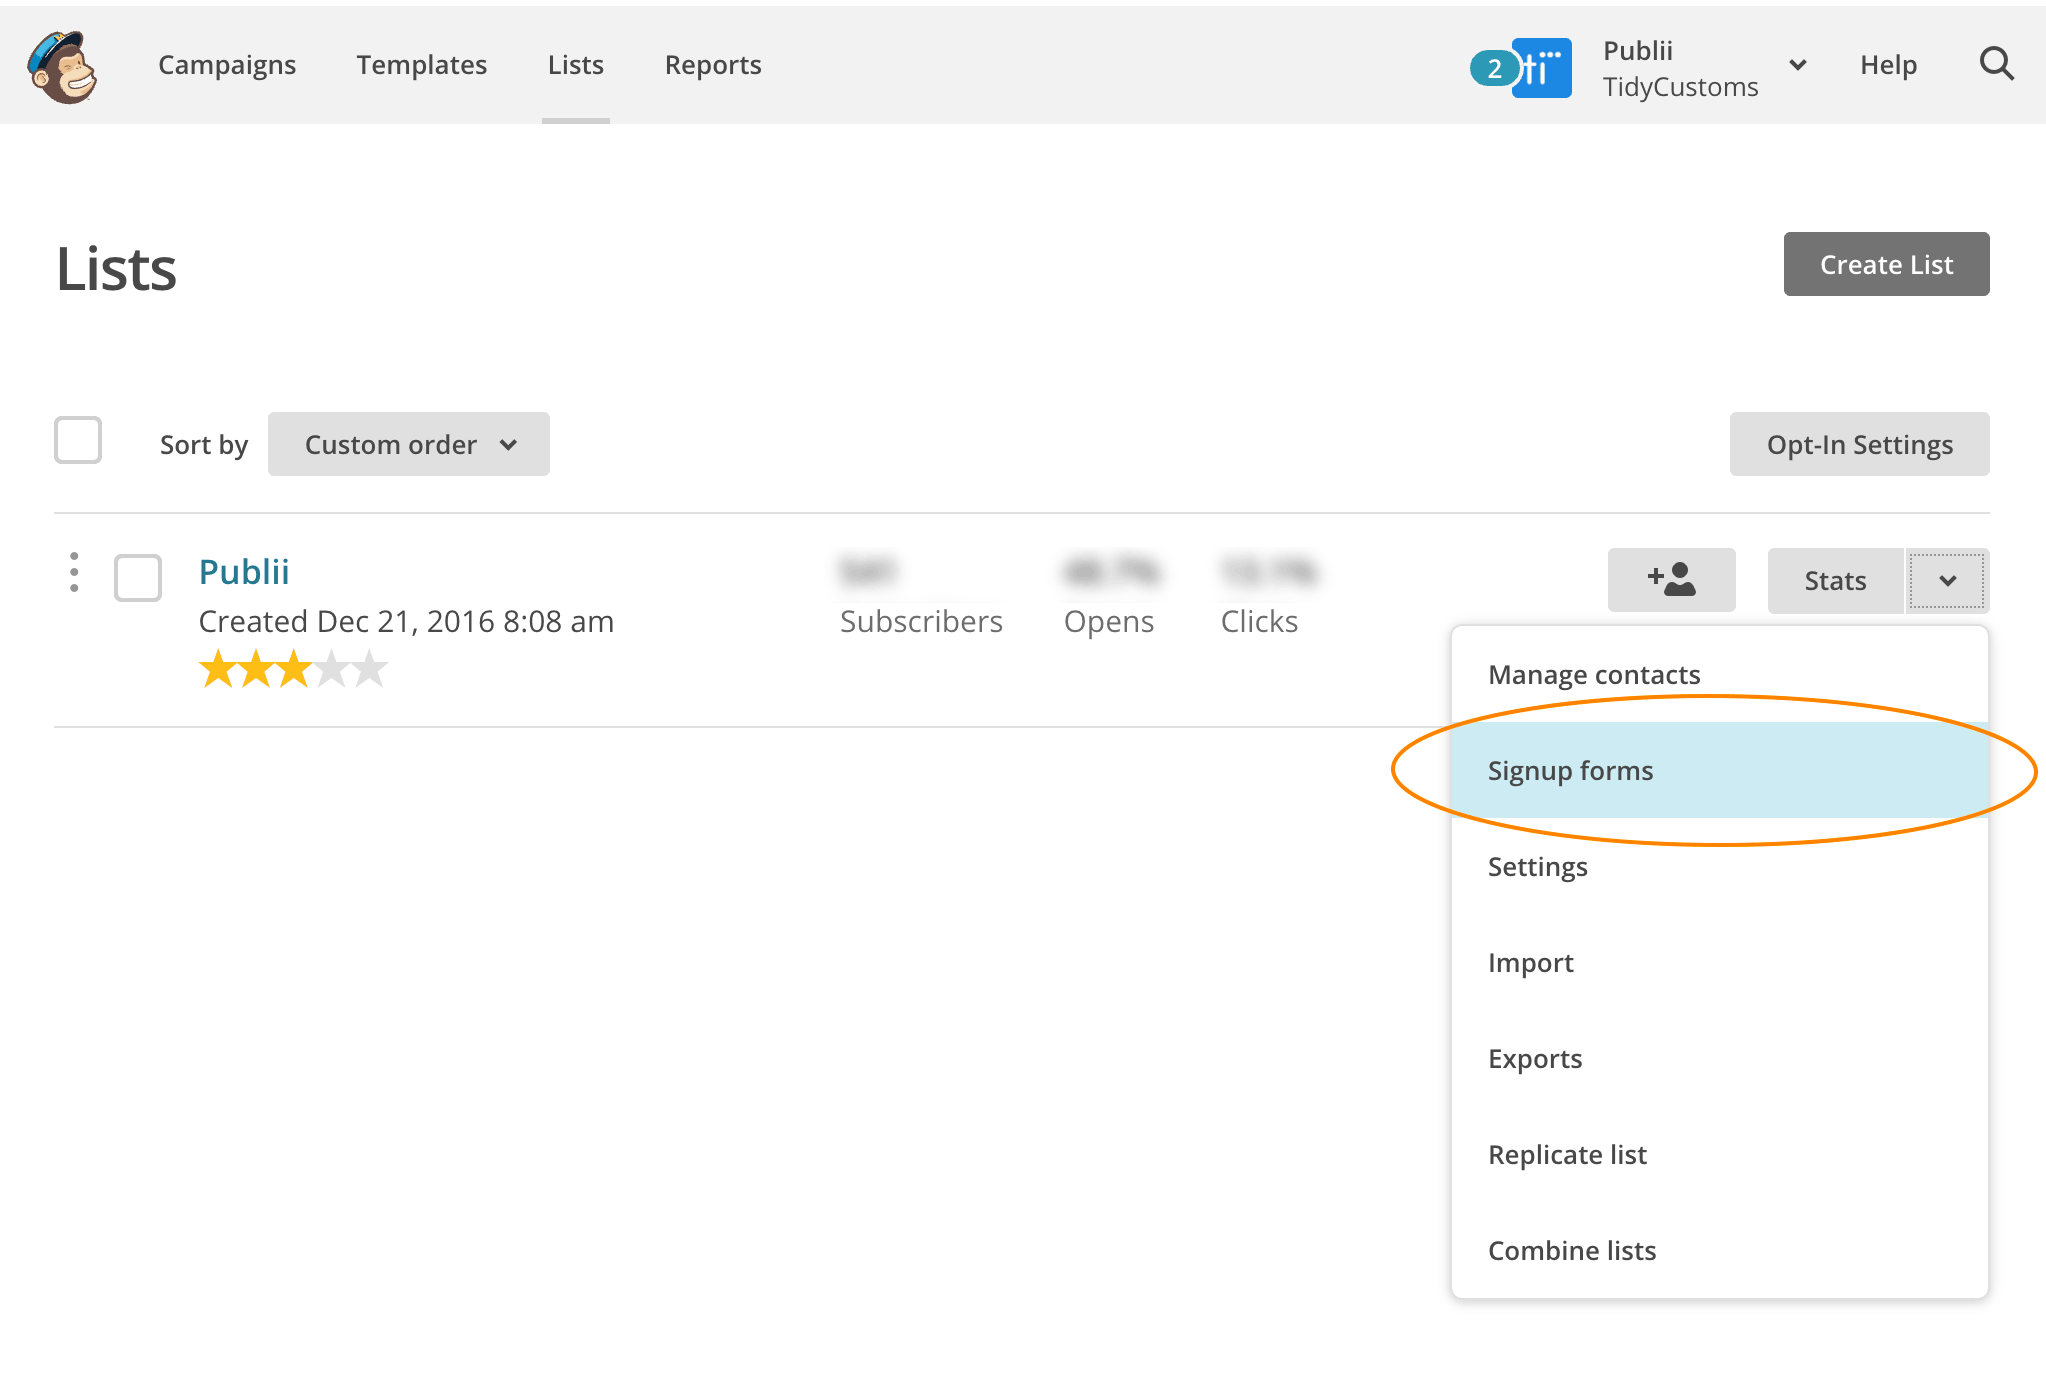
- In the Mailchimp interface, go to the Lists page by clicking the option in the main menu, then choose Signup forms from the drop-down menu next to the list you want to work with.

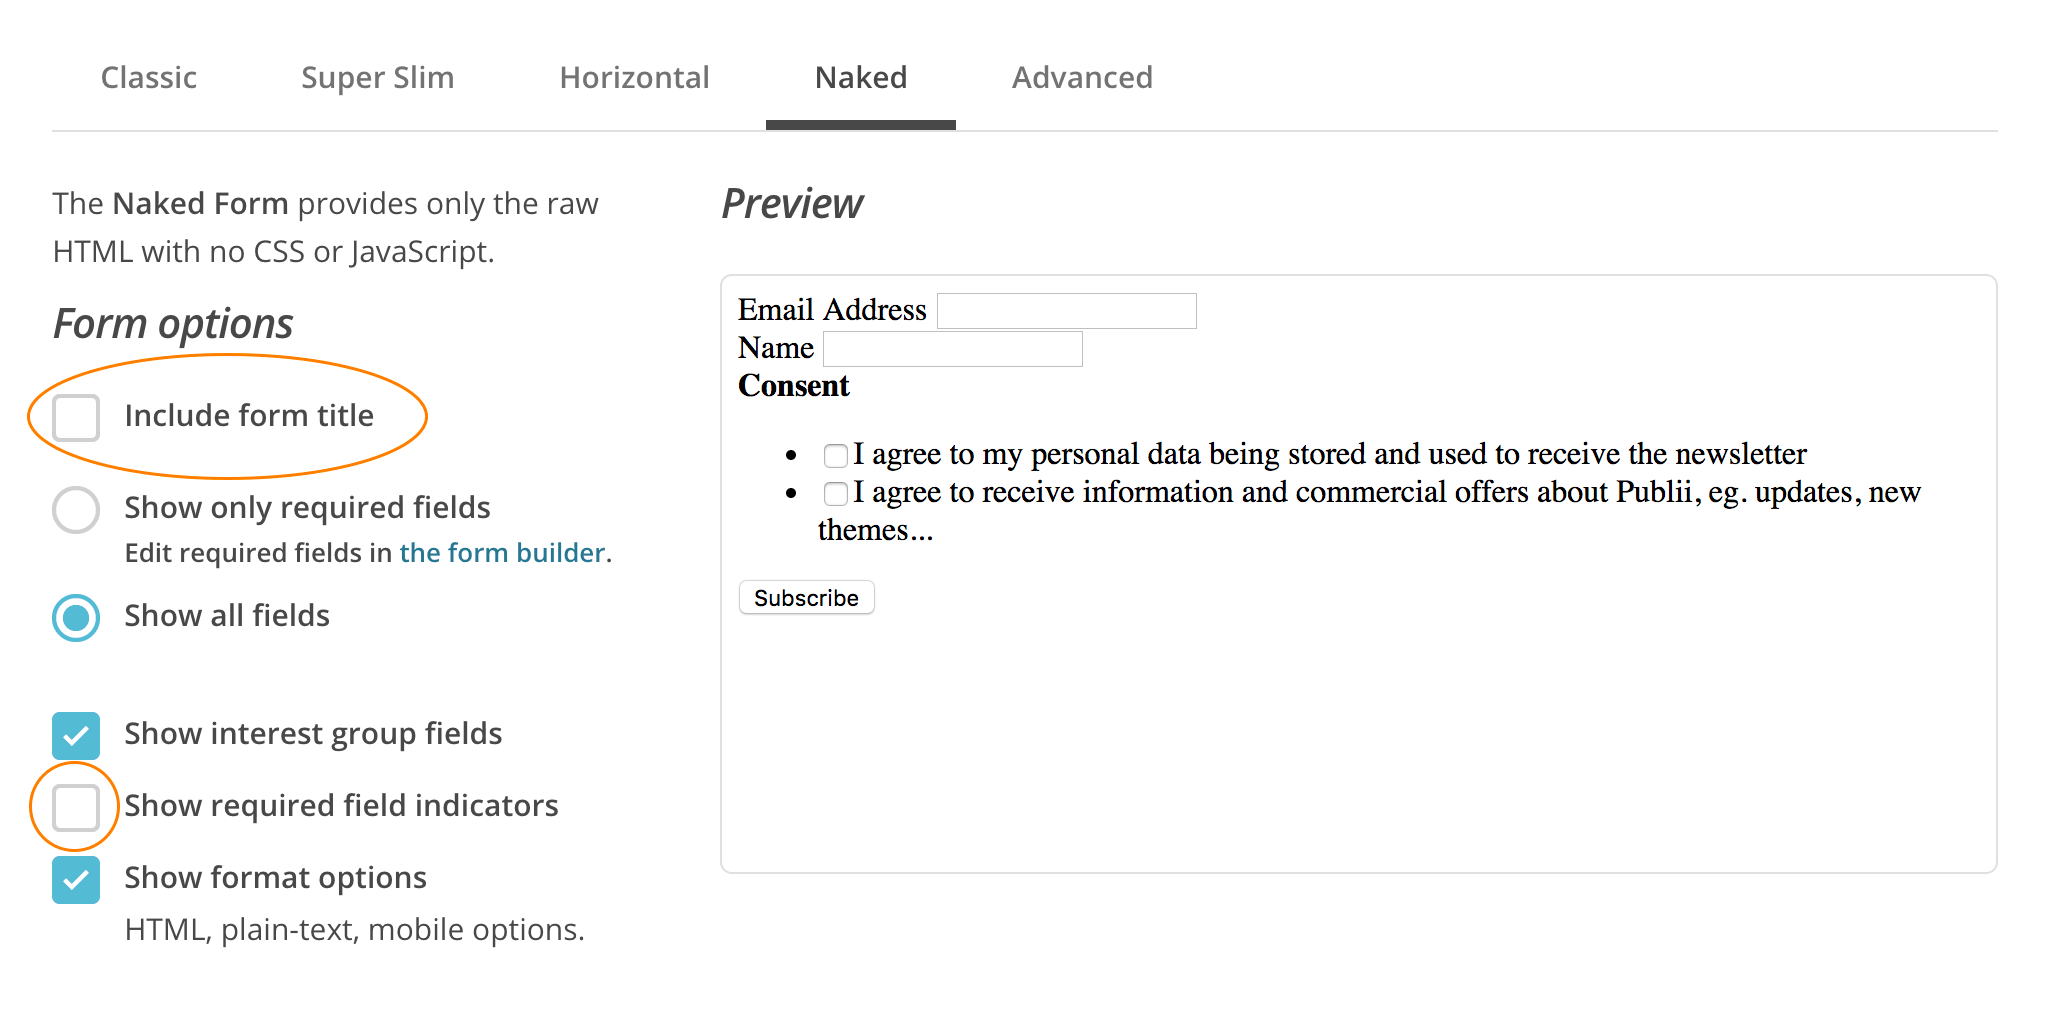
- Now, select Embedded forms, and then click on the Naked tab, which will provide us with a basic form. Since the form is barebones it will have fairly clean code, but we can format it even further to make really clean code.
We can remove the form title and/or the required field indicators by deselecting the following checkboxes:

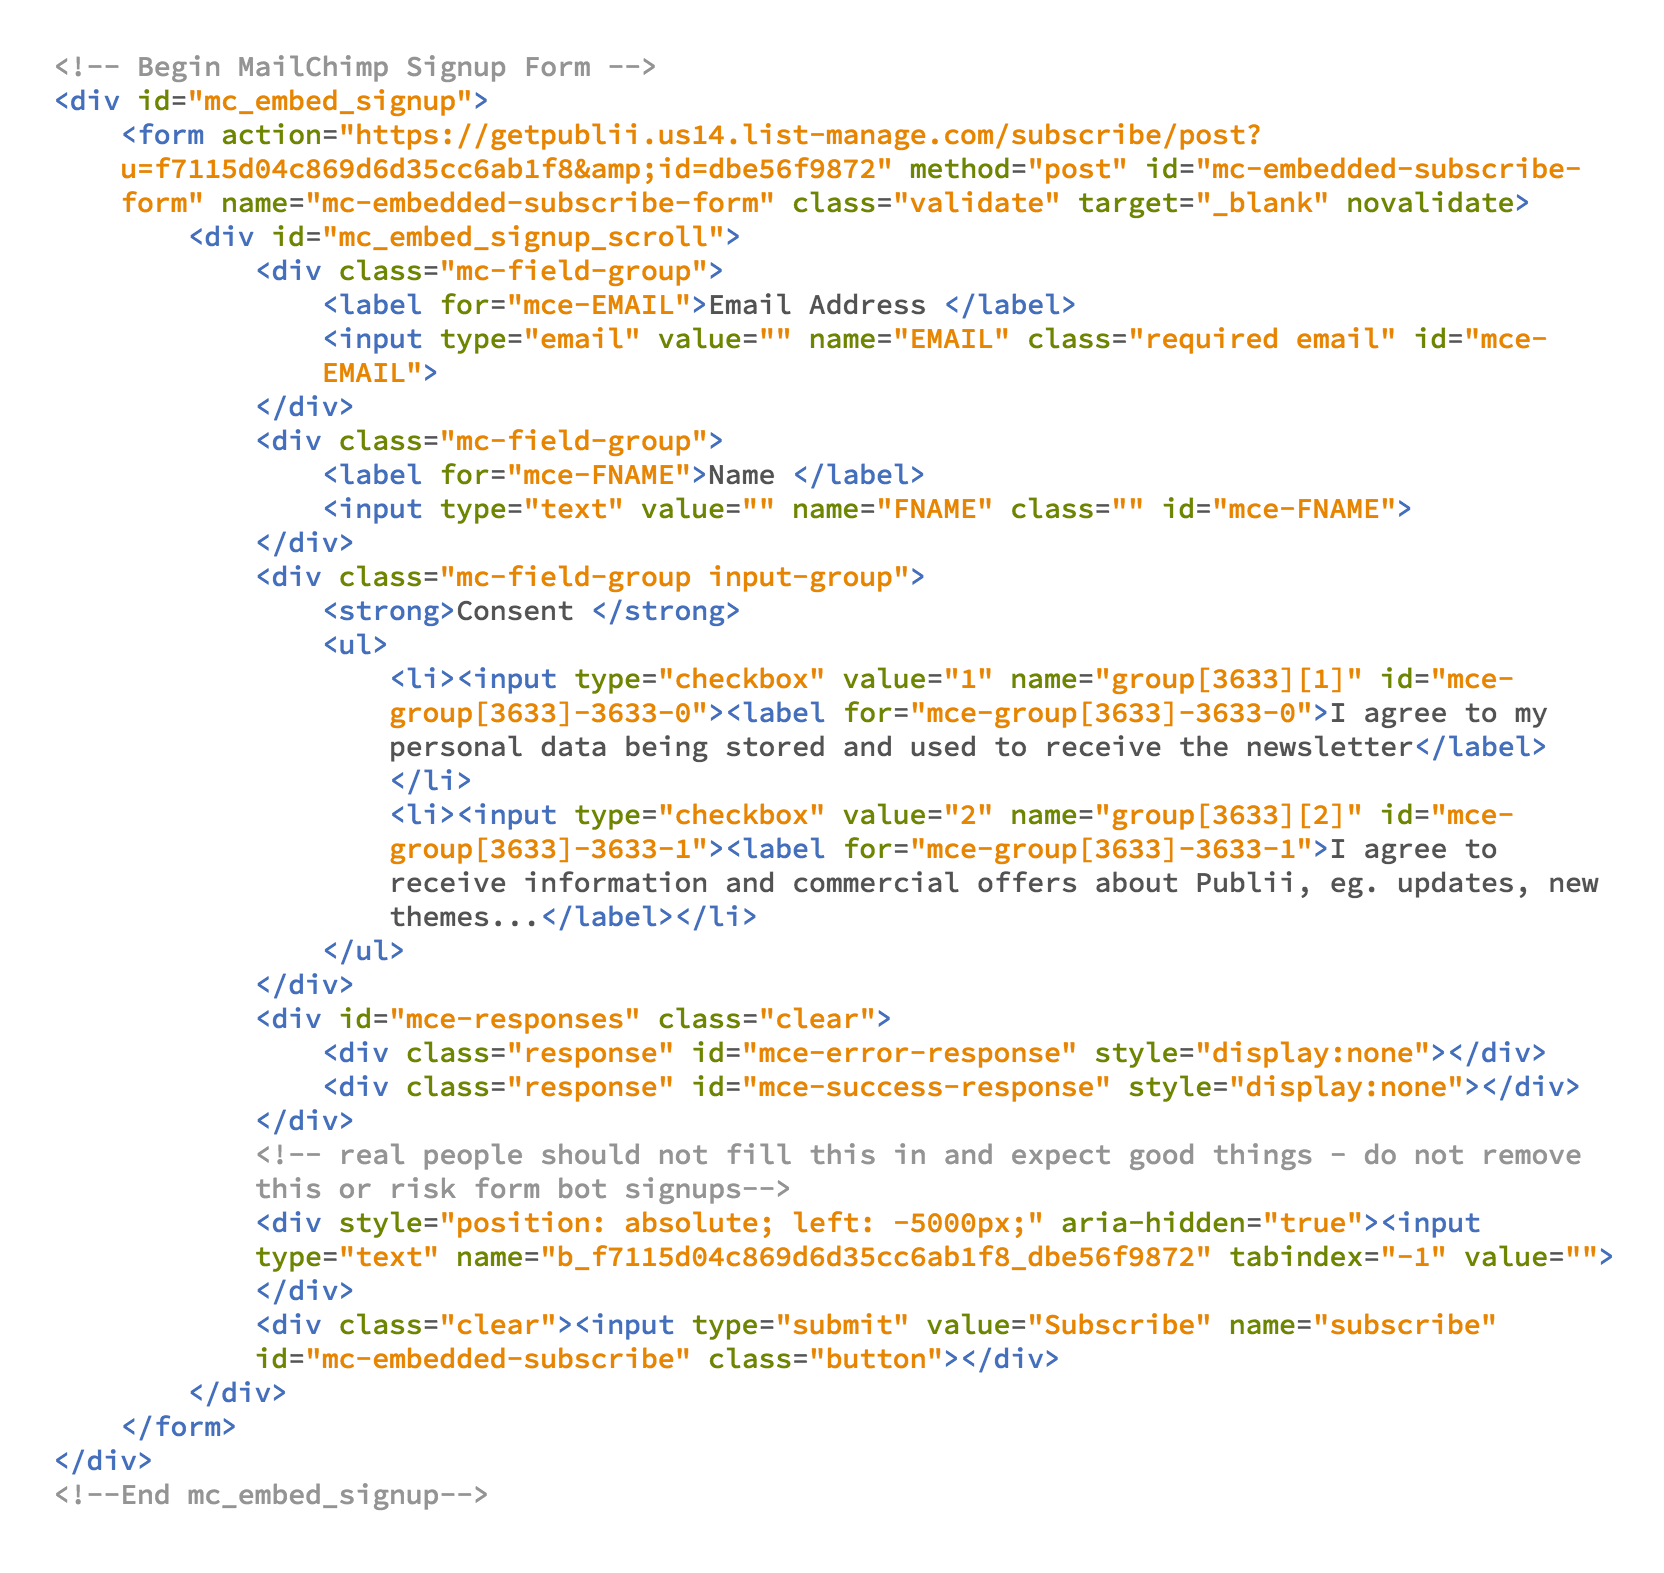
This will give us some code that will look something like this:

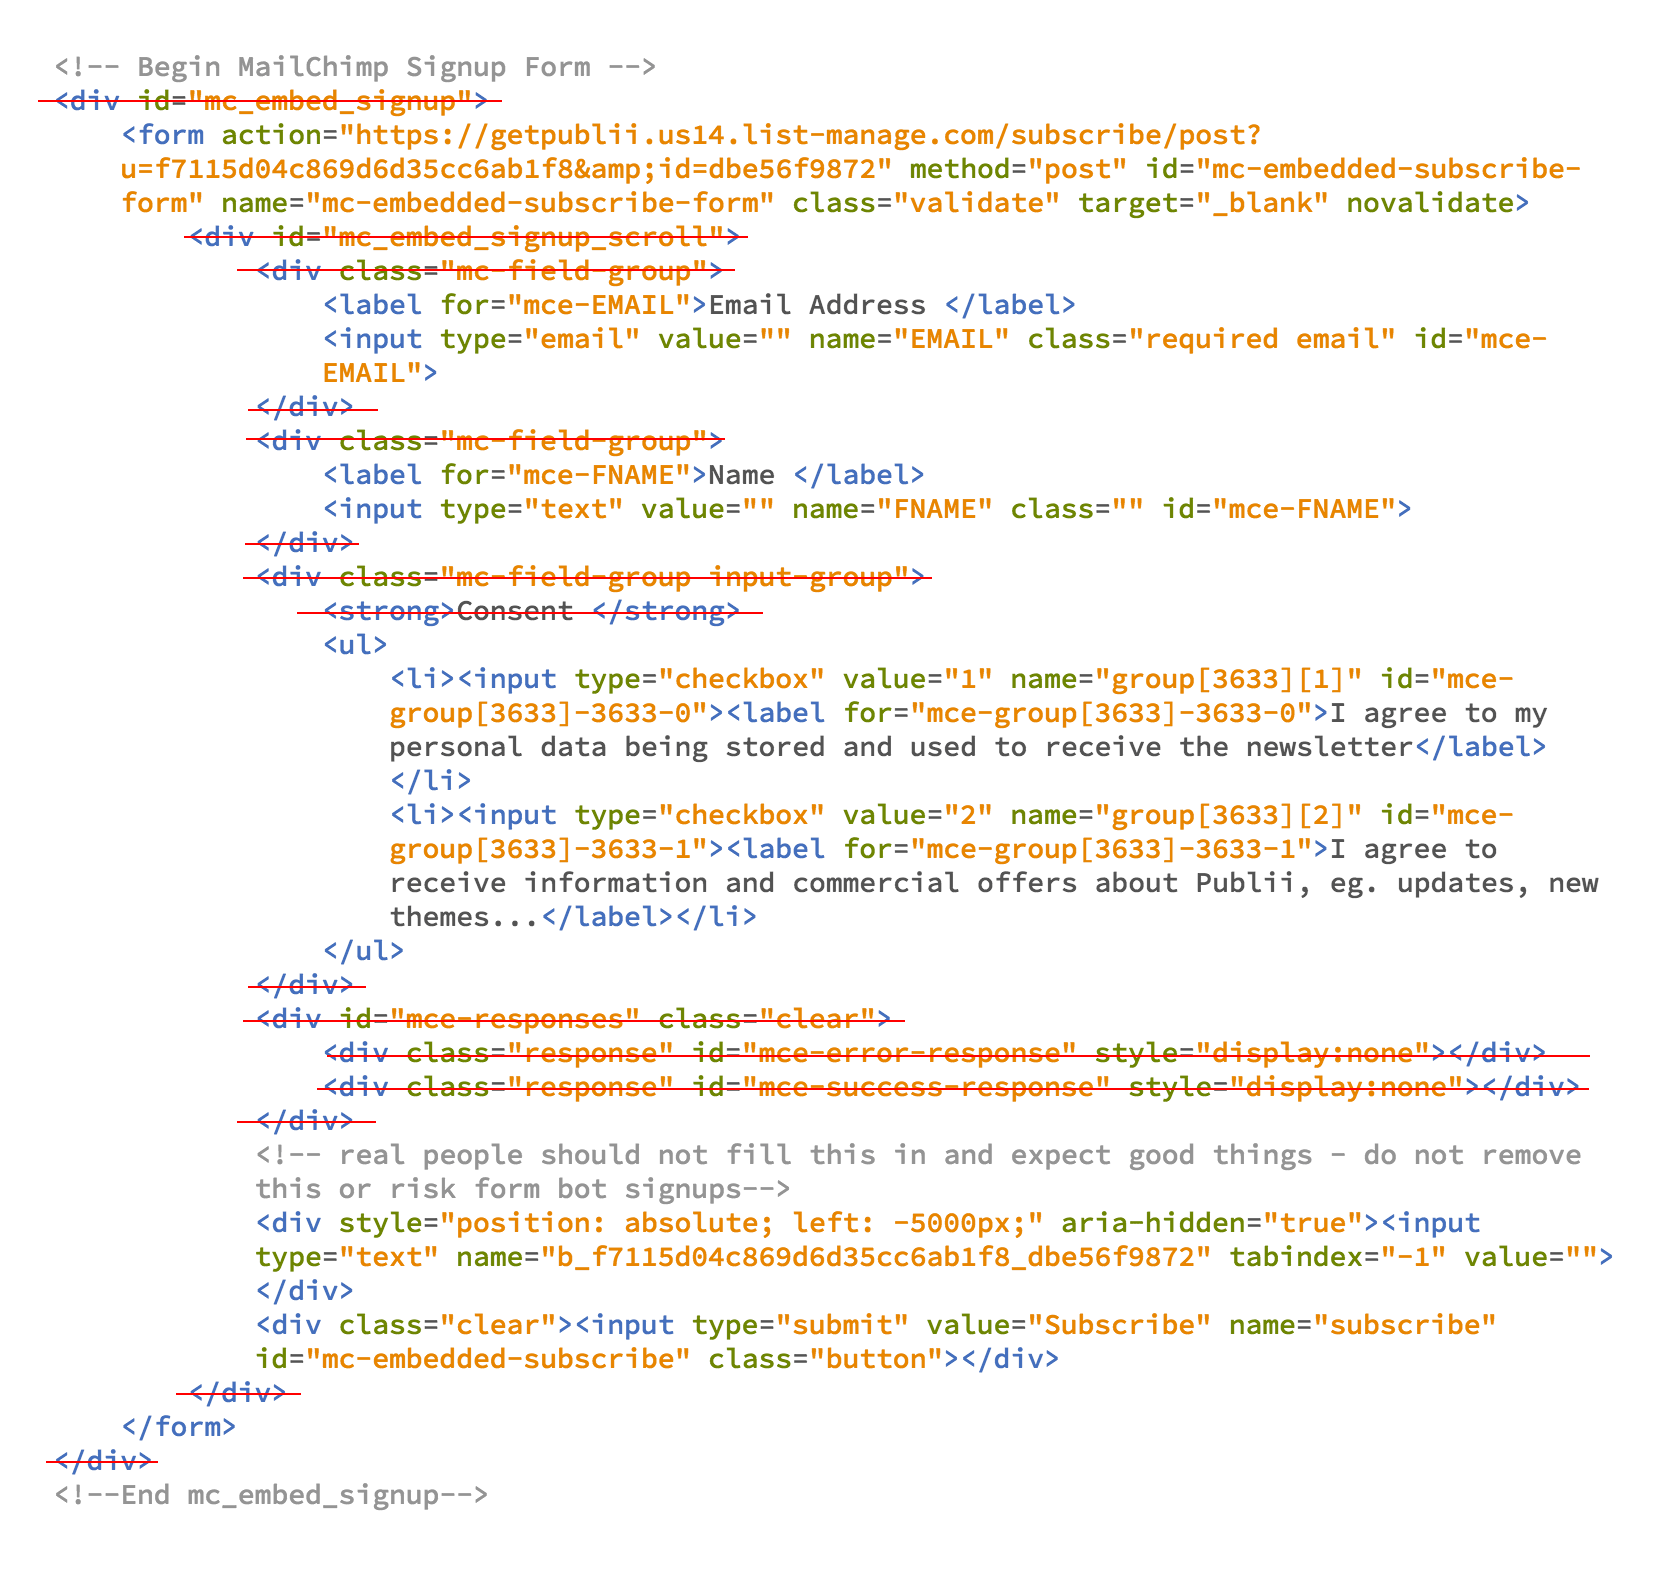
- As you can see the code above still does not look neat, so let's work a little bit of it. Remove all unnecessary HTML elements like DIV containers.

- If you want to make any elements required (that is, the user must fill them out to submit the form) you should add the required HTML attribute to your inputs. Since this is for a newsletter, the email and consent checkboxes should be required, e.g.:
<input name="EMAIL" class="email" placeholder="Email Address" id="mce-EMAIL" type="email" required>or
<input value="1" name="group[3633][1]" id="mce-group[3633]-3633-0" type="checkbox" required - You may want to swap the labels for the fields to placeholders instead; this is the way that we designed the newsletter form in the QF theme. Generally, using placeholder text instead of label is not recommended as it impacts accessibility - screen readers can read labels, but can’t read placeholder text. Still, QF supports placeholders with hidden labels so they are visible to screen readers
Use placeholder text, but still keep the labels e.g.:
<label for="mce-EMAIL">Email Address </label>
<input name="EMAIL" class="required email" placeholder="Email Address"id="mce-EMAIL" type="email" required>
Some Publii themes, especially Premium such as Mellisa or Cortado include a newsletter form in the popup. In order to make the [Close] and [Submit] buttons work properly just add to the second one a "newsletter-popup__submit" class.
<input class="newsletter-popup__submit" type="submit" name="subscribe" id="mc-embedded-subscribe" value="Subscribe">