How to translate your Publii theme to another language
It's easy enough to make a website in your native language with Publii; just create the content! But if you do, you'll quickly notice that there's a little problem: the additional bits of text that come with the theme, such as the "Published On" text you see at the top of a post or the button labels on your social media buttons, don't show up in the content editor or in the general options of Publii. This makes them a bit of a liability in a non-English site, since you'll always have a few stray bits of English messing up your aesthetics.
To solve this, Publii offers two ways to localize theme text. The easiest option is to use the Language File Editor Plugin, which allows you to edit theme language files directly from the Publii interface. The plugin automatically creates a safe override file for your translations, ensuring they remain intact even after theme updates. With a simple, user-friendly interface, it streamlines the translation process and eliminates the need to edit .json files manually.
 Download Language File Editor
Alternatively, translations can also be done manually by editing the theme's language files. The sections below provide a detailed guide on how to locate, override, and edit these files step-by-step.
The Publii theme language file
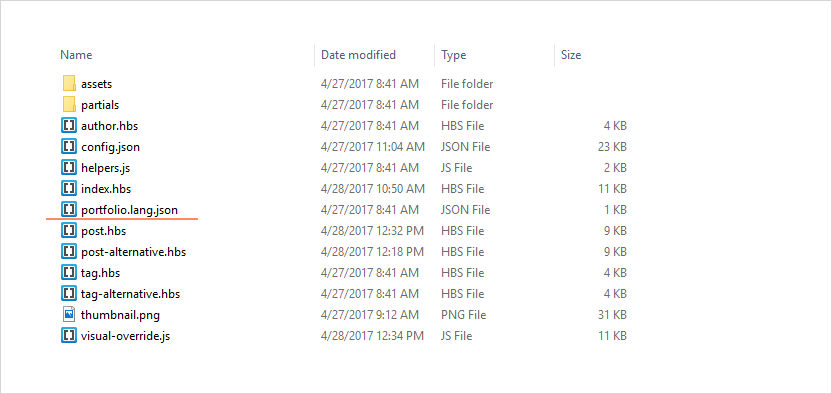
The name of the language files is themeName.lang.json, which is stored in the theme's folder in the Publii files location (this is defined in the Global Settings for Publii). So, if we wanted to find the language file for the new Portfolio theme, we'd first go to our Publii file folder, then open the themes → portfolio folder, where we'll find the language file:
Now, to translate the theme's text we technically could simply open the language file and edit it directly, but there's a problem; when the theme is updated the language file will be overwritten, and all our changes will be lost. Instead, we need a more permanent solution, which Publii already provides.
Instead of editing the file directly, instead we can create a copy of the file that's unique for our website, that Publii can use to override the default language file. Let's go through it step-by-step.
Translating a Publii theme
First, locate the language file for the theme you wish to translate; as mentioned before, this will be in the Publii files → themes → themeName folder, where Publii files is the path defined in Sites Location option of your Publii Global Settings. the filename will be called themeName.lang.json, where themeName is the name of the theme you are using e.g. "portfolio.lang.json".
Create a copy of the language file, leaving the original untouched where it is. Place the copy in your sites/siteName/input/languages folder, where siteName is the name of your site as defined in Publii (make sure that the filename matches exactly with the original language file). You may find that your input folder doesn't have a languages folder; if that's the case, simply create the folder manually and put the language file inside.
Open the copy of the language file with your text editor of choice; even Notepad will work! Inside, you will see some code; each line will either be a category for sorting the text which can be ignored, or the translation text. The translation text will have this format: "placeHolderText": "translatedText",. Text to the left of the colon is the placeholder text, which we can ignore. The text to the right of the colon is the actual text that will appear on the website.
{
   "partials": {
      "cookiebar": {
         "close": "Close"
      },
      "disqus": {
         "noscript1": "Please enable JavaScript to view the",
         "noscript2": "comments powered by Disqus."
      },
      "menu": {
         "label": "Menu"
      },
      "pagination": {
         "prev": "Previous",
         "next": "Next"
      },
      "shareButtons": {
         "shareWithFacebook": "Share with Facebook",
         "shareWithTwitter": "Share with Twitter",
         "shareWithGooglePlus": "Share with Google Plus",
         "shareWithPinterest": "Share with Pinterest",
         "shareWithStumbleUpon": "Share with StumbleUpon",
         "shareWithLinkedIn": "Share with LinkedIn",
         "shareWithBuffer": "Share with Buffer"
      }
   },
   "slider": {
      "button": "View project",
      "slide": "Slide %s"
   },
   "post": {
      "publishedBy": "By",
      "publishedOn": "Published on",
      "previousPost": "Previous Post",
      "nextPost": "Next Post"
   },
   "common": {
      "readmore": "View more"
   }
}
Translate each piece of text that is to the right of the colon; don't modify the category text or the text to the left of the colon on each line, as these are used in the theme code to tell Publii which text to replace:
 {
   "partials": {
      "cookiebar": {
         "close": "Your close button text here"
      },
      "disqus": {
         "noscript1": "Your enable Javascript message here",
         "noscript2": "Your Disqus intro text here"
      },
      "menu": {
         "label": "Your menu label here"
      },
      "pagination": {
         "prev": "Your previous button text here",
         "next": "Your next button text here"
      },
      "shareButtons": {
         "shareWithFacebook": "Your Facebook share button text here",
         "shareWithTwitter": "Your Twitter share button text here",
         "shareWithGooglePlus": "Your Google+ share button text here",
         "shareWithPinterest": "Your Pinterest share button text here",
         "shareWithStumbleUpon": "Your StumbleUpon share button text here",
         "shareWithLinkedIn": "Your LinkedIn share button text here",
         "shareWithBuffer": "Your Buffer share button text here"
      }
   },
   "slider": {
      "button": "Your slide button text here",
      "slide": "Your slide text here"
   },
   "post": {
      "publishedBy": "Your published by text here",
      "publishedOn": "Your publication date text here",
      "previousPost": "Your previous post button text here",
      "nextPost": "Your next post button text here"
   },
   "common": {
      "readmore": "Your readmore button text here"
   }
}
With the text replaced with your own translation or interpretation, save the changes to the file. Now, when Publii creates the website to be uploaded, the new language file you created will be used to override the options in the default language file, and you'll see your translated text displayed on your live or preview site.
For Advanced Users
There are two things to note for more advanced users; it is not necessary to include all of the code from the original language file in the override version of the file. Instead, you can include only the string that you wish to change. So if we only wanted to change the button label for the homepage slideshow in the Portfolio theme, we could create a language file with the following code inside:
{
   "partials": {
      "menu": {
         "label": "Menu"
      }
   },
   "slider": {
      "button": "View project",
      "slide": "Slide %s"
   }
}
This will override on the button text, leaving the rest untouched. Secondly, it's important to note the purpose of the %s text that can be seen in some translation text, such as in the example above; "slide %s". The %s text represents a variable that is to be taken from another part of Publii. For example, a text string might say "Welcome to my site, from %s", and in the live site, the %s text will be replaced with the author name, so that it says "Welcome to my site, from authorName". The %s symbol represents a number, character or text string that can be replaced by other variables, so before changing them it's important to check what the variable being displayed is to ensure your translation matches.
More about that can be found below, in the Variable %s
How the .json language file works
So you've figured out how to make translations, but would like to know a bit more about how it works? Read on! In a standard website theme, the incidental text is hard-coded in, hidden away in the theme files, making it hard to get to. Of course, if you have a small amount of working knowledge of theming or code, then it's extremely easy to change it directly in the files. However, this isn't a viable solution most of the time; the average person isn't going to have much knowledge about coding, because it's not essential; this is why apps like Publii exist, after all! Secondly, whenever the theme files are updated, the changes will be overwritten and the text returned to the default.
So clearly a simpler, more user-friendly method of translating themes is required. In Publii's case, instead of hard-coding text into the themes, we instead utilize a language .json file, which acts a bit like a codebook of sorts. Basically, instead of putting text in the theme code, we'll put a piece of placeholder text; and in the language file, we'll define what each bit of placeholder text should be replaced with. Then, when Publii creates the files for the website, it will look for all the placeholder text, and replace them with their respective translations from the language file. Think of it as like reading a piece of algebra; a formula like "x + y = z" doesn't mean anything on its own, but if you define both "x" and "y", then the formula can be calculated. In a Publii theme, the "x" and "y" would be the placeholder text, which is then defined in the language file.
The language file structure
The best way to understand the language file is to get a look at the contents; despite the .json extension you can view the file with pretty much any text editor, even Notepad! Let's open the portfolio.lang.json file, which can be found in the Publii → themes → portfolio folder:
{
   "partials": {
      "cookiebar": {
         "close": "Close"
      },
      "disqus": {
         "noscript1": "Please enable JavaScript to view the",
         "noscript2": "comments powered by Disqus."
      },
      "menu": {
         "label": "Menu"
      },
      "pagination": {
         "prev": "Previous",
         "next": "Next"
      },
      "shareButtons": {
         "shareWithFacebook": "Share with Facebook",
         "shareWithTwitter": "Share with Twitter",
         "shareWithGooglePlus": "Share with Google Plus",
         "shareWithPinterest": "Share with Pinterest",
         "shareWithStumbleUpon": "Share with StumbleUpon",
         "shareWithLinkedIn": "Share with LinkedIn",
         "shareWithBuffer": "Share with Buffer"
      }
   },
   "slider": {
      "button": "View project",
      "slide": "Slide %s"
   },
   "post": {
      "publishedBy": "By",
      "publishedOn": "Published on",
      "previousPost": "Previous Post",
      "nextPost": "Next Post"
   },
   "common": {
      "readmore": "View more"
   }
}
As we can see in the above code, there are multiple groups of text separated by braces. Each line of text can be classed as one of two types; either it is a category, or a placeholder with translation. A category is used to split the translations into groups so that they're easy to find, and each category can have sub-categories if necessary. In the above example, we can see that the first line is a category, partials, which contains several subcategories; cookiebar, disqus, menu, pagination and shareButtons. It's easy to tell when a line is a category, because it will have only a unbroken text string in quotation marks followed by a colon, such as "newCategory":. Note that the translations don't need to be grouped into categories; it's just good practice so that others dealing with the code and translations can easily find what they need.
The second type of content is the placeholder with translations; this is the real meat of the file. Unlike the categories, the references and translations will have two separate words in quote marks, to the left and right of the colon, like this: "placeholderText": "translationText". The text to the left of the colon (in this case, "placeholderText"), is the placeholder that will be entered into the theme code for Publii to replace when it creates the website. The text to the right of the colon ("translationText"), is the text that Publii will use to replace the placeholder text in the complete website.
Overriding Language file
Because the core files of the theme will be replaced with every update, an additional feature was added to allow translations; Overrides. By creating a file with the same name as the language file, but placing it in the sites/websiteName/input/languages folder (where websiteName is the name of the site as defined in the Publii app backend), you can add your own translations that will override the language file, as described in the translation section earlier in this article. When Publii creates the pages for your site, it first takes the placeholder text from the language file, but then it checks for an override file. If it finds one, it will then find any replacement translation text strings in the override file, and use them to replace the text it took from the language file. This will allow you to modify text without messing around with the core files, or worrying about losing your changes when an update hits.
Variable %s
The %s that you sometimes see in the text is a another piece of placeholder text, but in this case it will fetch a variable that may be dynamic, or modifiable. Let's say that a theme has a bit of homepage text that says "Hello from the folks at websiteName", where websiteName is the name of the website. Each user that installs this theme will have a different website, so they can't just hard-code a particular website name into the theme. Instead, they will use an %s element in the language file, then in the theme code they will define what the variable should be, such as @website.name. This way, when Publii creates the live site code, it will automatically replace the %s with the website name variable, which will be different for each website.
For example, on the Tags page, in place of %s let's put the number of all tags. We will use the {{tagsNumber}} tag for this (https://getpublii.com/dev/tags-page-tags/#templatespecific-tags).
Language file:
{
   "tags": {
		"pageTitle": "Tags",
		"description": "Collection of all %s tags"
   },
}
in the tags.hbs file put as follow:
{{ translate "tags.description" tagsNumber }}
as a result we will get: "Collection of all 5 tags", where 5 is the number of all available tags.