How to host a Static Website on Amazon S3
The Amazon Simple Storage Service, or Amazon S3, for short is very modern storage solution for your website. This service is all about connecting users to the cloud, with expanded features beyond just storing files; it's used for everything from backup and recovery to running cloud-based applications. It's flexible, fast and reaches across the world, making it an amazing option for hosting your static website, and it's scalable, so you don't need to blindly commit to a long-term contract like you would with a traditional host.
The big problem with getting started with hosting on this platform for a beginner, however, is that its scope is so broad that finding the right options and settings can be a real challenge if you're not familiar with the S3 interface, and the technical jargon that comes with it. We're here to help though, so in this guide we'll take you step-by-step in setting up static website hosting via Amazon S3.
Getting Started with Amazon S3 hosting
There's a lot of options on offer in the S3 interface, but we won't need to use most of them to get our site set-up, so don't worry if it seems bewildering at first; just follow the steps below!
- Head over to the Amazon S3 official website and click on the yellow Create an AWS Account button at the top-right of the page.

- You'll need a free Amazon Web Services account to use this service; this is separate from your standard Amazon account so unless you've used AWS in the past you'll need to register. The procedure is very simple, but a credit card will be required even though the initial tier of service is free.

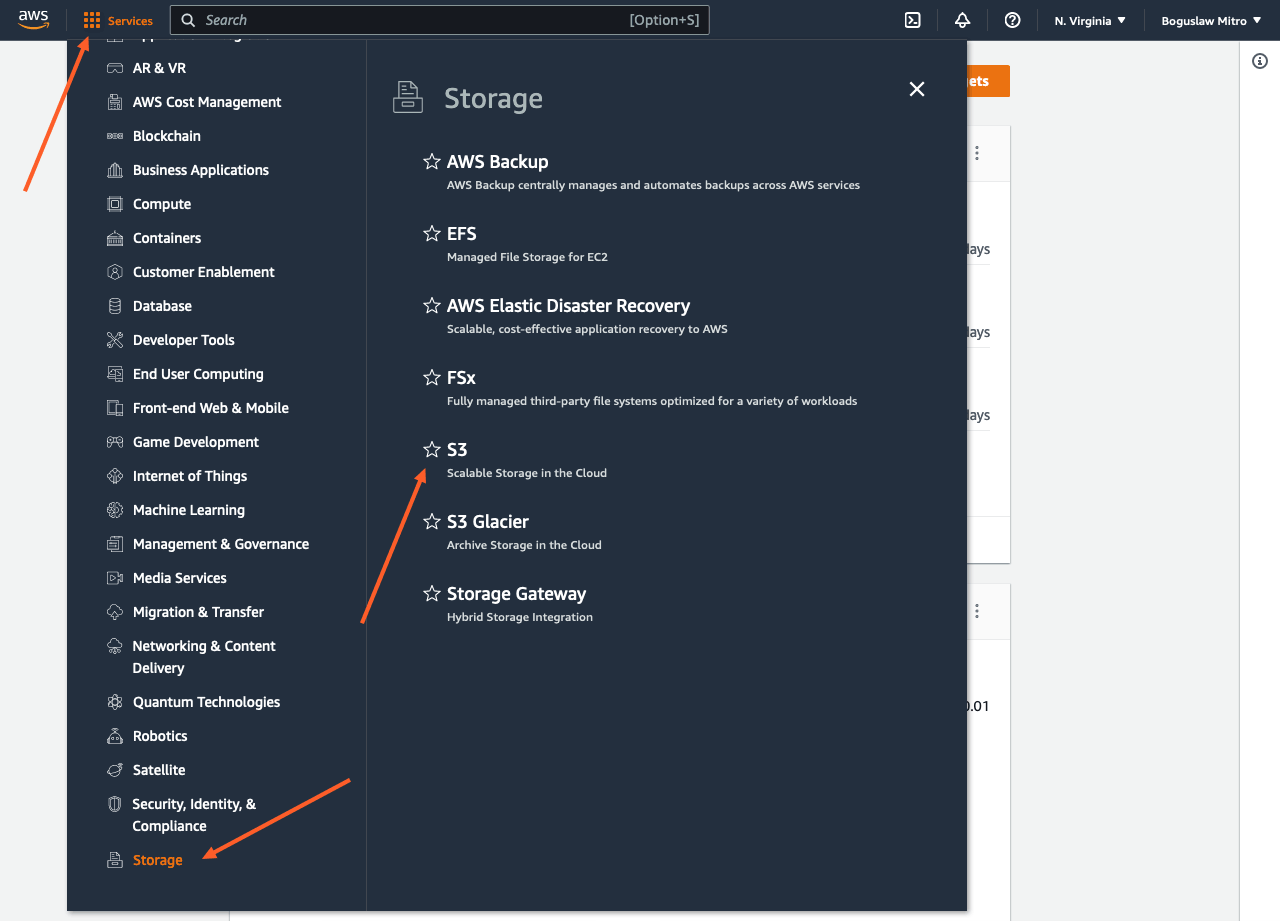
- Once you've registered and/or logged-in, you'll be redirected to the AWS console. There's a lot of options here, but we don't need to worry about that; just highlight the Services menu at the top of the screen, then select the Storage and S3 item as seen in the screenshot.
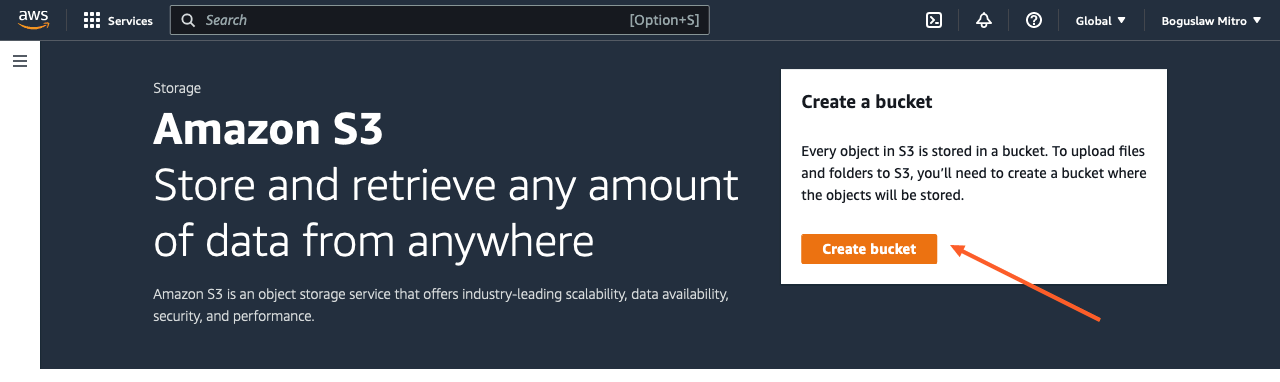
- On the next screen, click on the Create a bucket button; think of a bucket as a place where you can dump files for different purposes, which in our case will be set to act as a website host.
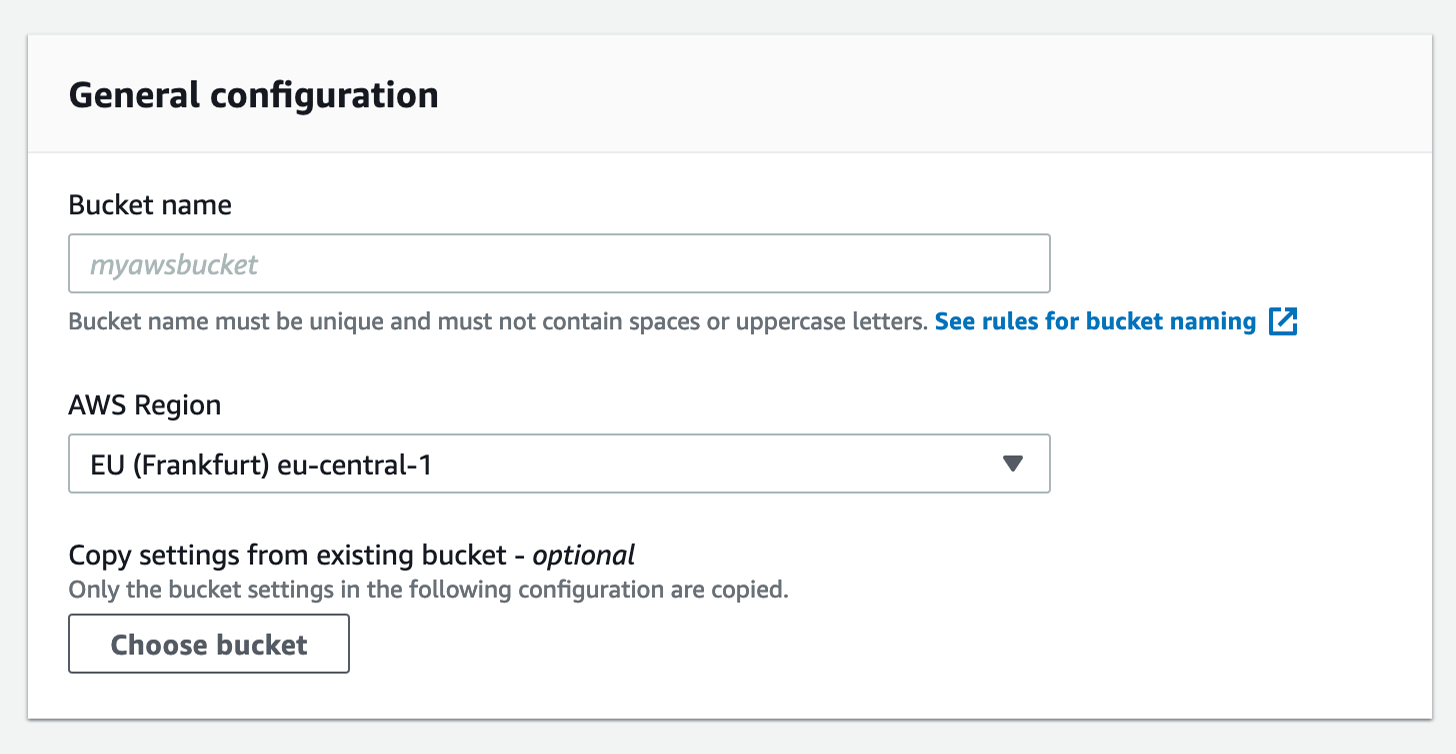
- Now we need to start entering the settings for your bucket, starting with the Bucket name and Region. You may call the bucket whatever you want, as it'll be just for your reference. For the region, simply set it to whichever location is closest to you.
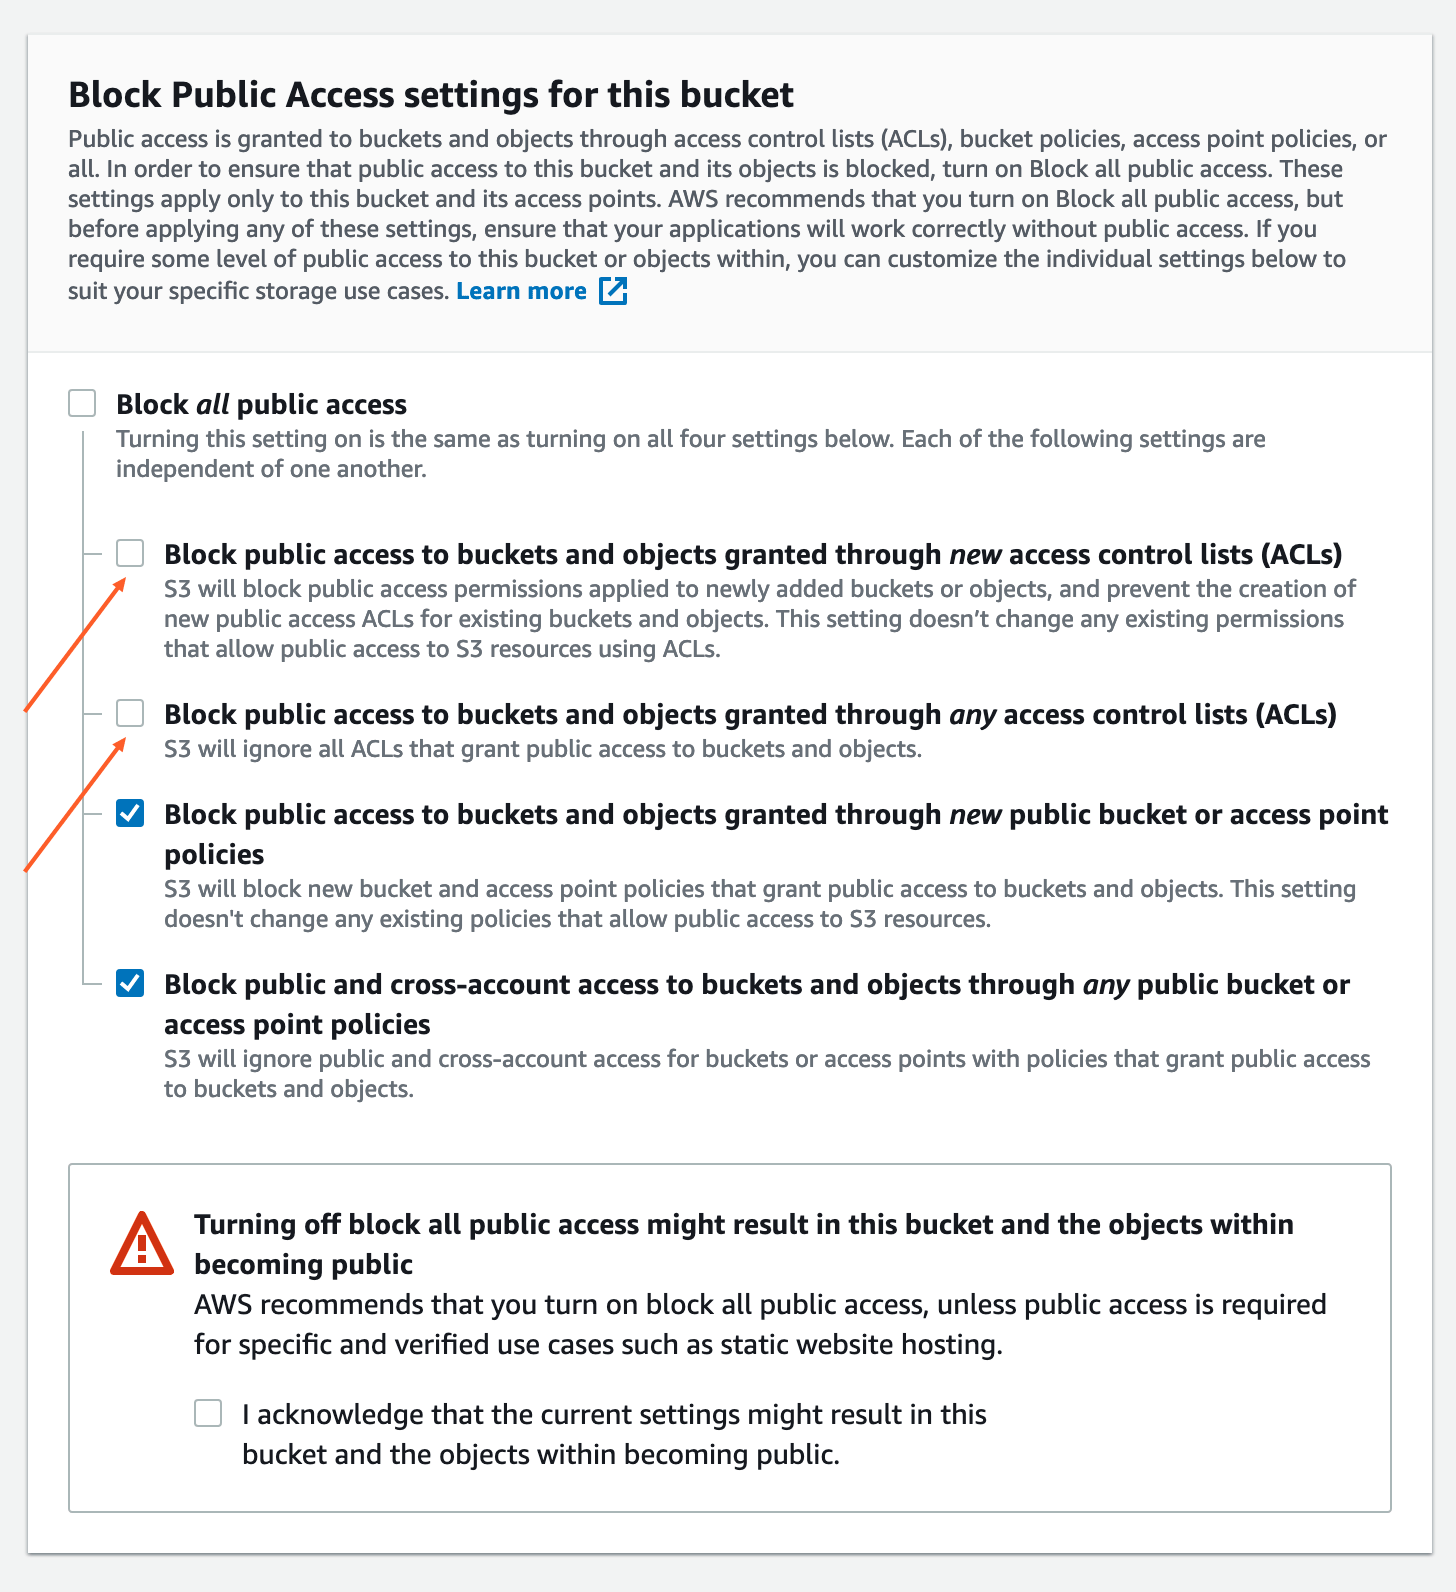
- Next is the Permissions, please uncheck the main "Block all public access" checkbox and first two of its children.
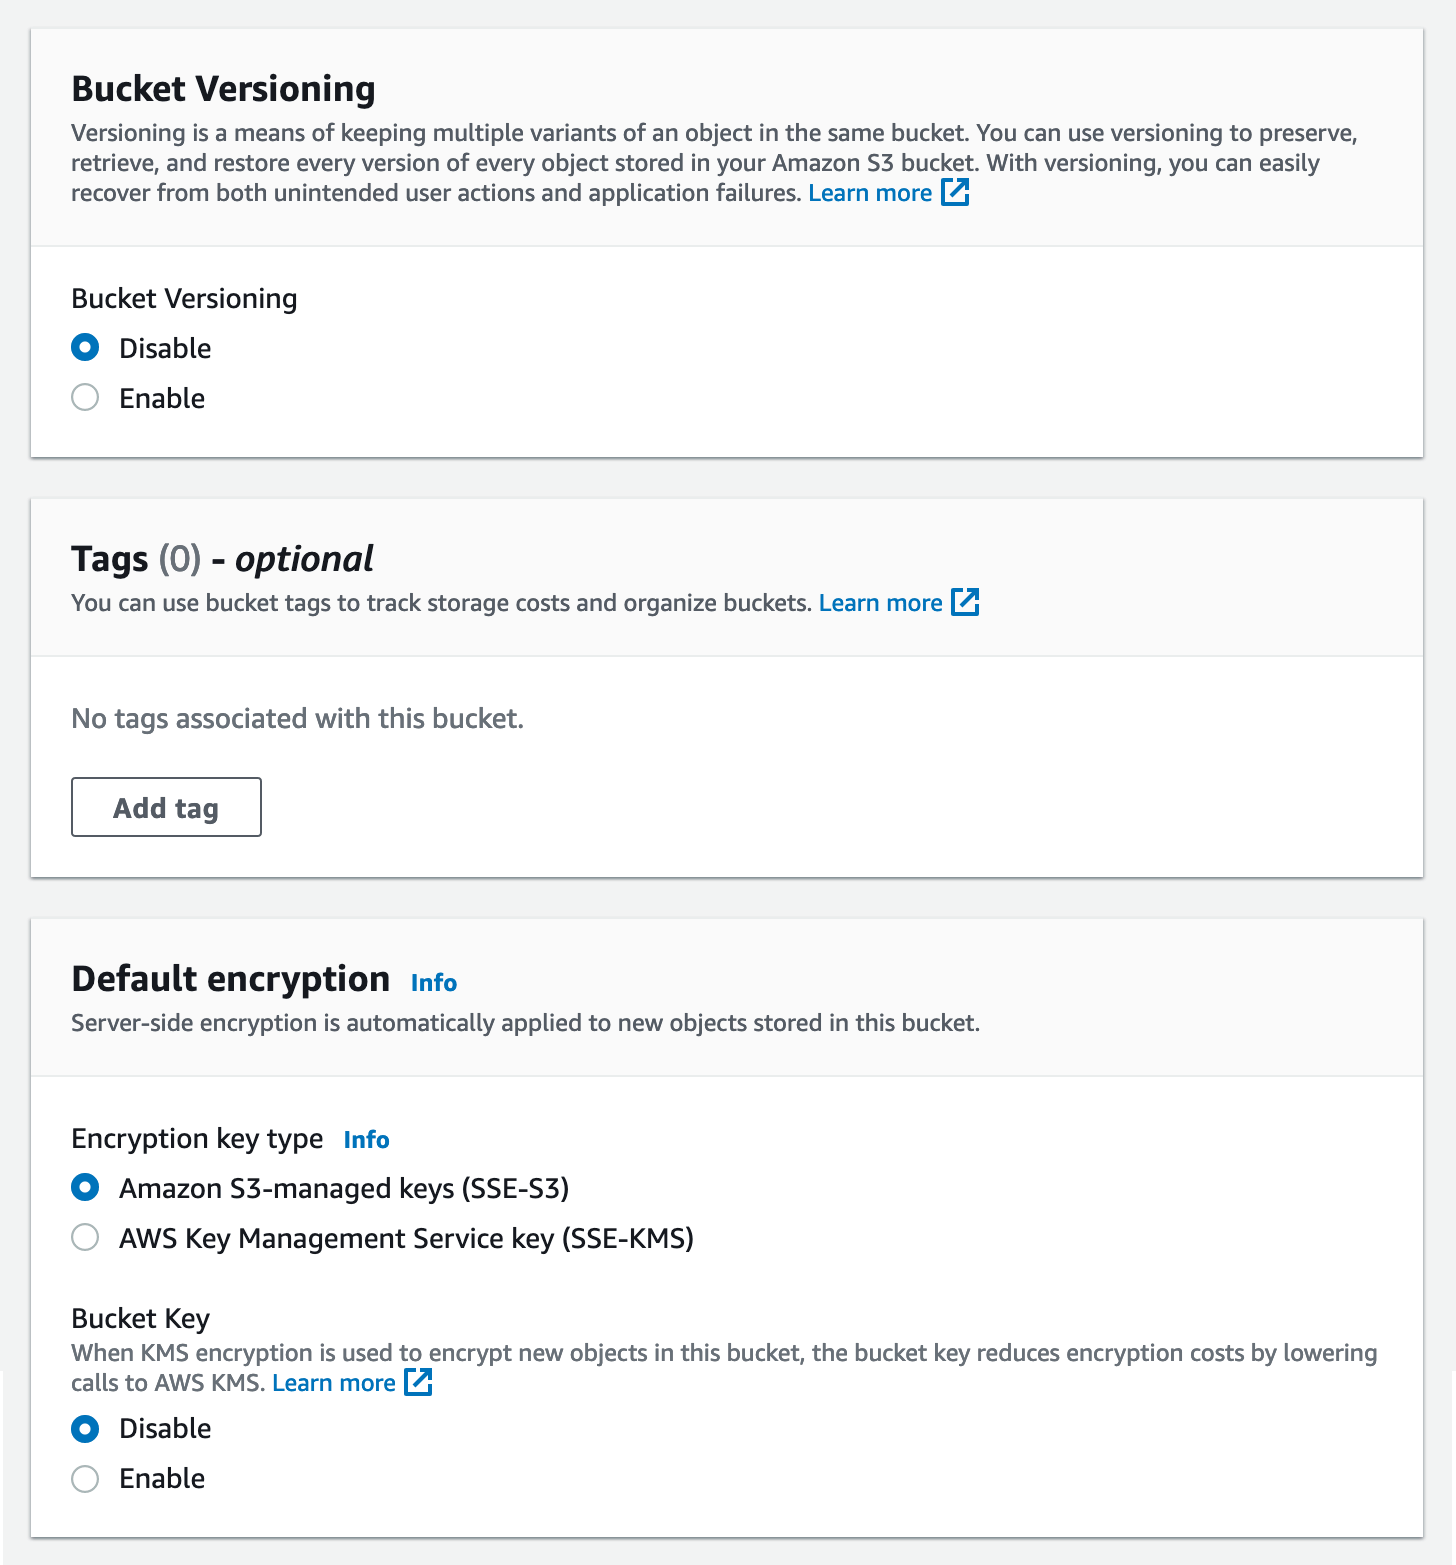
- The next step in bucket creation is all about additional technical features like versioning or server-side encryption; the average user won't need to use these options so unless you're familiar with the options and know what you want to add, just leave the options disabled.
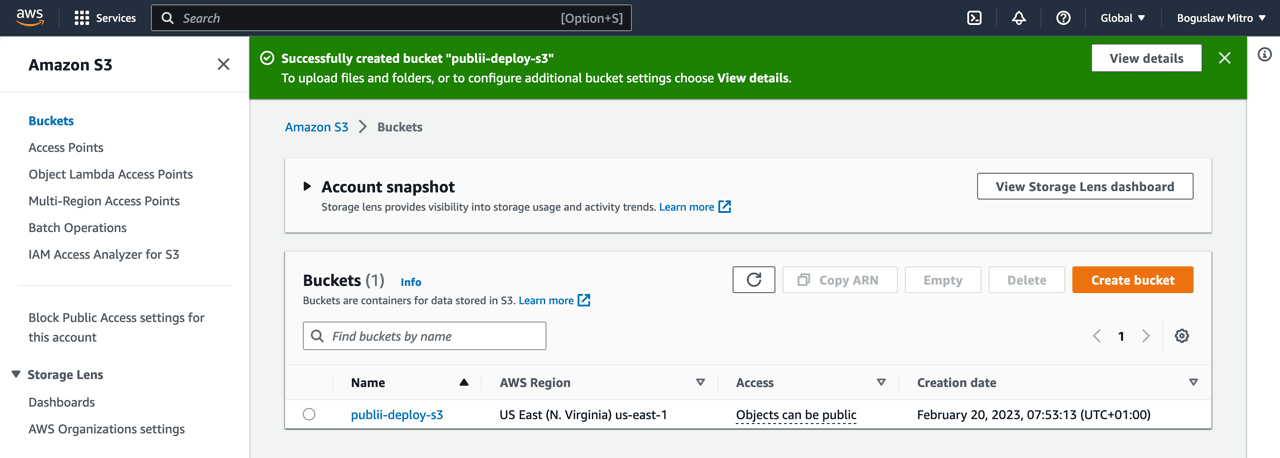
- The last step is a review of the options from the previous steps, so just click Create bucket to finish.
- You'll be taken back to the main S3 overview screen, but now your newly-created bucket will appear in the list on this screen. Click on it to view the contents.
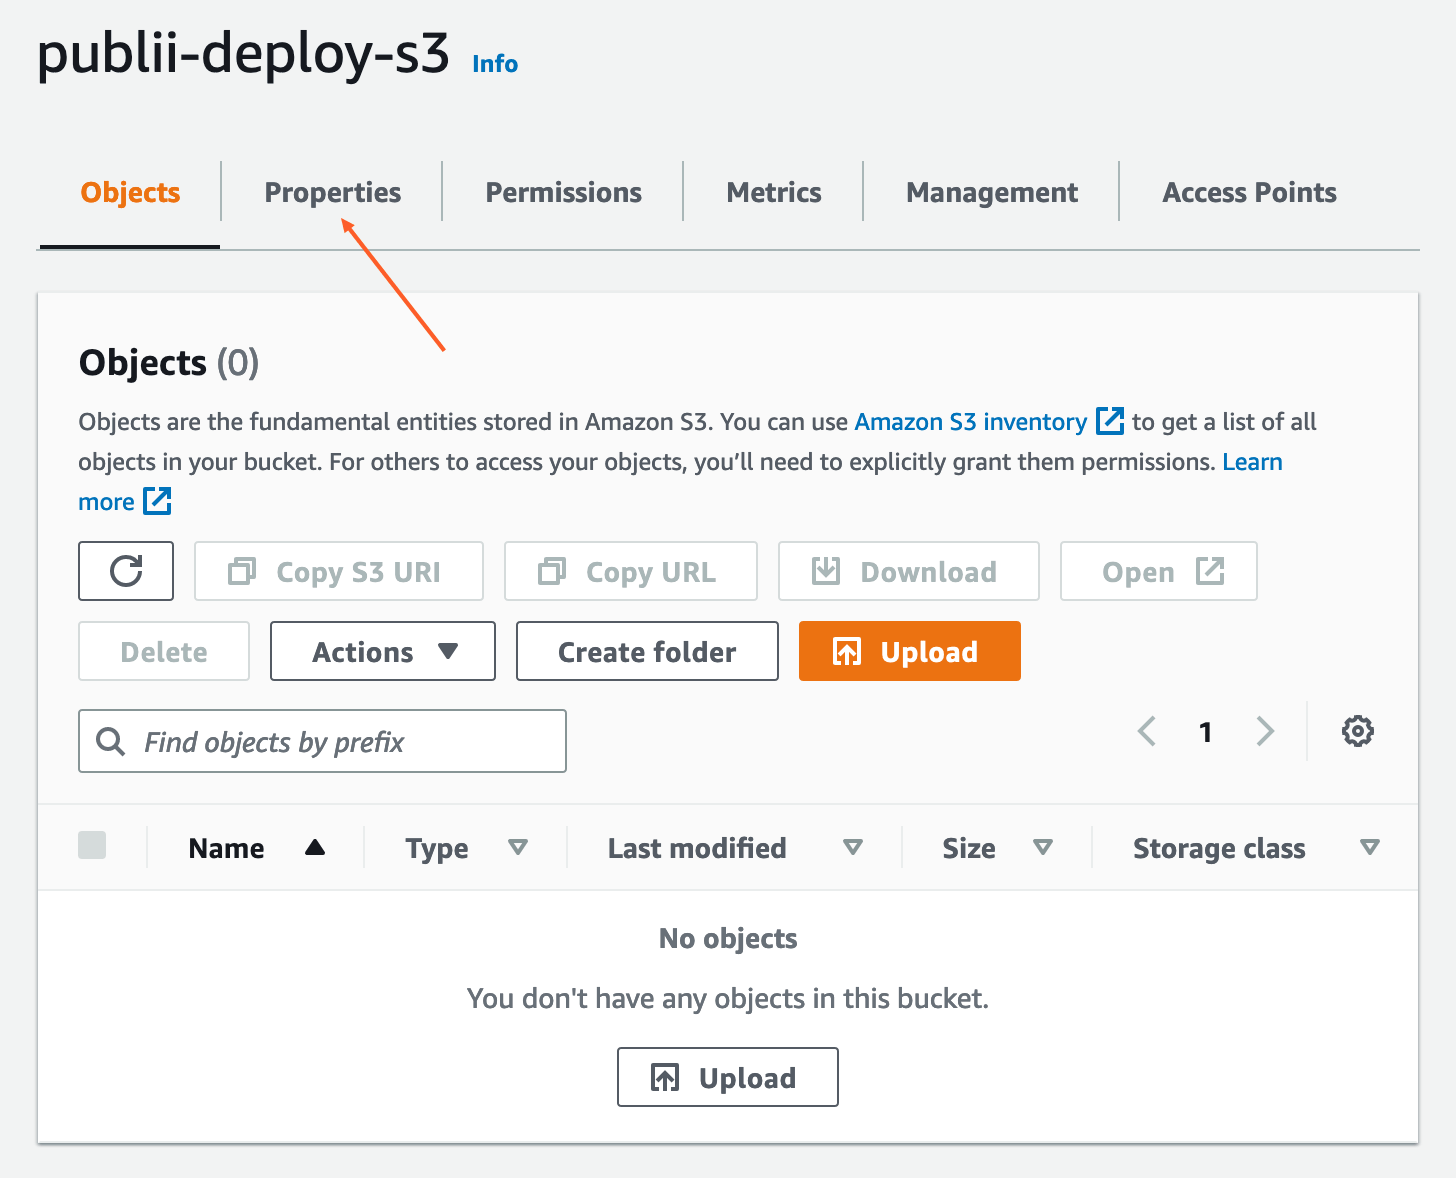
- You'll see that your bucket is empty; we'll fix that soon, but first we need to sort out the settings. Click on the bucket name and then on Properties tab at the top of the screen to view the various functions available for the bucket.
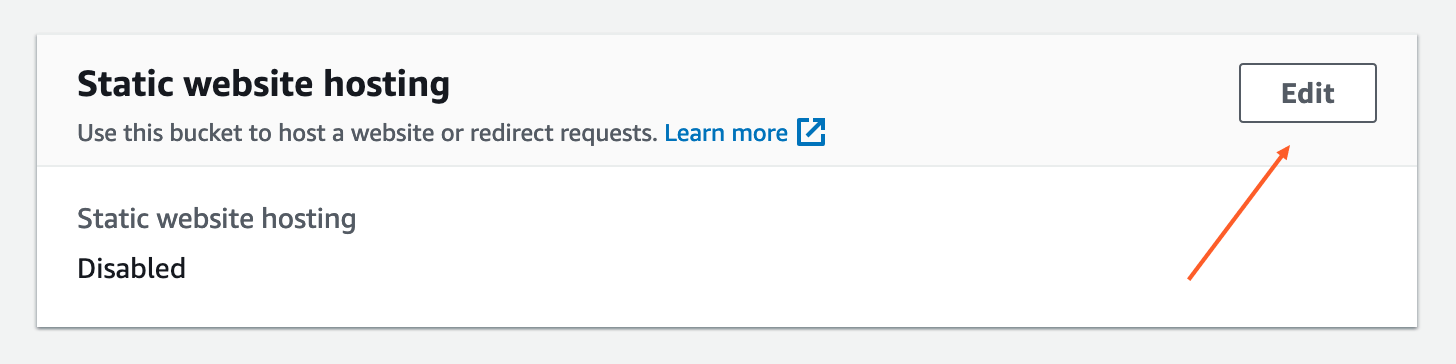
- There's some complex settings here, but we only need one; the Static website hosting option, which can be found at the bottom of the page. Click the Edit button.
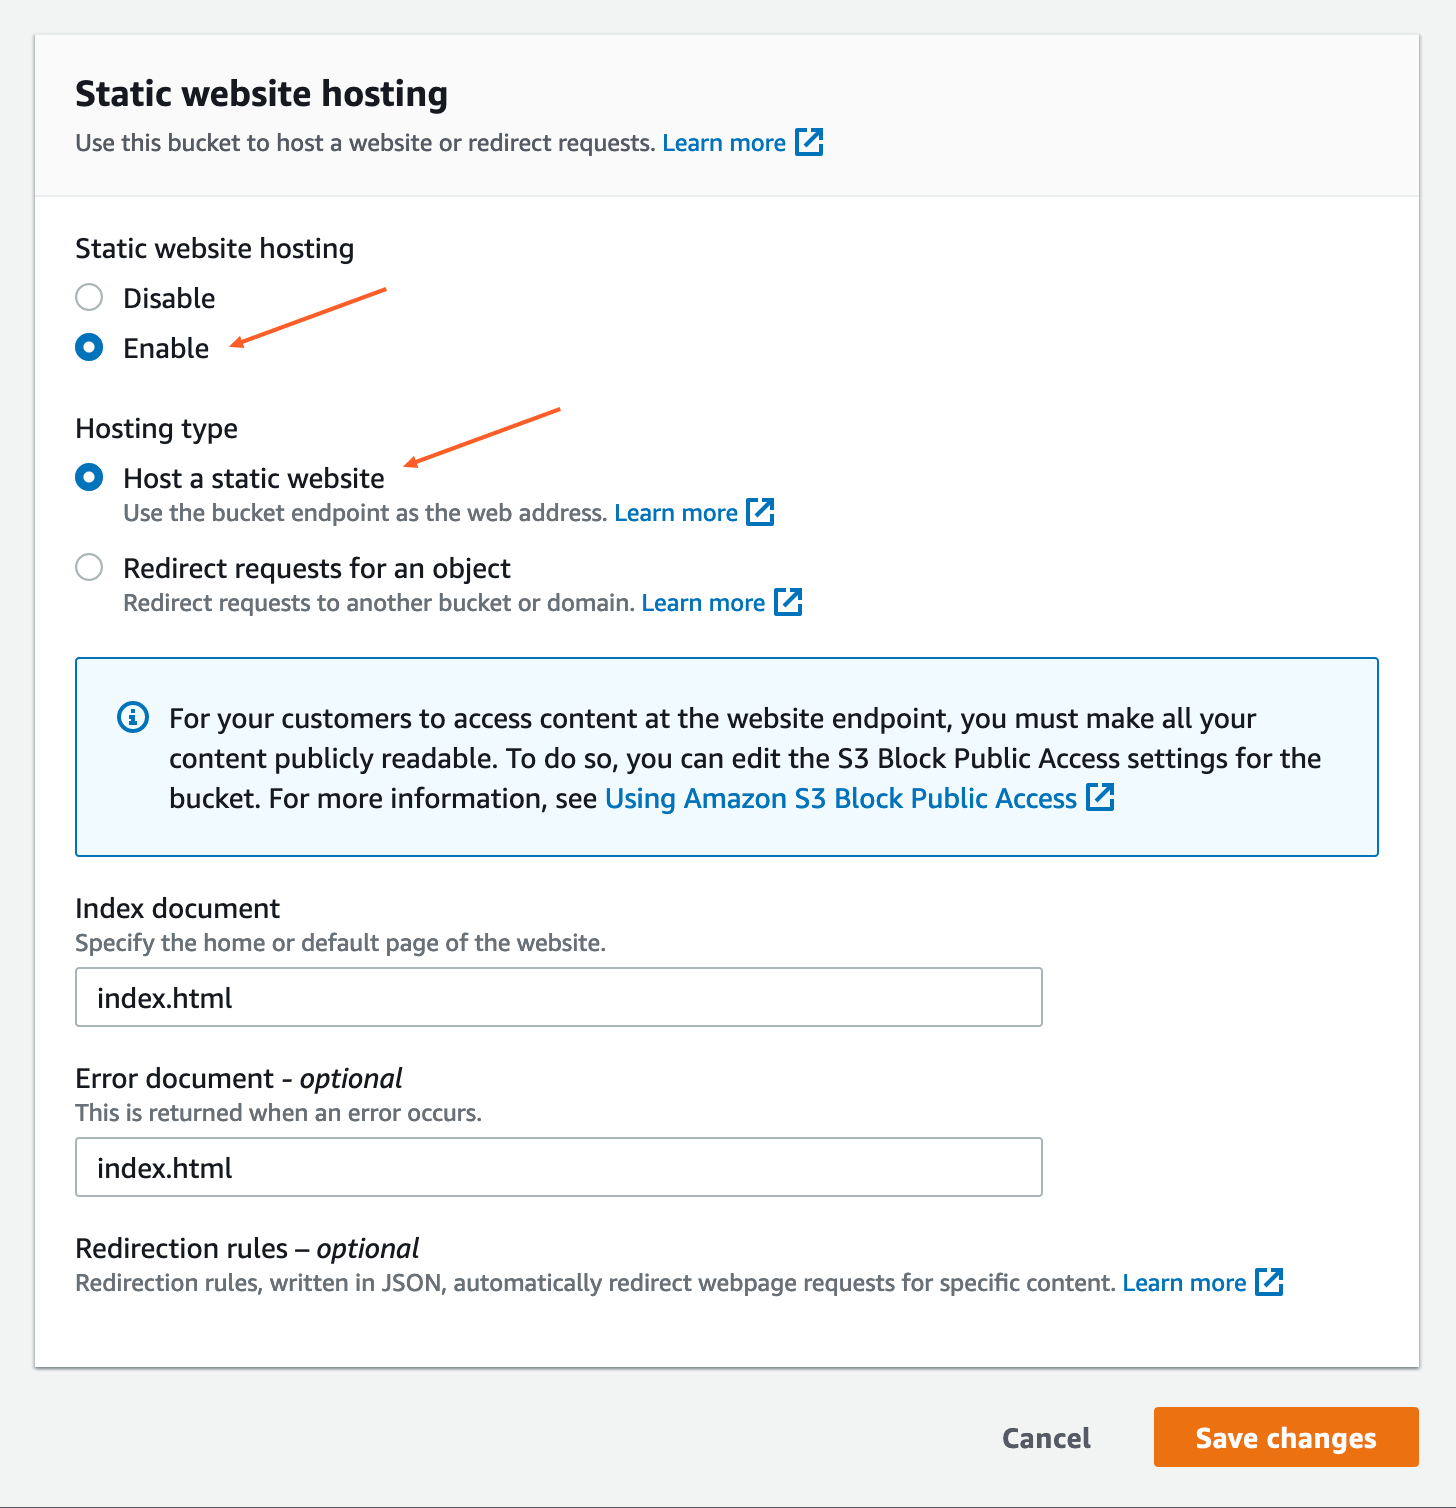
- A new form will appear with some data to be added; first, enable Static website hosting, then click on the Host a static website radial button to enable it, next enter "index.html" (without quotes) in both the Index document and Error document fields, then click the Save changes button.
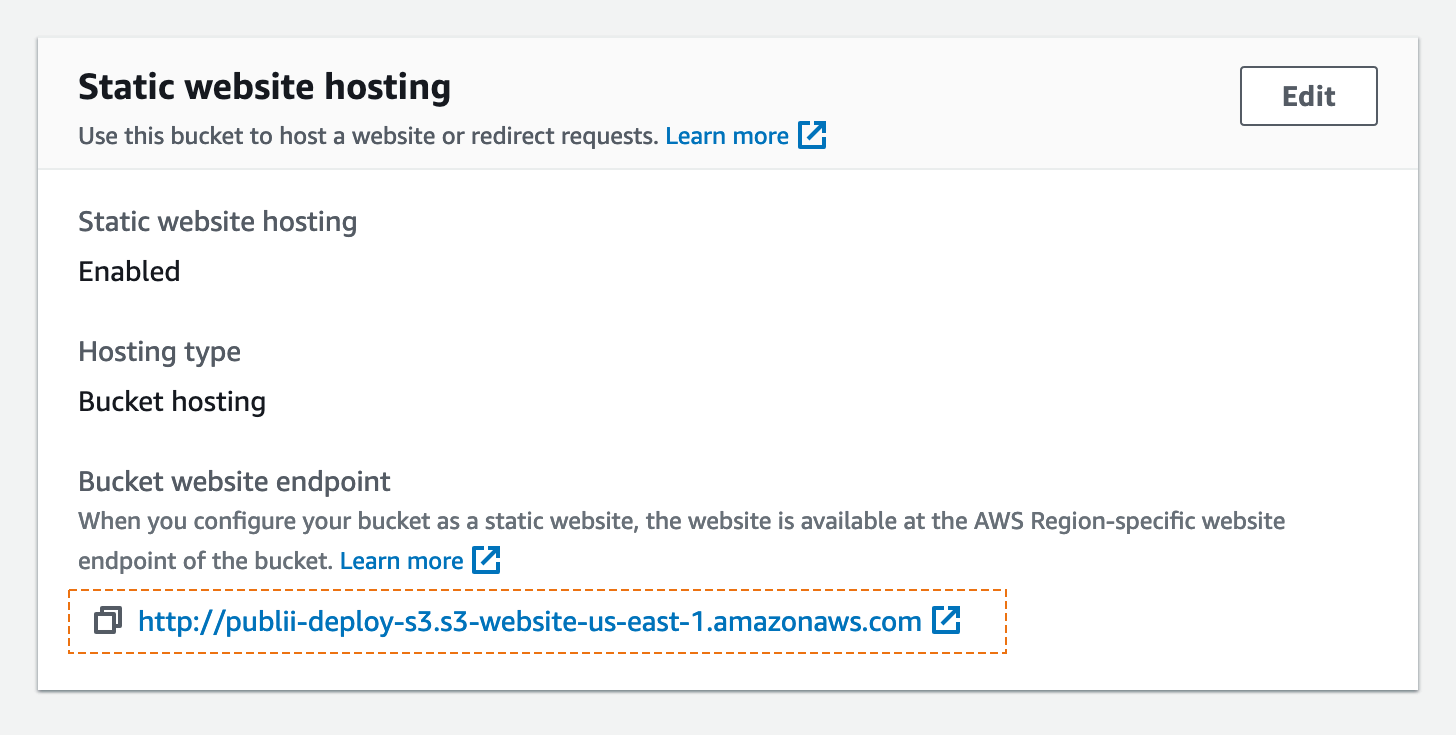
- After saving, your bucket will be ready to be used as a static website host; to view your website you'll need to navigate to the Endpoint URL noted at the bottom of the page. Of course, your site doesn't have any files yet, but we're going to change that.
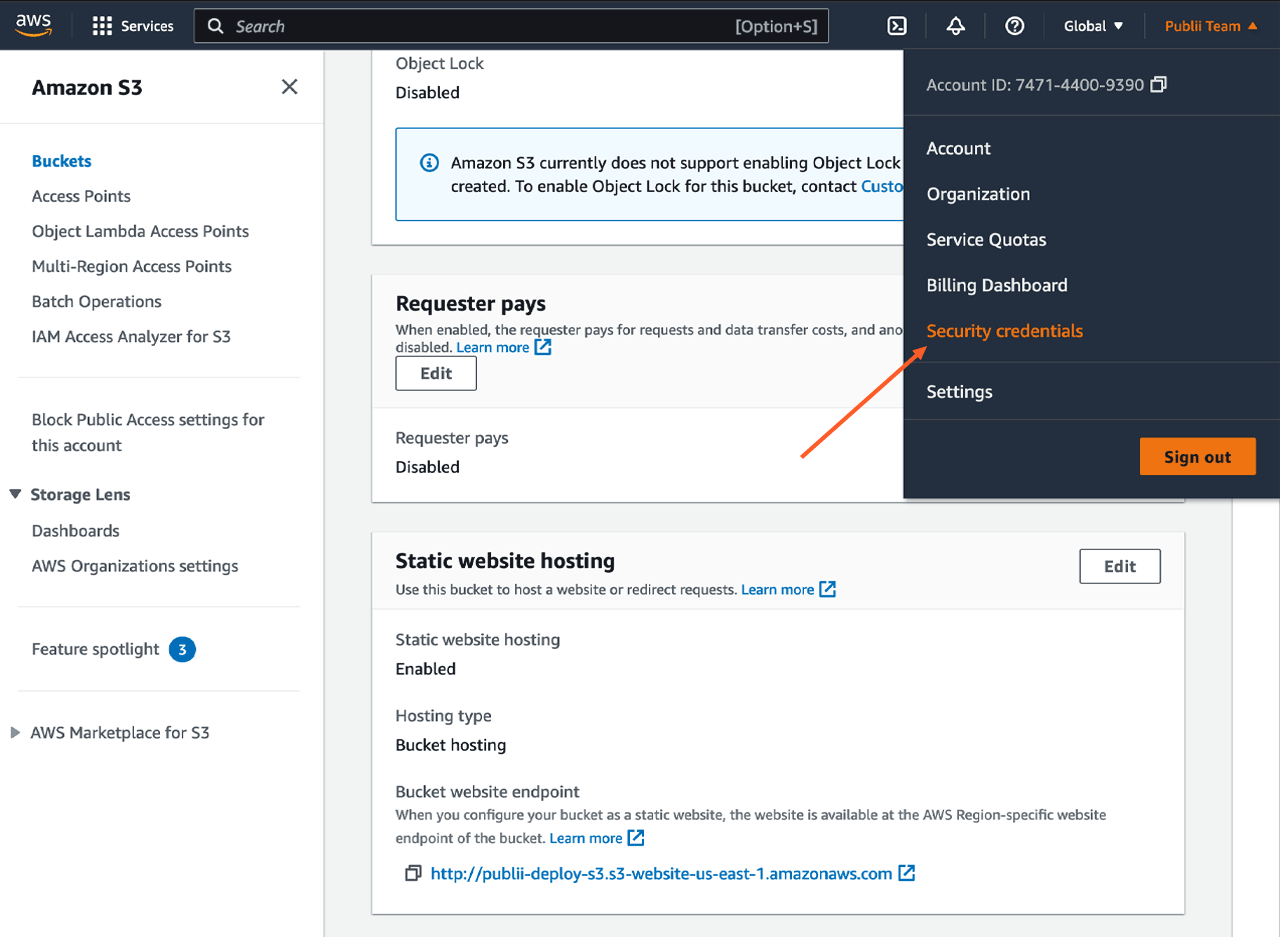
- We'll need to get some credentials that will allow the Publii app to upload to your S3 bucket. Click on your username in the top menu, and then click on the Security Credentials option.
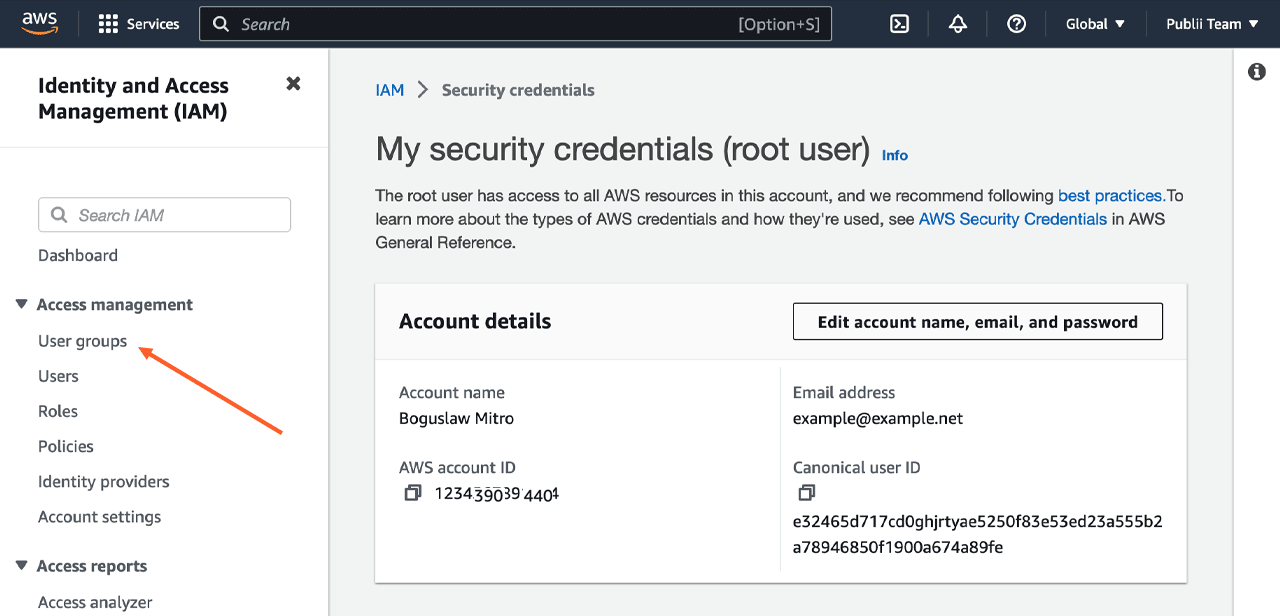
- On the Security Credentials screen, click on the User Groups link:
- On the Groups listing, click the Create Group button:

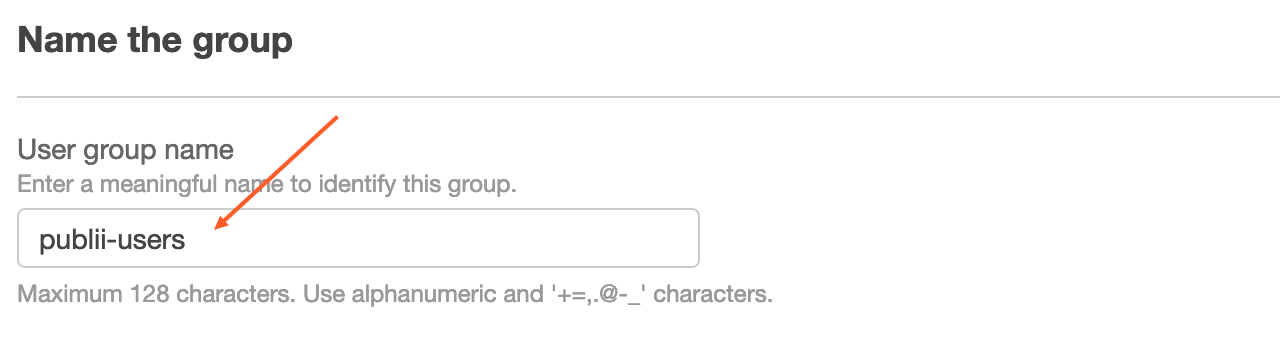
- Provide the Group Name and scroll down the page to the Attach permissions policies section:
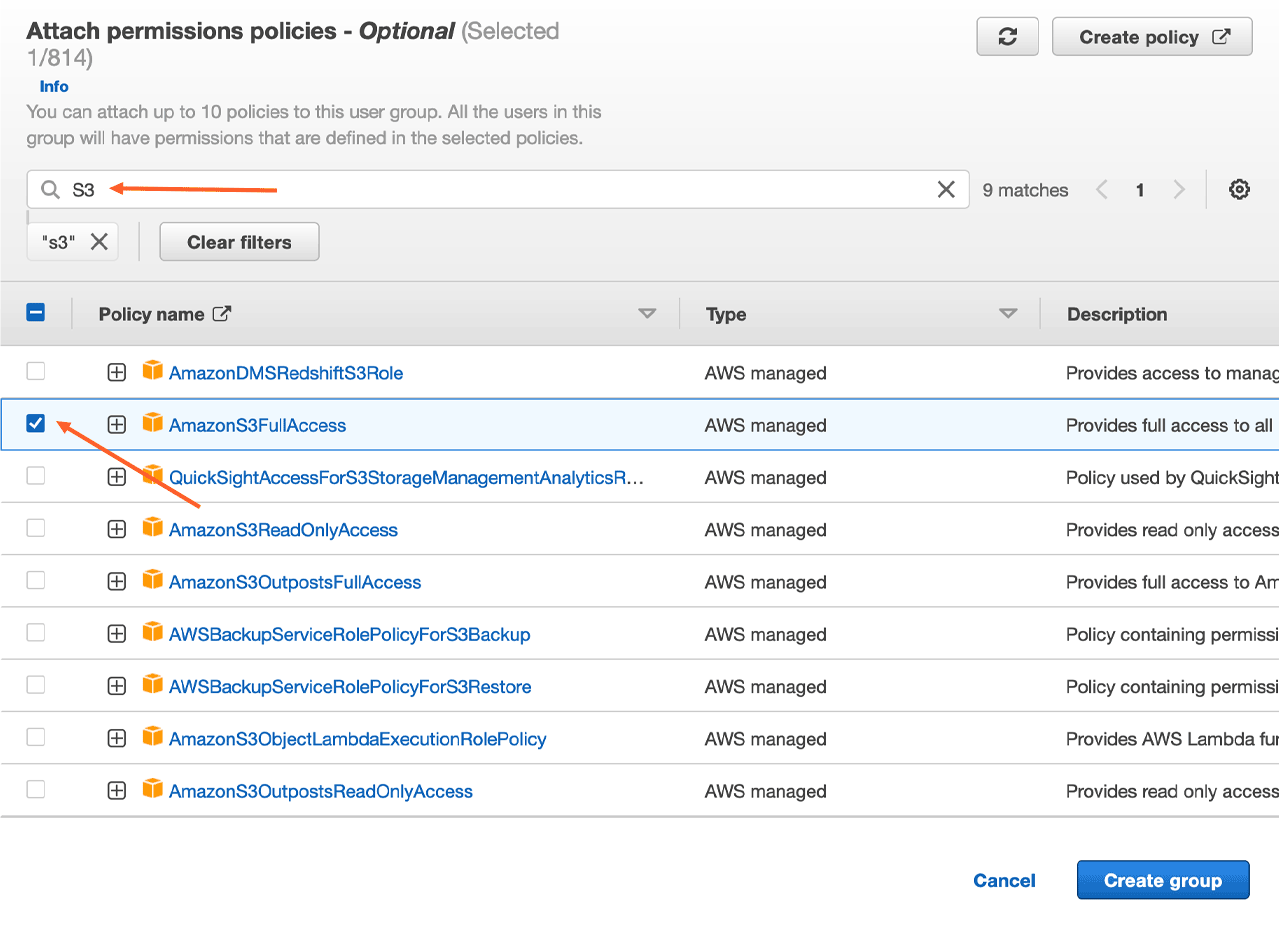
- In the filter please type s3, then select checkbox near AmazonS3FullAccess policy name. After that, click Create Group button.
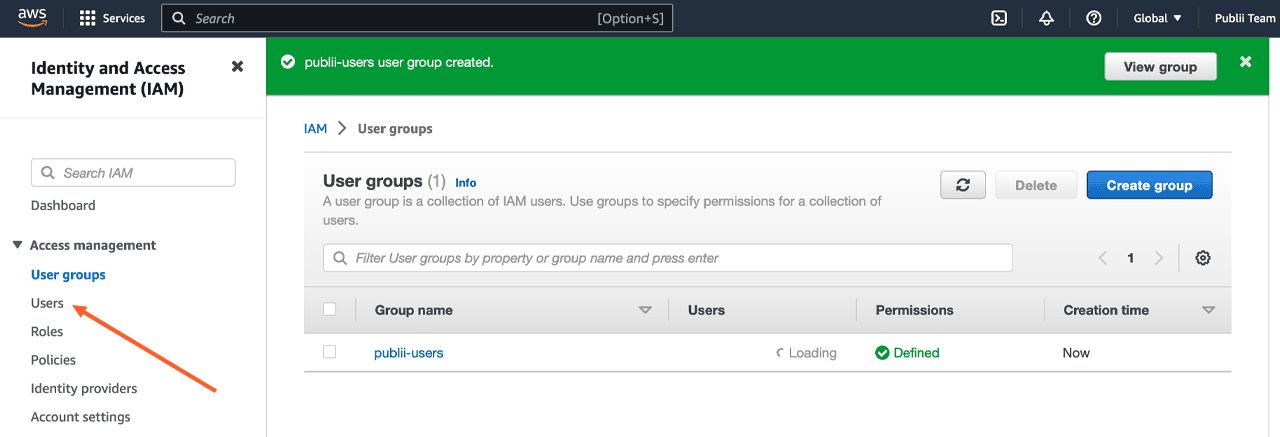
- On the group's list screen, please click the Users link:
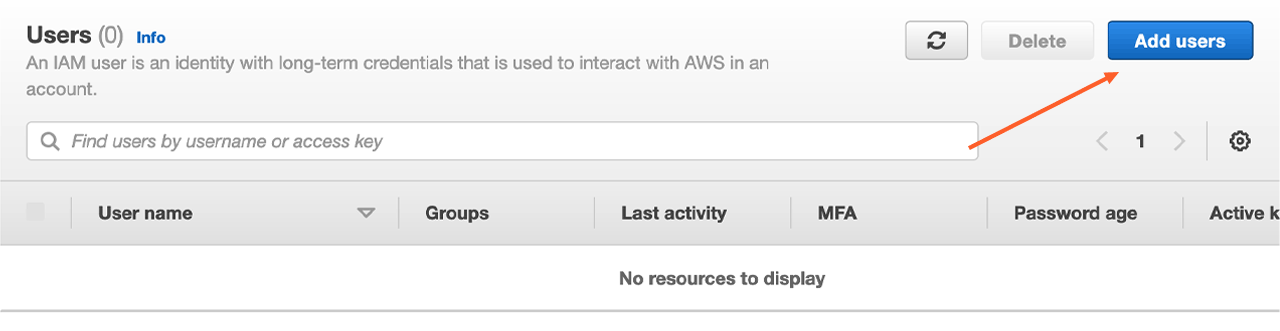
- On the user's list screen please click Add users
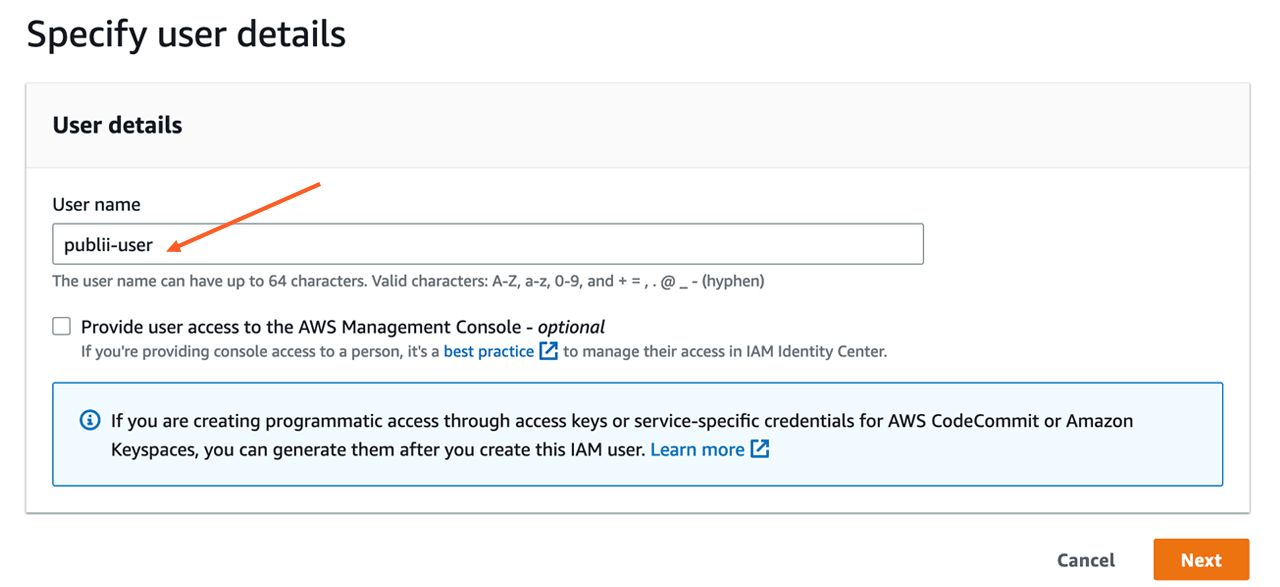
- On the Add user form, please provide a username, then you can click Next button:
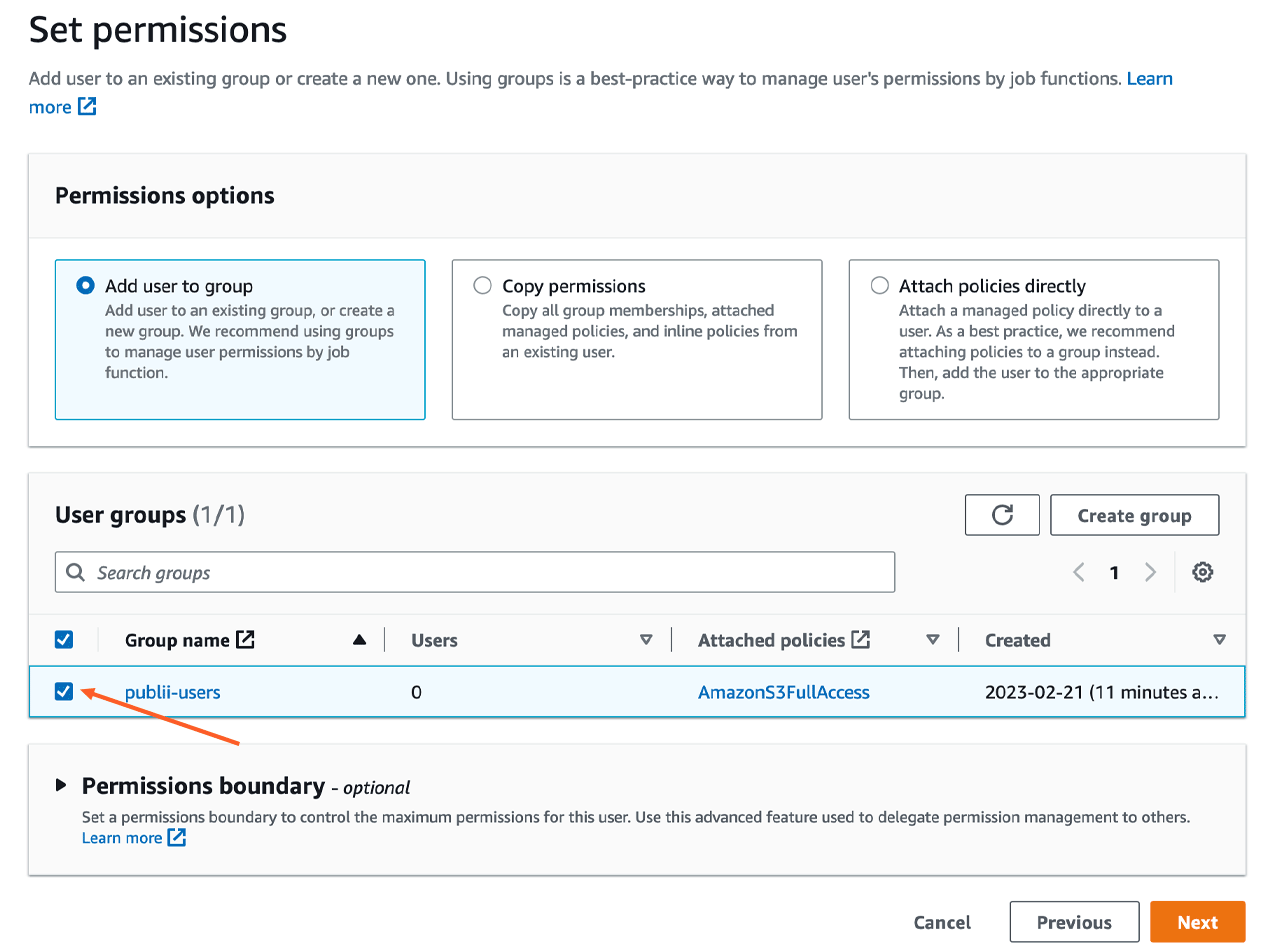
- On the next screen please select your newly created user's group and then click Next button:
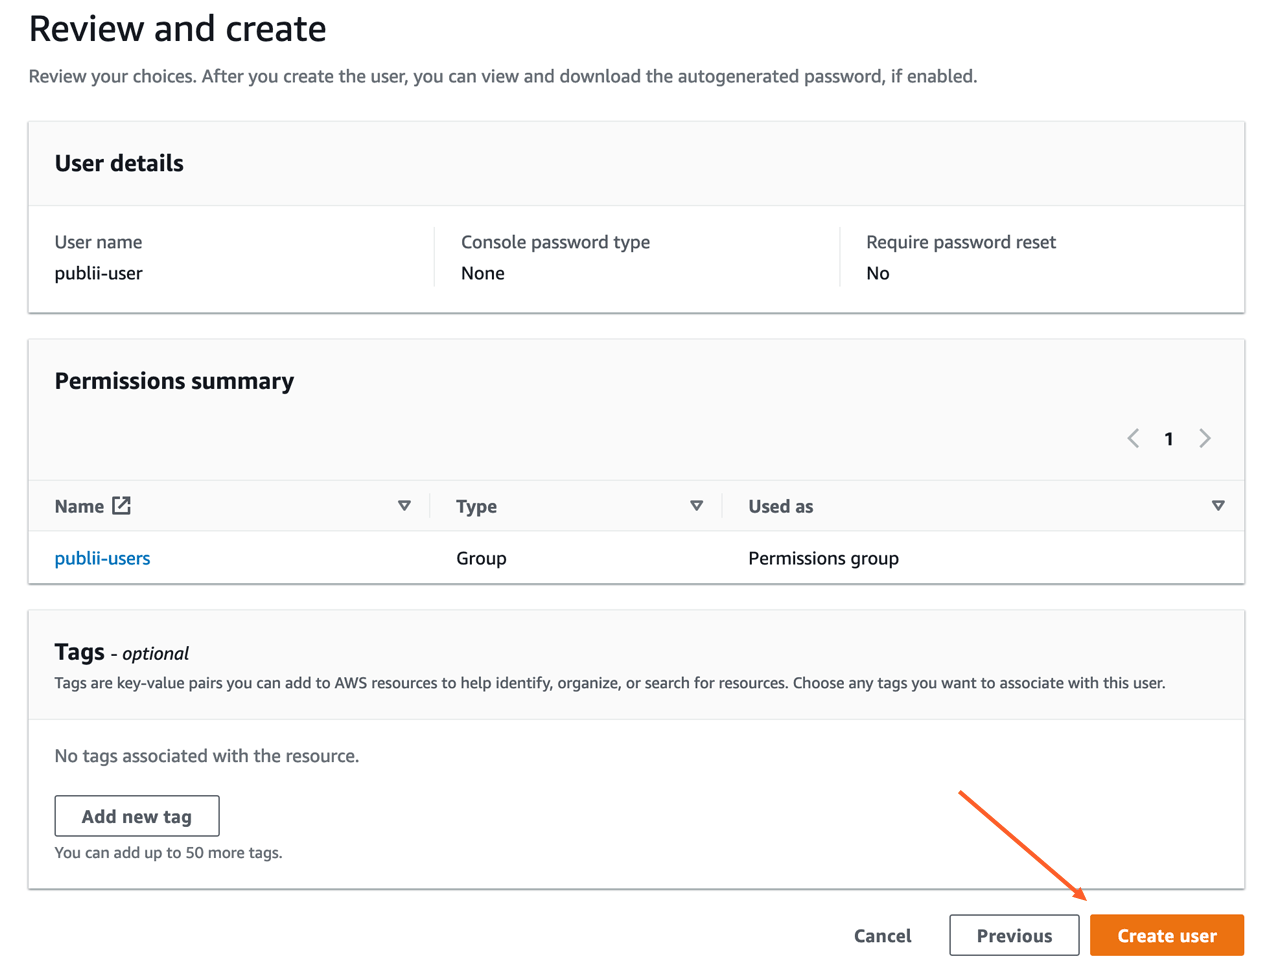
- On the Review and create screen just click Create user:
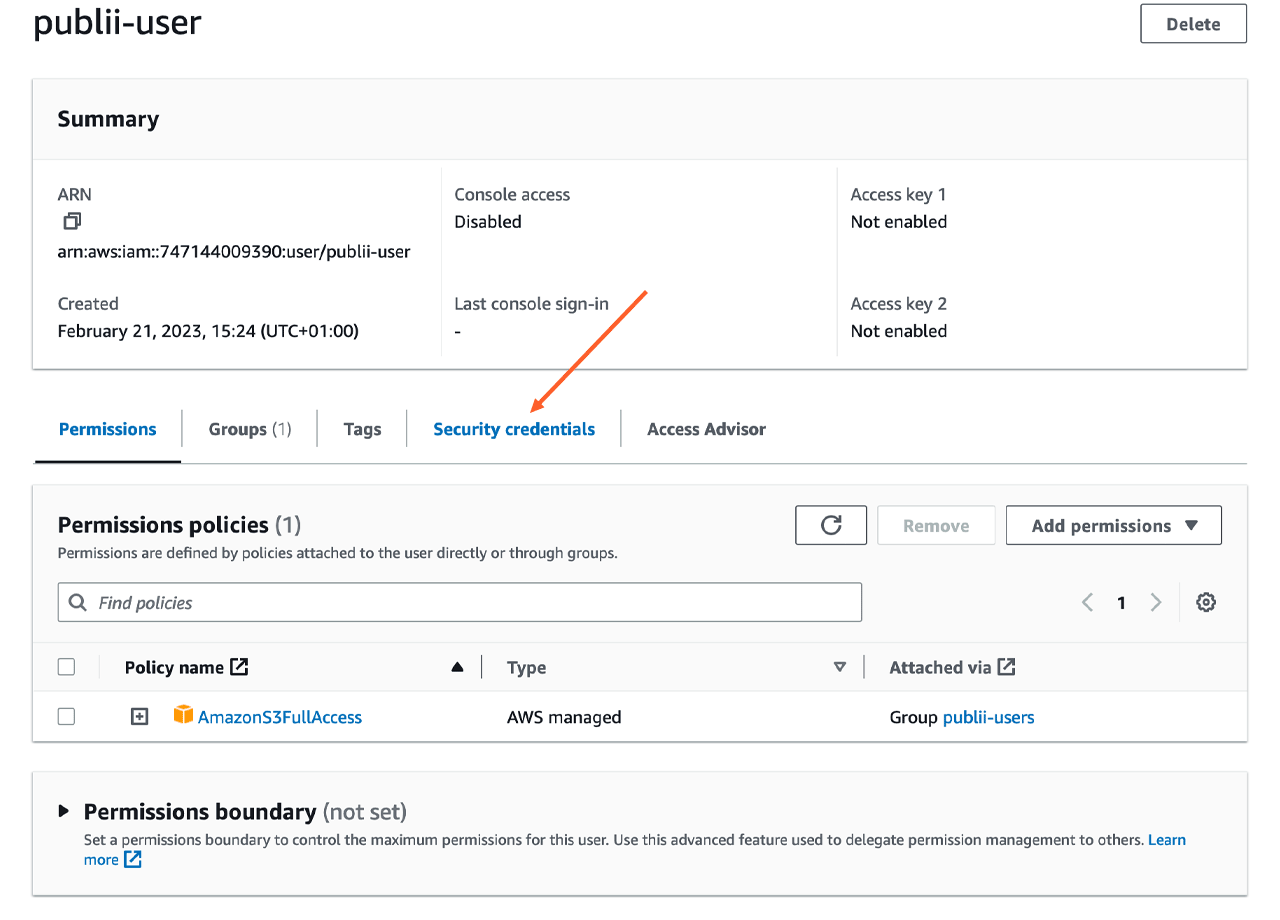
- Once the user has been successfully created, you can click on their name in the list.

- On the Summary screen, click the Security credentials tab.
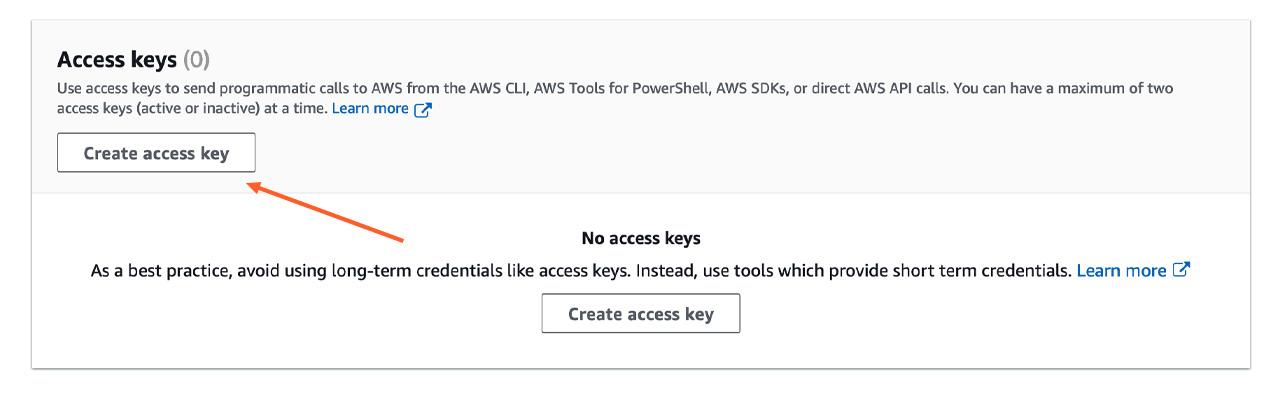
- Now, navigate to the Access Keys section and click the Create access key button.
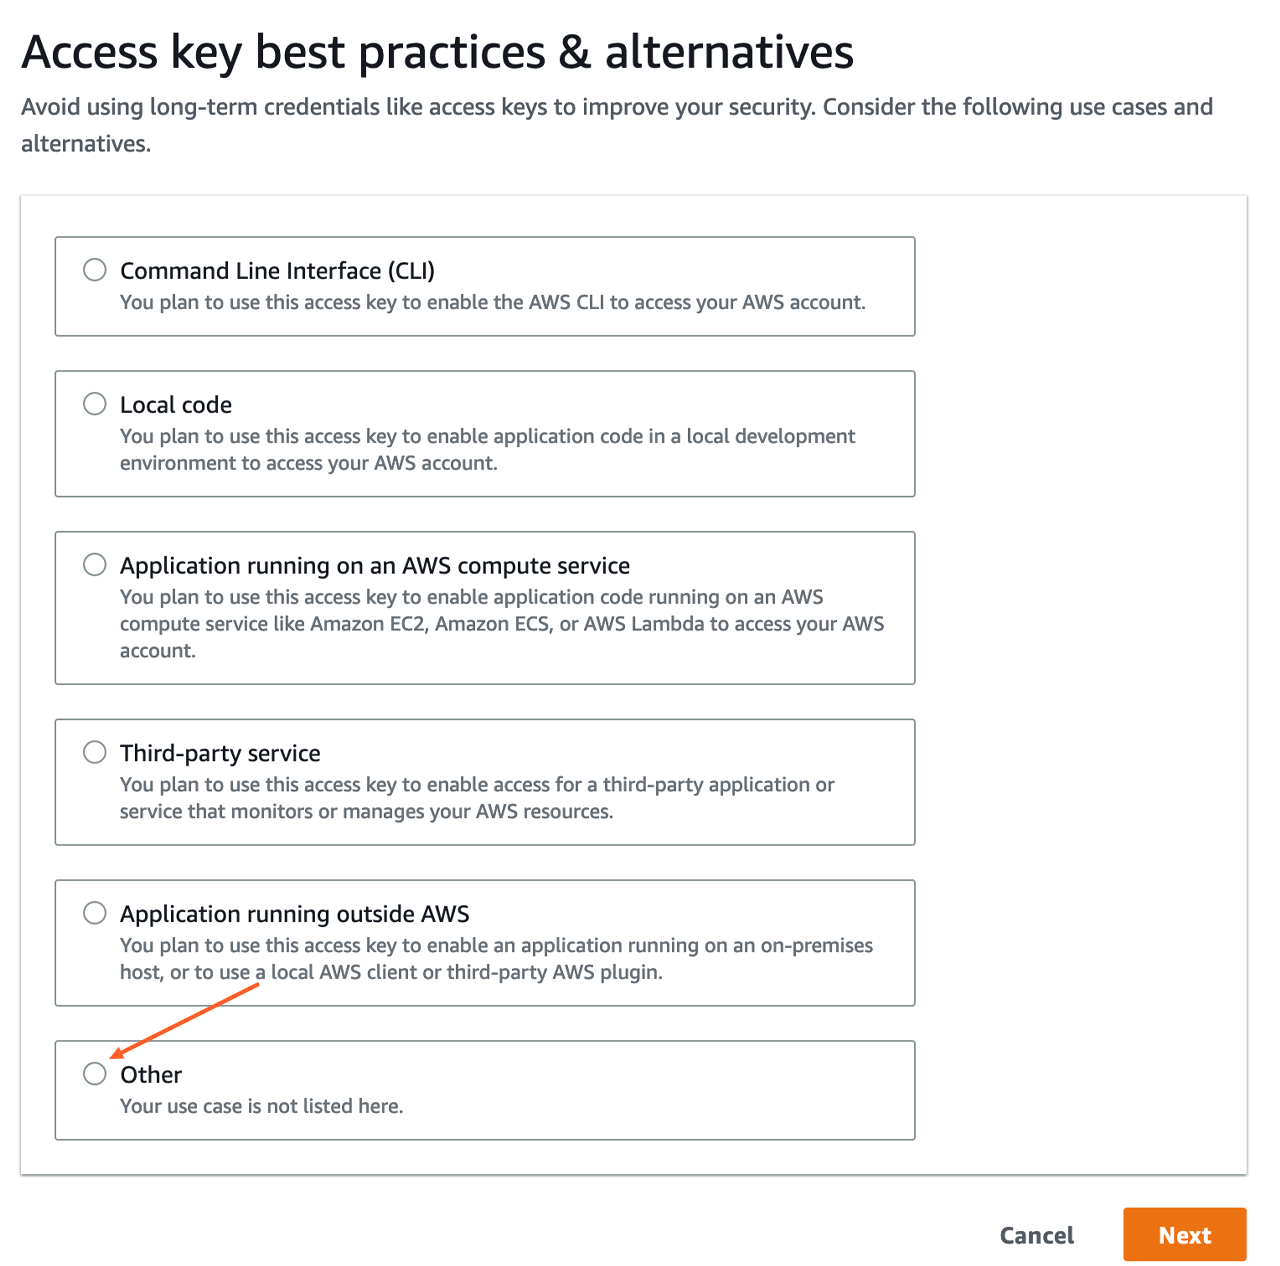
- On the next screen select Other and click Next button.
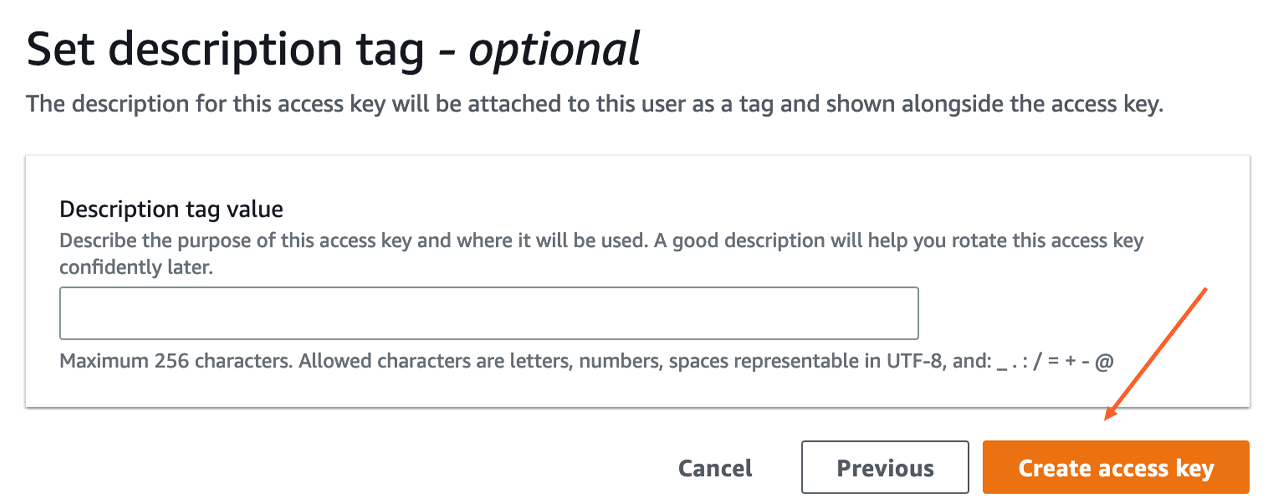
- The Set description tag that follows is optional; you can provide a description for your access key or skip this step. Finally, press Create Access Key button.
- After successful creation of the user, you will see a screen with Access Key and Secret Access Key.
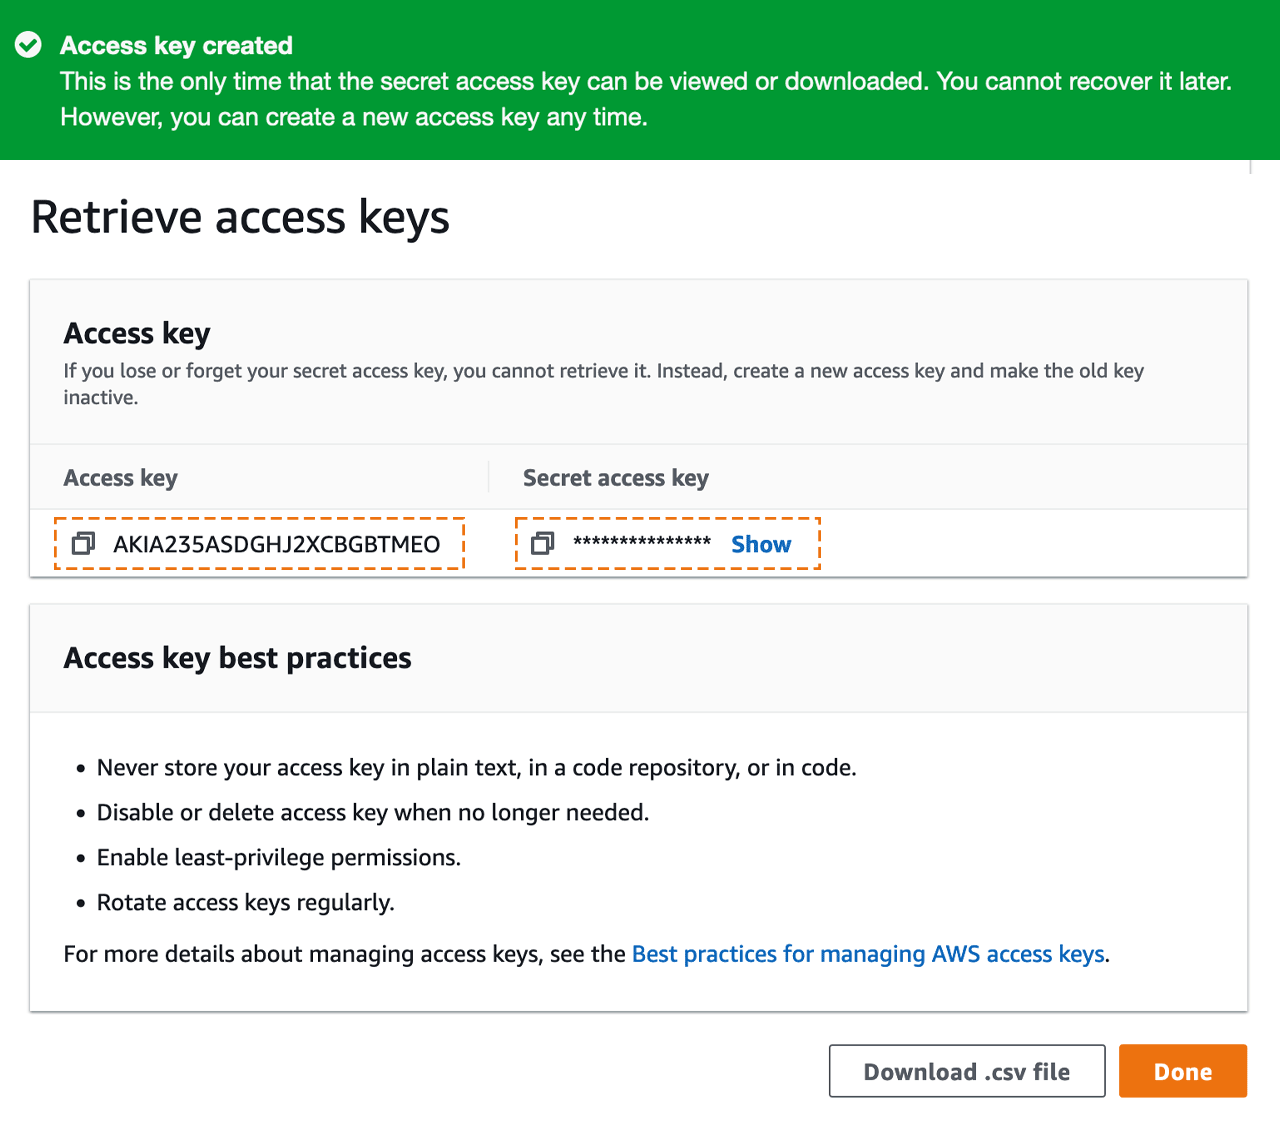
Remember: don't share your access key and/or secret key with anyone, as this could allow someone to access your storage and incur charges on your credit card.
Now copy them both as it will be required to deploy your website with Publii.

- With all the options filled out correctly, you're ready to save. Optionally, you can add a Prefix to create subdirectories in your bucket for running multiple websites from a single bucket, but this is not recommended; instead, we suggest leaving this option blank and using one bucket per website. If you're all done, click on the Save settings button to store all your details.
- That's it! Your S3 hosting is ready to go, and Publii has all it needs to connect and upload your website files. Now click the Sync your website button to start uploading files; once it's done your website will be available to view at our endpoint URL.
So there you have it; there's quite a few steps to getting the hosting set-up, but nothing to stressful to deal with! If you want to run multiple sites via your S3 account, simply follow the steps to create another fresh bucket. We hope this guide helped you get started, and feel free to get in touch with us if you have any questions about using Amazon S3 with Publii.