404 error page configuration
404 error pages are an important element of any site; even if a site is well-managed, there's always the chance that someone will mistype a link or change a page URL without updating the associated links. With an error page, you can not only let users know that something has gone wrong, but also provide links to alternative resources to encourage them to keep browsing your site.
Configuring 404 pages in Publii themes
To generate a 404 error page, your theme must support this feature and include a 404.hbs template. Publii uses this template to generate the HTML error page when building your website; enabling the feature does not create the template itself.
In the theme configuration file (config.json), the renderer section contains a create404page option that enables or disables error page generation. For example, the following setting enables it:
{
    "renderer": {
        "create404page": true
    }
}
This example shows only the relevant part of the configuration file. The default value depends on your theme; it is not always set to false for new websites.
To set the generated error page's filename, open Site settings → Advanced options → URLs and find the Error page field. The default filename is 404.html. We recommend keeping this name unless your hosting configuration requires a different one.
Host-dependent 404 page configuration
Generating an error page is only part of the setup: your hosting service must also display it when a visitor requests a page that does not exist. The configuration depends on the web server or hosting service you use.
Apache servers (synchronizing via FTP, FTPS, or SFTP)
If your website is served by Apache and your hosting provider allows error page settings in .htaccess, add the following line to that file:
ErrorDocument 404 /404.htmlThe 404.html part of this line must match the filename set in Publii's Error page field. The leading slash makes the path relative to your domain's root.
If your website is published in a subdirectory, such as https://example.com/blog/, include that directory in the path:
ErrorDocument 404 /blog/404.htmlThis is the public URL path to the error page, not the directory path shown by your FTP client. Connecting via FTP, FTPS, or SFTP does not necessarily mean your hosting service uses Apache; if you are unsure, check with your hosting provider.
You can manage your website's .htaccess file through Tools → File Manager in Publii. Open an existing file in an external text editor, or prepare the file on your computer and add it to the website's root through File Manager. Save your changes, then sync your website.
Note: If your server already has an .htaccess file, preserve its existing rules before uploading a replacement. Syncing a local .htaccess file with the same path can overwrite the server's copy.
GitHub Pages and Netlify
GitHub Pages and Netlify normally recognize a 404.html file in the root of the published website without additional error page configuration. Keep the Error page filename set to 404.html in Publii, then sync your website.
If you have configured custom routing or redirect rules, check that they do not send requests for missing pages somewhere else.
Google Cloud Storage
Google Cloud Storage uses a website configuration setting called NotFoundPage to select the error document. When using Publii's Google Cloud integration, Publii sets this to 404.html, so keep the same filename in your site settings.
If you configure the bucket manually, set its NotFoundPage to 404.html. The custom error page applies when requests use Cloud Storage's website-serving behavior; other access methods or a load balancer may require additional configuration.
Amazon S3
For a website served through Amazon S3's static website hosting, set an Error document in the bucket's hosting settings. You do not need to create a redirect rule to display a custom 404 page.
- Open your website's bucket in the Amazon S3 console and select Properties.
- Find Static website hosting and click Edit.
- With static website hosting enabled, enter 404.html in the Error document field and save your changes.
The filename is case-sensitive and must match the error page uploaded by Publii. Sync your website so that the file is available in the bucket.
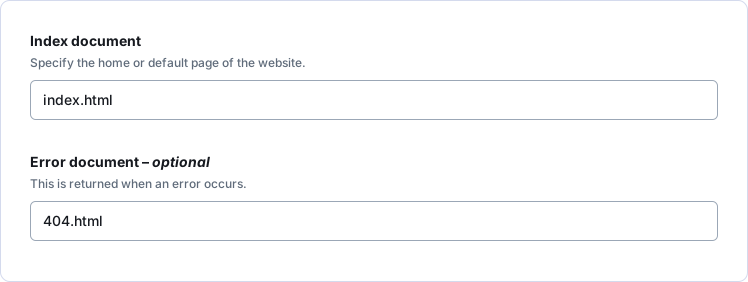
These settings apply to the S3 website endpoint. If you serve the website through CloudFront or another service, check that service's error response configuration as well.
Testing your 404 page
After syncing your website, visit a URL that does not exist on your site, such as https://example.com/this-page-does-not-exist. Your custom error page should appear.
You can also use your browser's developer tools to check that the request returns an HTTP 404 status. Opening /404.html directly only confirms that the file exists; it does not confirm that your hosting service handles missing pages correctly.