How to create a static website using GitLab Pages
Much like GitHub, Gitlab offers a web-based solution for managing coding projects, making it easier to track and resolve bugs and other issues with the project, provide information and wikis on the project's function and use, and a host of other benefits.
As you might have guessed, the idea behind GitLab Pages is, like the name, very similar to Github Pages, which provides a space for a more complex static homepage for projects, and which have been supported as a deployment option in Publii since the early beta releases. WIth Gitlab's increase in popularity after GitHub's acquisition by Microsoft in June 2018, we decided to implement Gitlab Pages support in Publii to allow users previously based on GitHub to move their project website across without issue.
Creating a static website with GitLab Pages isn't difficult; we'll just need to complete a few simple preparatory steps on Gitlab before we can set-up the upload in Publii.
Generating an access token
Before we can start creating a GitLab Pages static website you'll need to generate an access token; this token will give Publii access to your GitLab repositories and allow it to make changes so it can create and edit your website files whenever you click the Sync button in the Publii app.
To generate; just follow these steps:
- Log-in to your account on the Gitlab website:
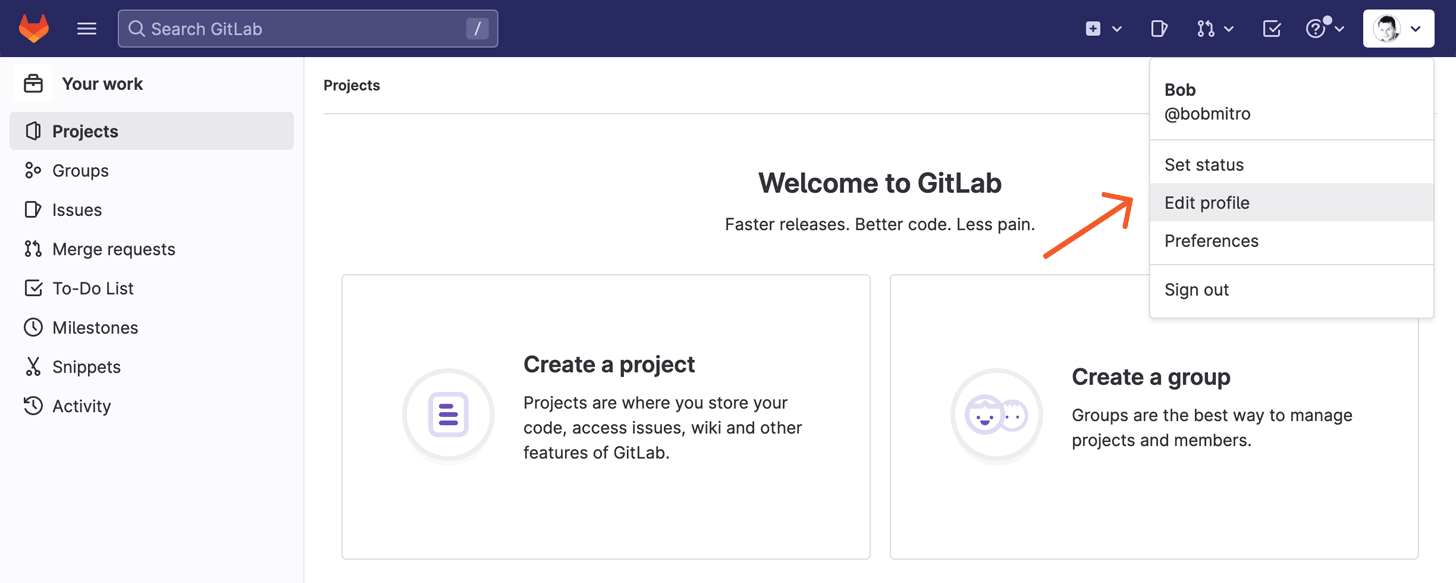
- After logging-in, click on the Edit profile option in the drop-down menu in the top-right of the screen:
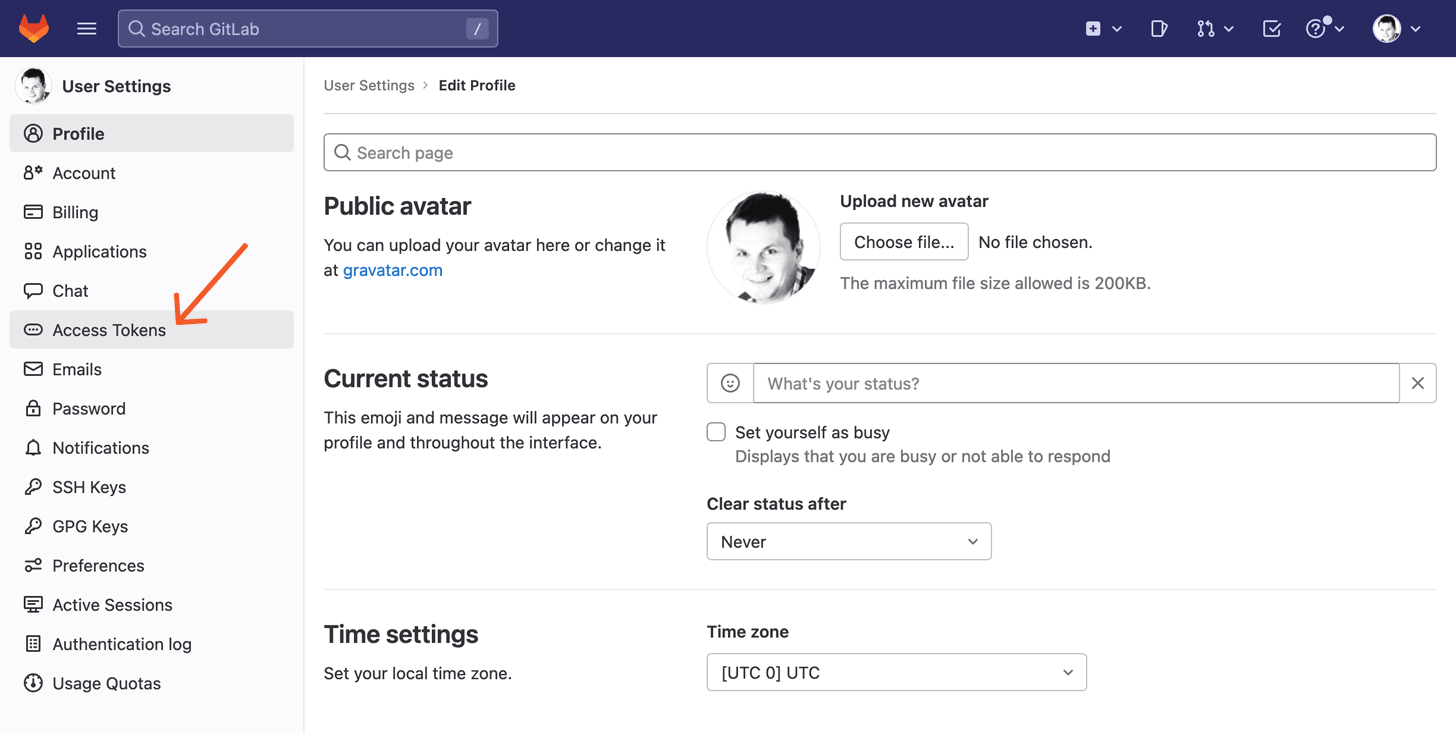
- On the User Settings screen, click on the Access tokens tab in the sidebar menu:
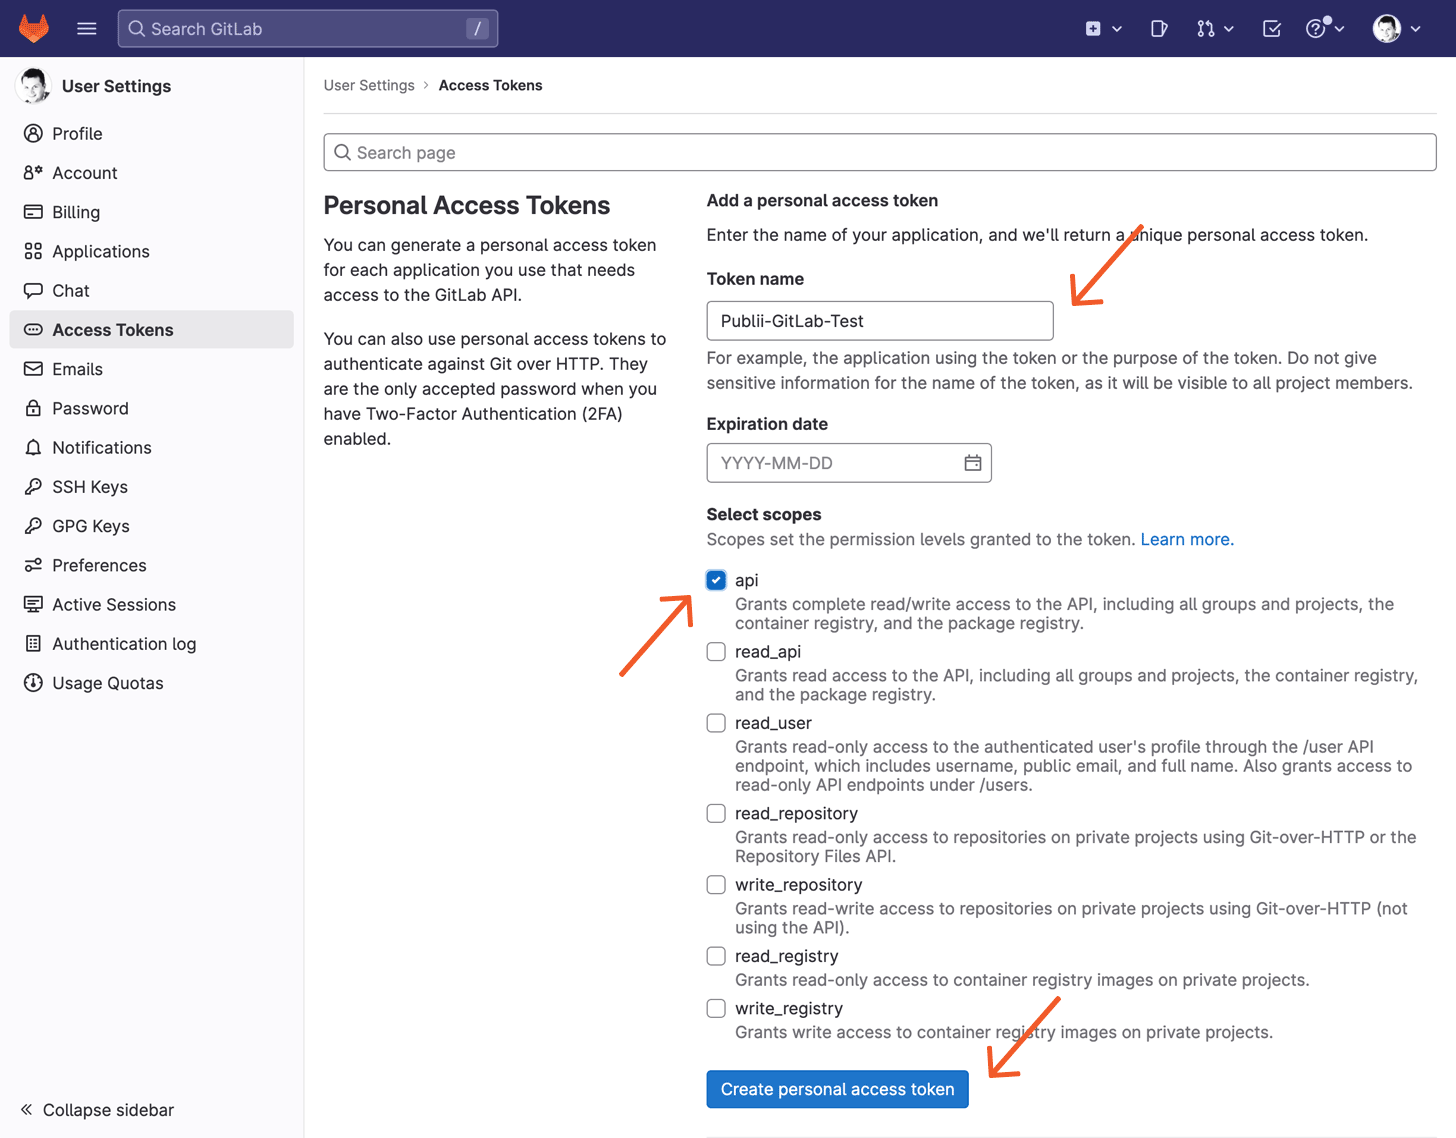
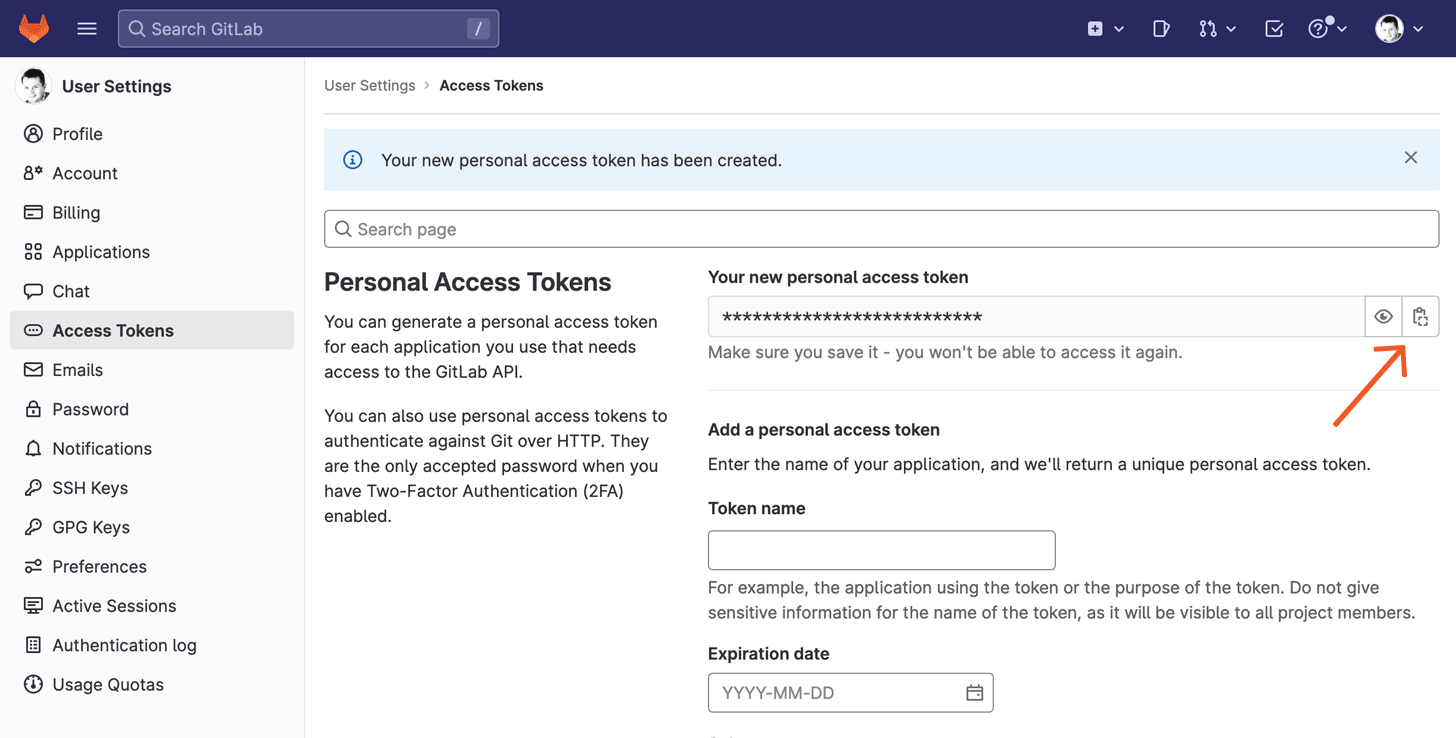
- Enter a name for your access token, then under the Scopes heading, add a checkmark to the api setting. Finally, click the Create personal access token button to complete the process:
- Your access token will appear on the next screen - click the clipboard icon to copy it to your clipboard and save it somewhere safe to use later (once you leave this screen you will not be able to access the token again, so make sure it's been saved before moving on to the next section!):
Creating our static website on Gitlab Pages
The access token will allow Publii to connect to your Gitlab Pages, so you'll have to create a new repository where your static website can be stored.
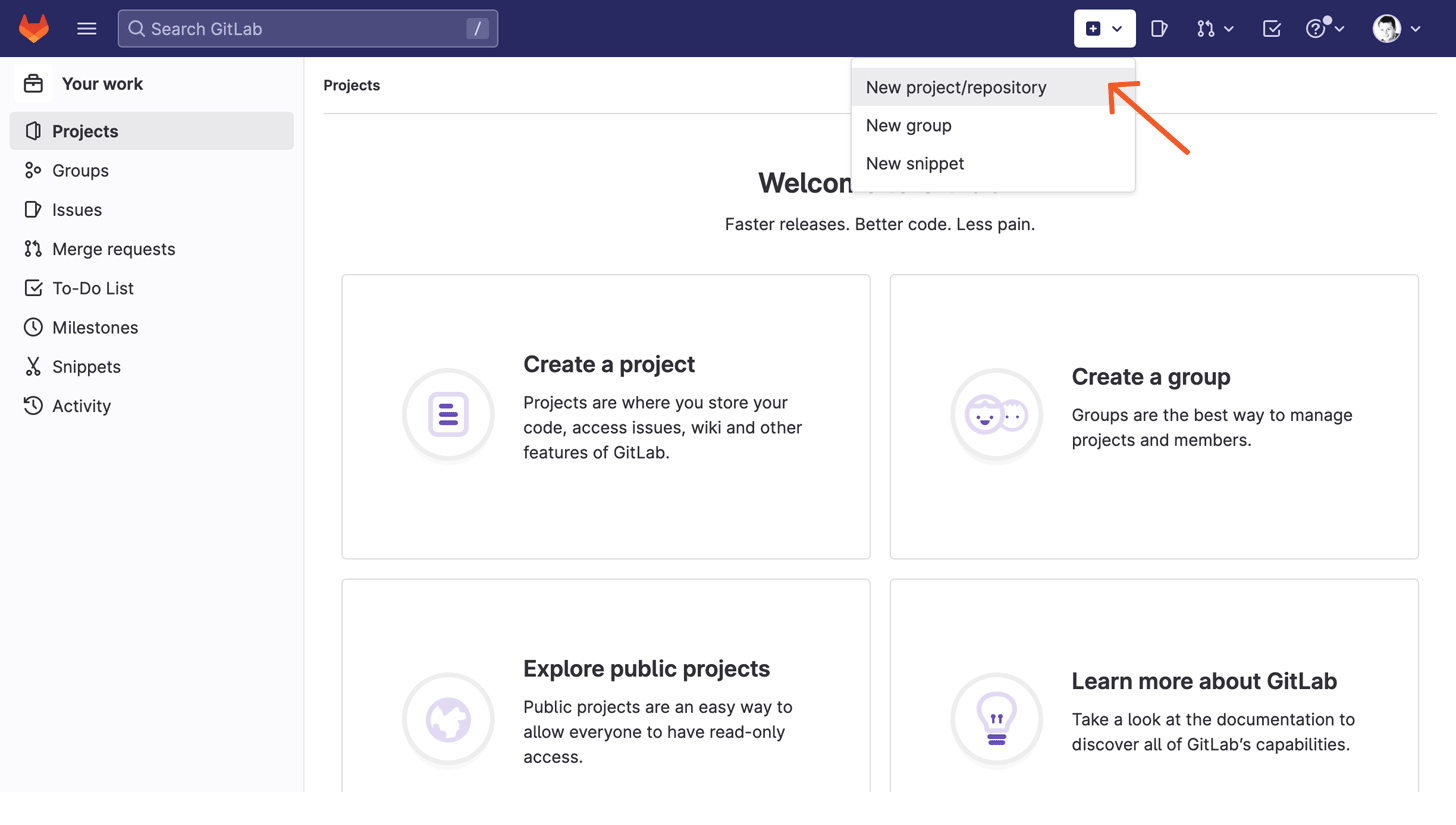
- On the Gitlab site, click on the plus button in the toolbar and select New project/repository:
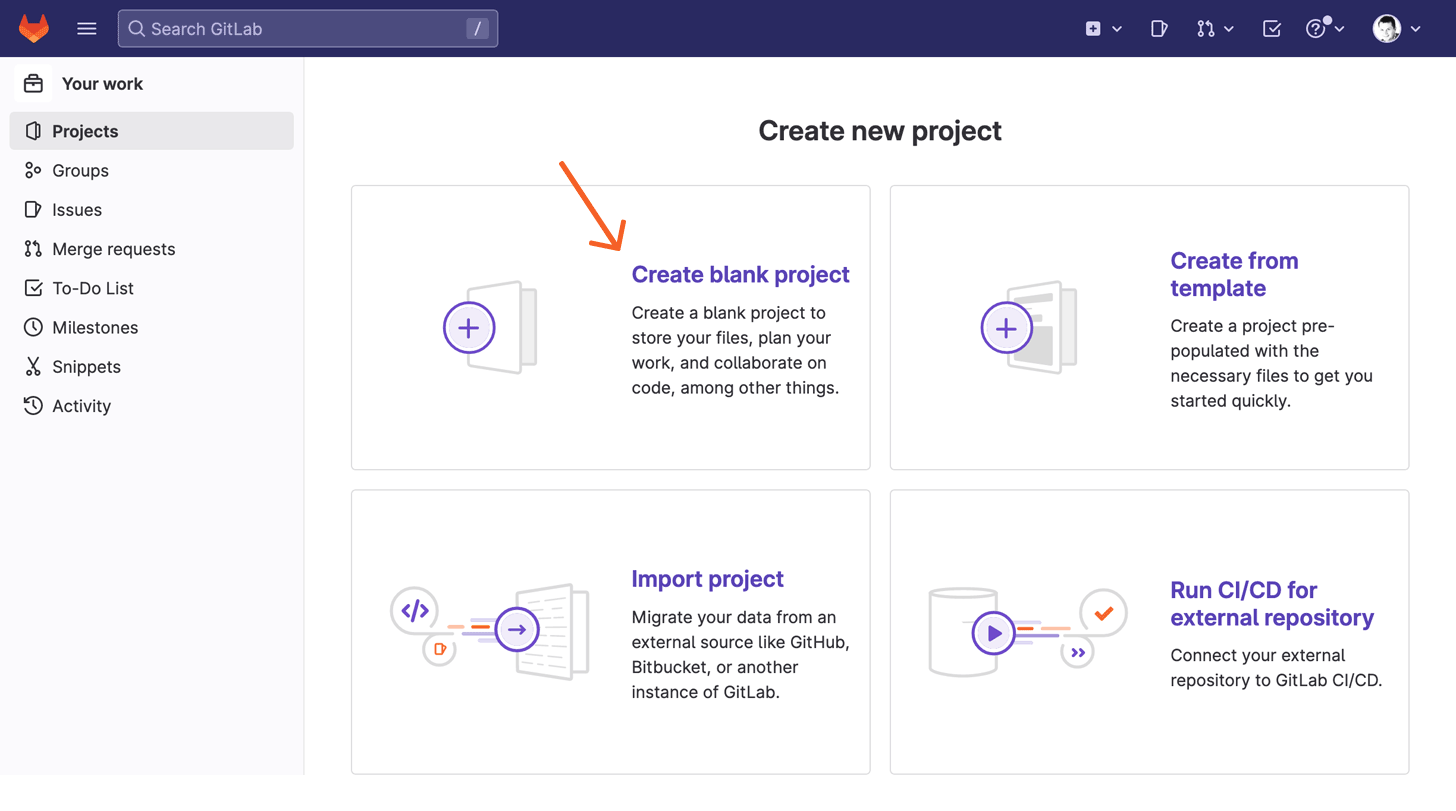
- On the next screen, click on the Create blank project box.
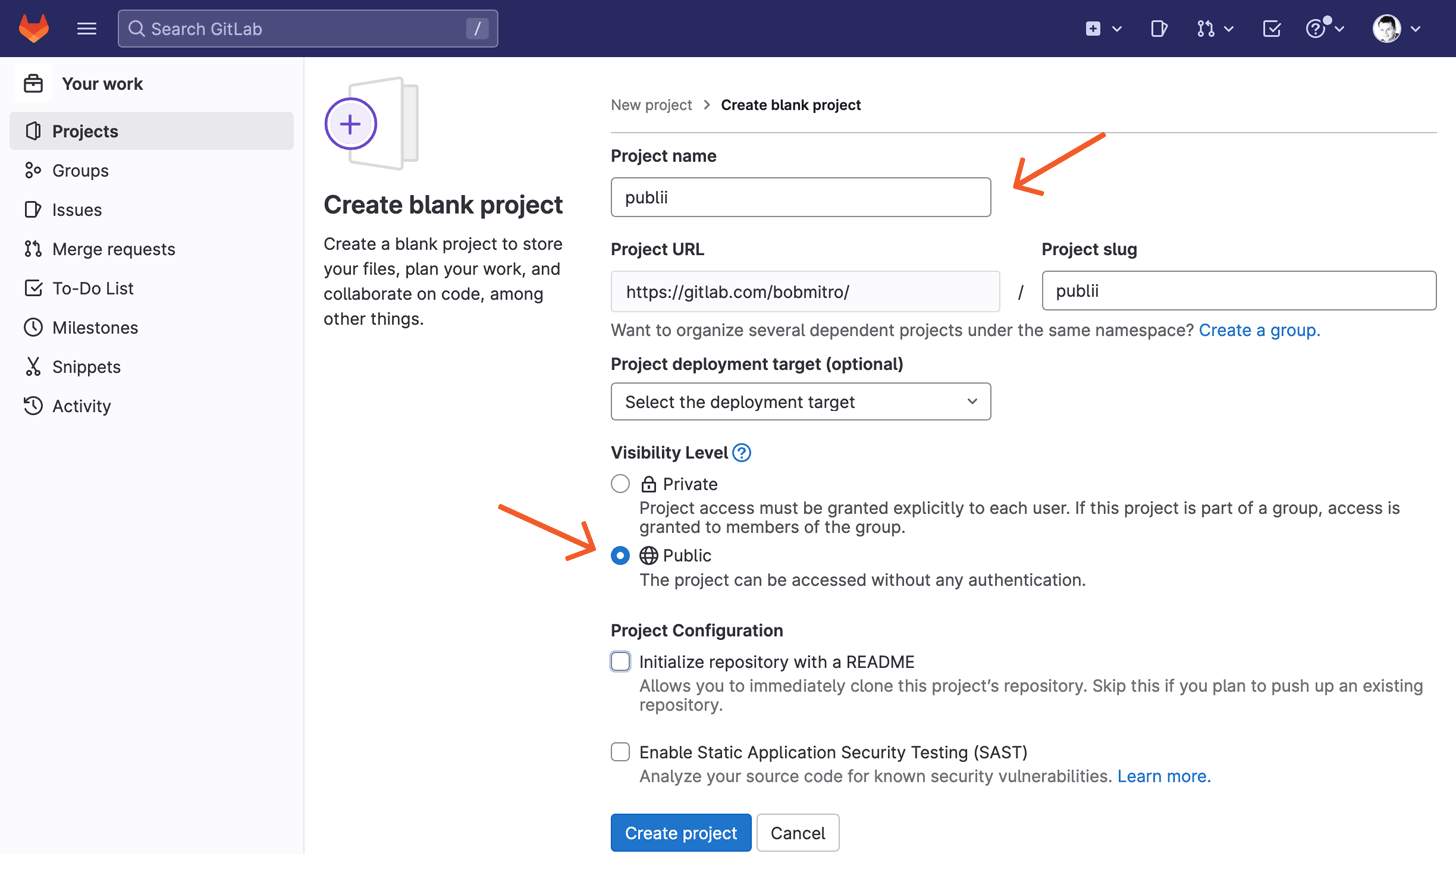
- Now, on the Create blank project page, give your project a name and set the Visibility level to Public so that visitors will actually be able to see the website once it's uploaded. Next, click on the Create project button:
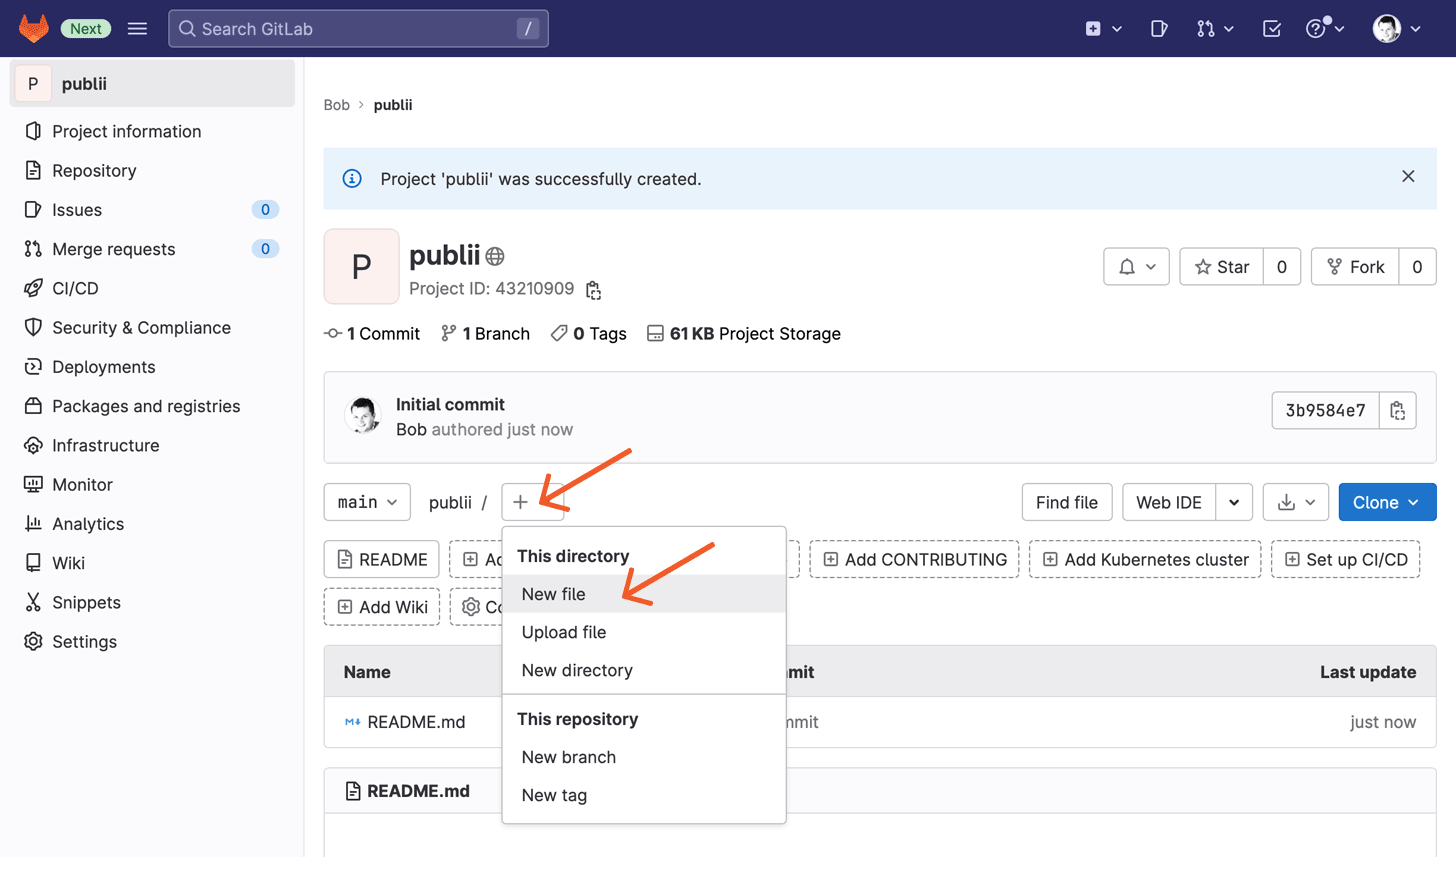
- The project is now created and you'll be on the project's home screen. As Gitlab uses pipelines to publish static websites we'll have to create a special file to take care of this. First, click on the plus button, then from the dropdown menu select New file button:
- On the next screen, for the Filename, type
.gitlab-ci.ymland in the main code window, paste the following code:image: alpine:latest
pages:
stage: deploy
script:
- echo 'Nothing to do...'
artifacts:
paths:
- public/
only:
- mainThe indents in the YML format are important so please make sure that you copied the file content exactly.
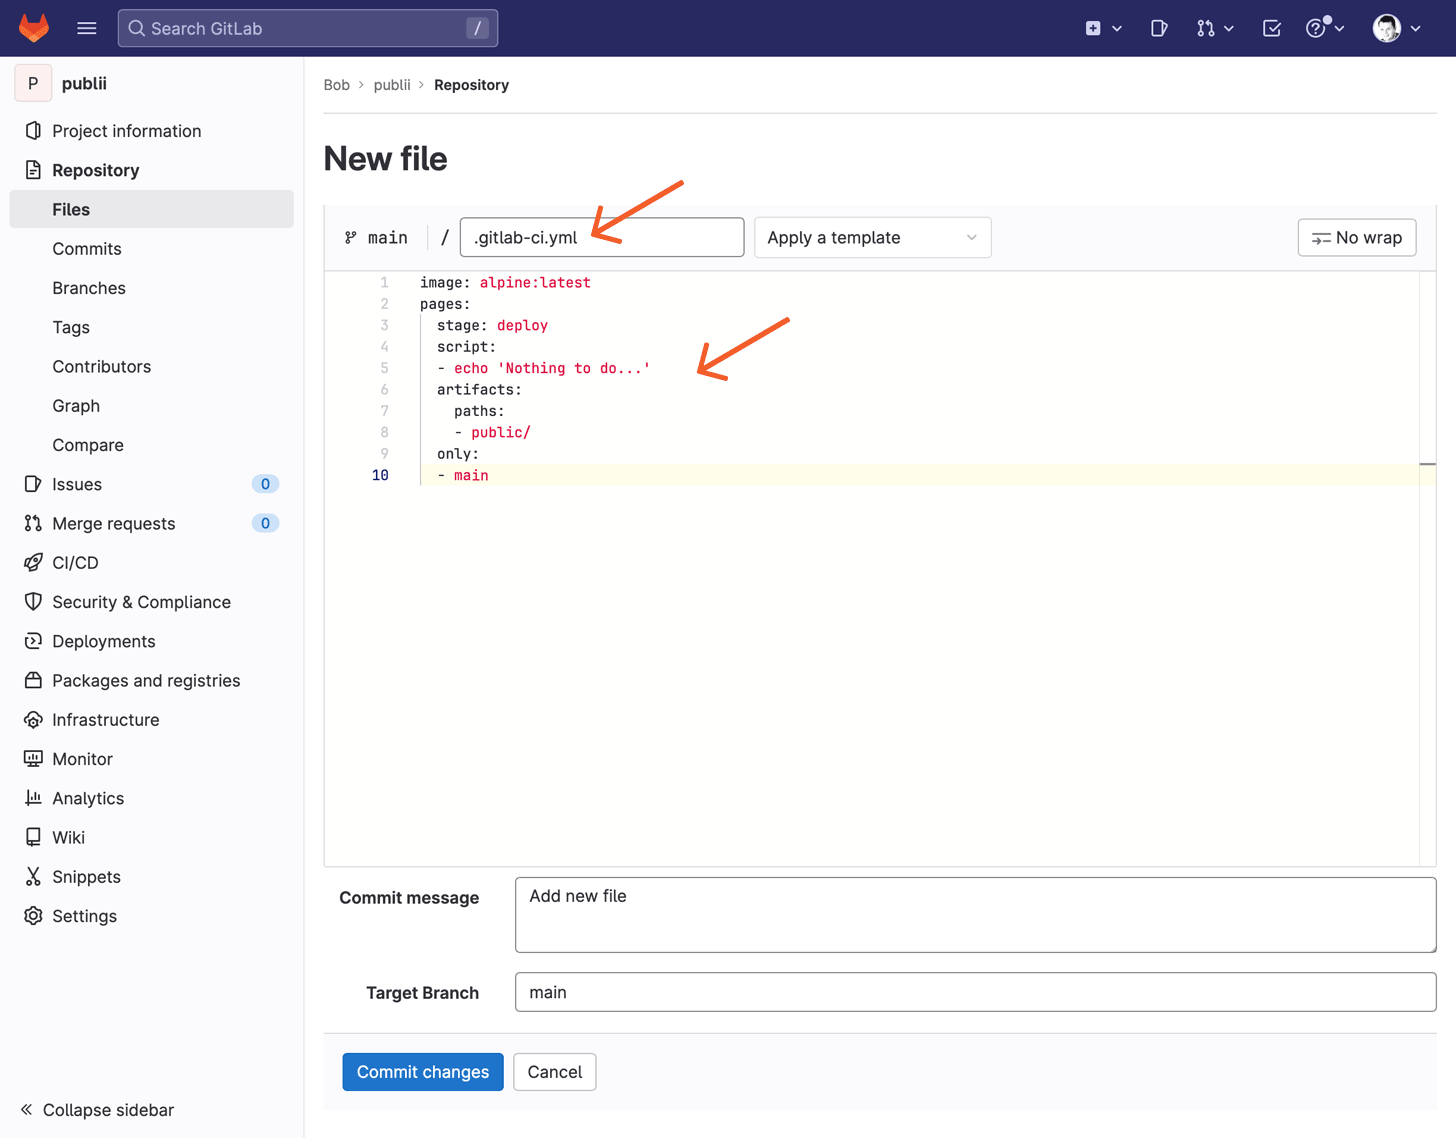
- Once the code has been entered, hit the Commit changes button to save the file.
Now you're ready to sync Publii with your GitLab Pages project!
Syncing your Publii static site with Gitlab
Setting-up Publii to upload to your Gitlab Pages repository is the easiest part of this tutorial, and you'll only need to do it once; after the initial setup you can simply click the Sync button to upload changes automatically in the future. Follow these steps:
- Create a new website (or, if you already have created the website you want to use with Gitlab in Publii, open that instead) and click on the Server section in the sidebar menu to open the server settings page:

- Enter the domain name for your Gitlab Pages repository. The domain is generated using the following format: username.gitlab.io/project-name, where username is your username on Gitlab, and project-name is your project's name as entered on Gitlab.
- The Server field can be left as the default, except when you are using your own instance of GitLab (on your own servers) rather than the Gitlab site.
- Enter the project name in the Repository field.
- The Branch field should contain the name of the branch which will be used to publish your website - you can double-check your repository on Gitlab Pages if you're not sure.
- In the Token field, enter the access token value that was saved in the first part of this guide.
With this done you can click the Save settings button to complete setup, then click the Sync my website button in the left sidebar to initiate the first upload of your website content to the Gitlab repository.
Once the sync is complete you will see the following file structure in your repository:
- public is a directory which contains all the website files.
- .gitlab-ci.yml is the configuration file for the pipelines we created earlier.
- publii-files.json is a file used during sync; please do not modify the files in the public directory manually as this will lead to desynchronisation of the data stored under the publii-files.json file.
It can take up to a few minutes for the website to appear under the selected domain; if you need to you can check the deployment status in the CI/CD section of the Gitlab website's menu:
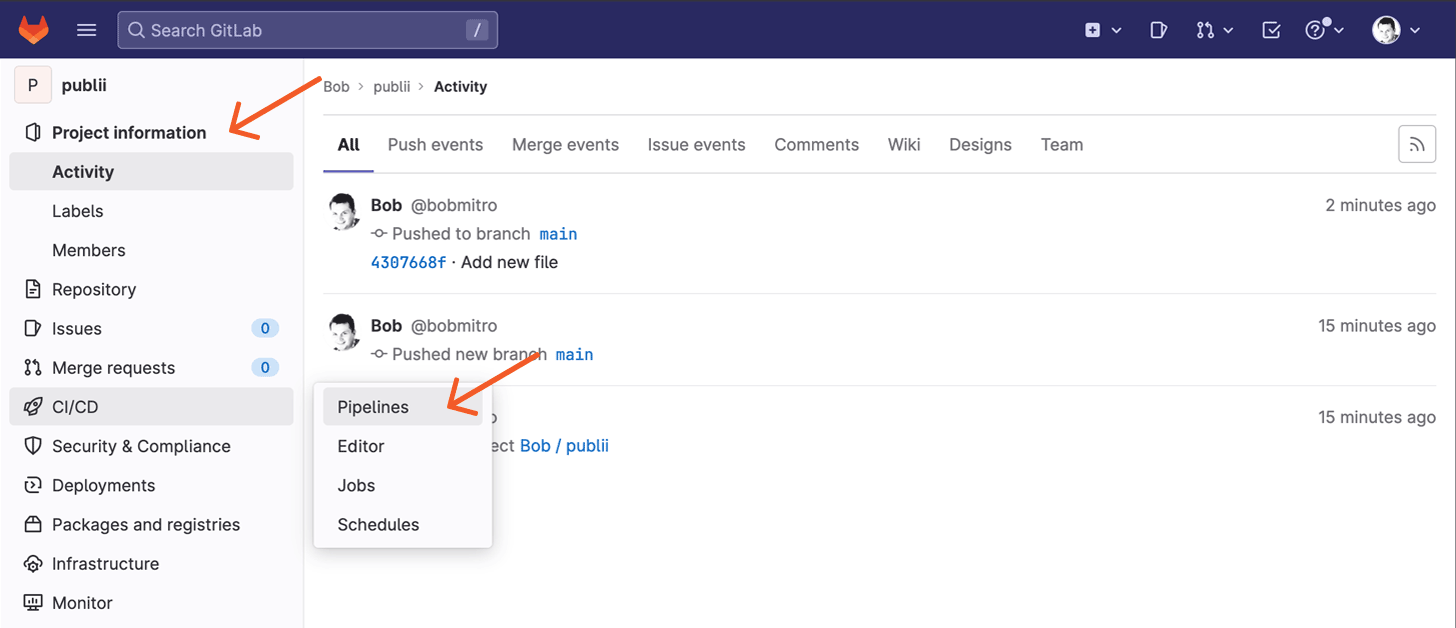
Here you can see if your pipeline works correctly.

You may also check the deployment process' status In the 'Jobs' menu section:

Clicking on the job ID will let you check the process output:

Once the sync is complete your website will be published on GitLab Pages!
Useful Tips and Tricks
Looking to get a bit more control over your site? Here's some useful tricks that will help you get your site exactly how you want:
Simplify your website URL to yourusername.gitlab.io
By default your GitLab page URL will be username.gitlab.io/repository-name, but we can simplify this by creating a repository for our website called yourusername.gitlab.io e.g. if my username is testname, I would create a repository called testname.gitlab.io.
Then, instead of duplicating the URL as testname.gitlab.io/testname, GitLab will simplify the URL to testname.gitlab.io only.
Use a custom domain
If you'd prefer to use your own domain name rather than the default gitlab.io subdomain you can use this tutorial to setup a custom domain for your static website.
Is SSL available for your custom domain?
All gitlab.io subdomains have SSL enabled by default. Custom domains can also use HTTPS. We strongly recommend that you use HTTPS for your domain as the Chrome browser (since version 68) marks HTTP-only websites as not secure (more details).
Use different branches in your repo
In our tutorial we specifically use the main branch of our repo, but you are free to use other branches; you could create a documentation website for your existing repository by using a docs branch, for example.