How to make a static website with Google Cloud
For modern developers and business-minded individuals, Google Cloud can be a flexible option for users that need a multi-purpose storage solution for their website and other projects, backed by some of the most robust servers on the market. Publii includes support for Google Cloud services, so it's a great option if you need a well-designed but easily-maintained site for your project.
Note: Please be aware that the configuration provided is just an illustration and might not correspond with the current Google Cloud functionalities and choices. It is highly advisable to verify all your project settings, especially the public access to the bucket, thoroughly to ensure their correct functioning before implementing them in a live production environment.
Configuring Google Cloud for Publii
Before we start on the step-by-step guide to configuring Google Cloud, we must first make some preparations as Google Cloud requires more credentials than similar services. Ensure that you already have a working Google Cloud account (a payment option must have been added), and a domain that you have confirmed ownership of in the Search Console. A custom domain is necessary to take advantage of website functionality in Google Cloud storage (that is, working index.html redirects that redirect browsers from URLs to the specific directories).
When you have met all of these requirements, we may then move on to creating and configuring your bucket to work with Publii. Follow these steps to set-up Google Cloud:
- Start off by opening your Google Cloud console at https://console.cloud.google.com/.
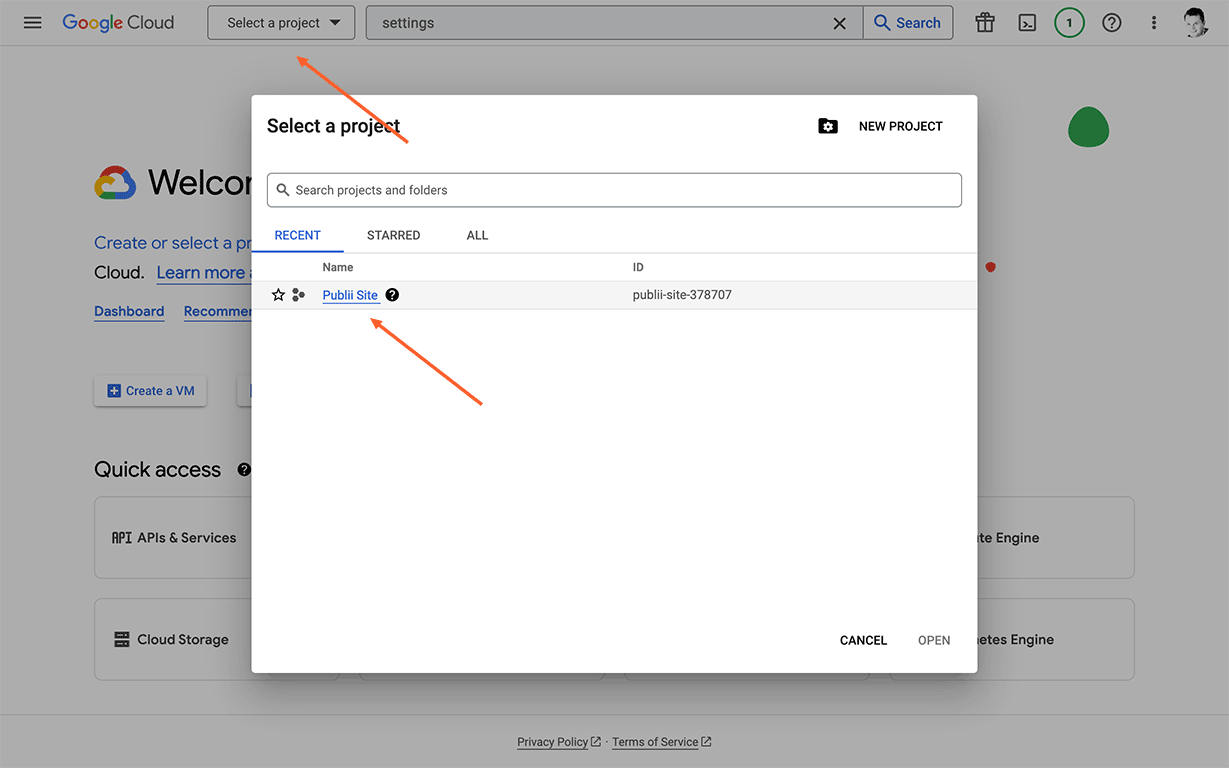
- Make sure that your website project is selected in the drop-down list in the toolbar at the top of the screen, or if you don't have a website project yet, you will need to create one before you can select it. To create a new website project, simply click on the New Project button and follow the prompts.
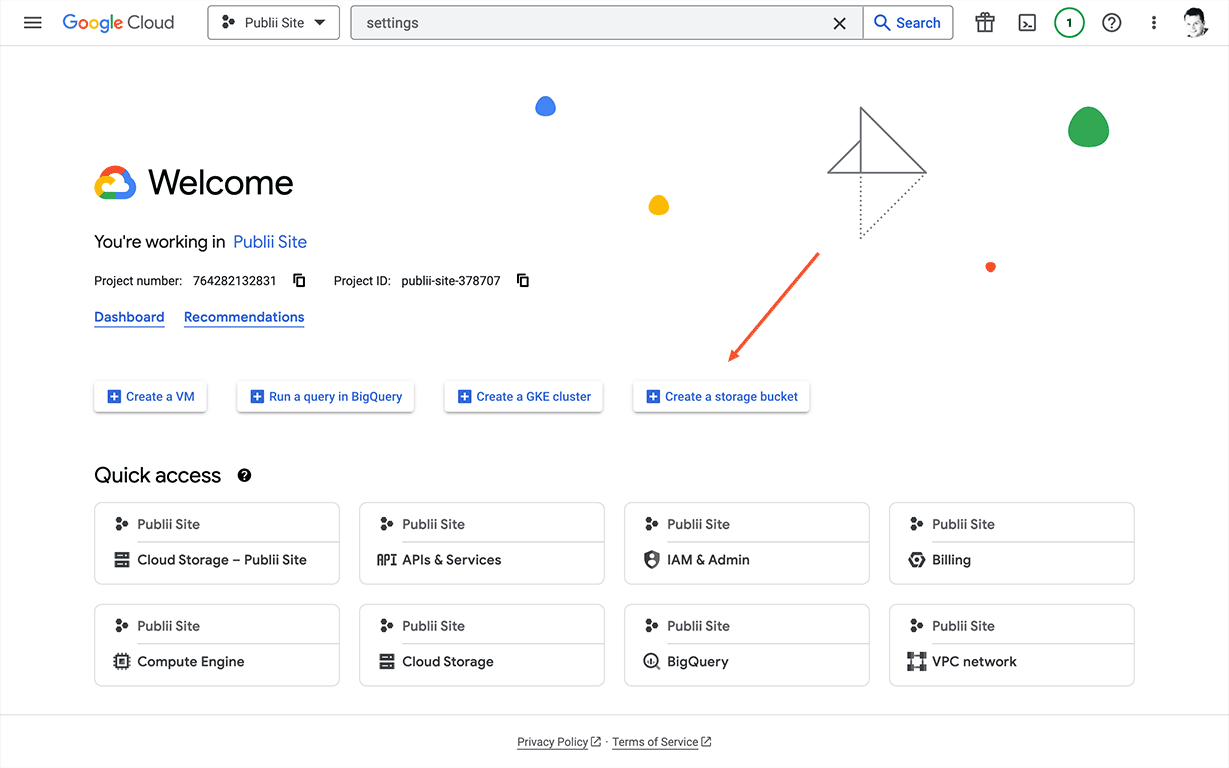
- Now click the Create a Storage bucket button.
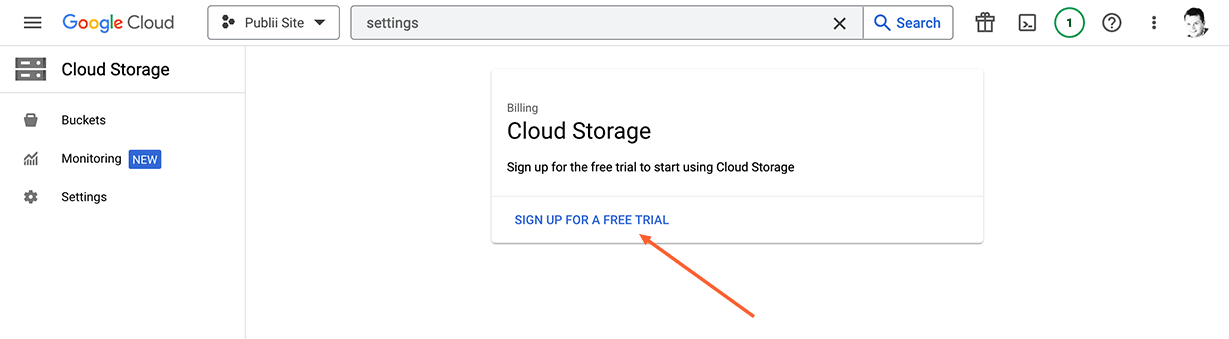
- To begin using and testing Cloud Storage for free, click on the Sign up for a free trial button located on the storage screen. This will take you to the next screen where you can follow the instructions to set up your trial account.
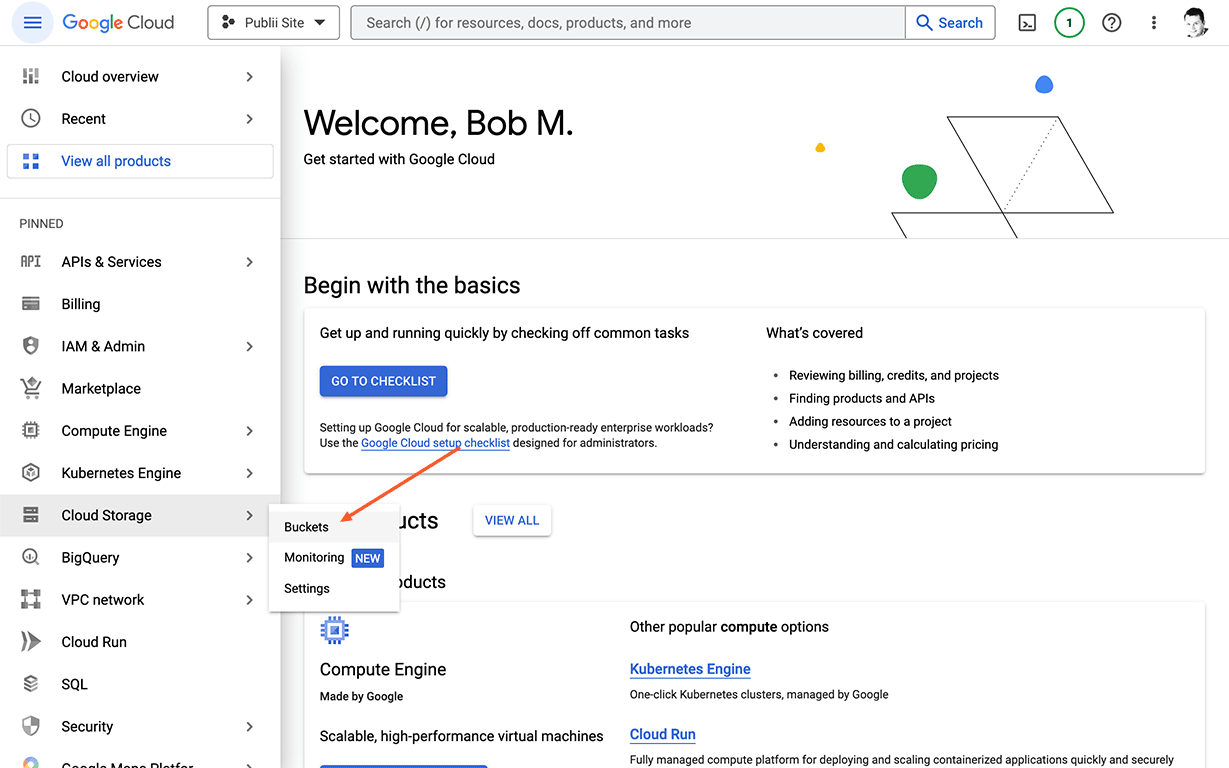
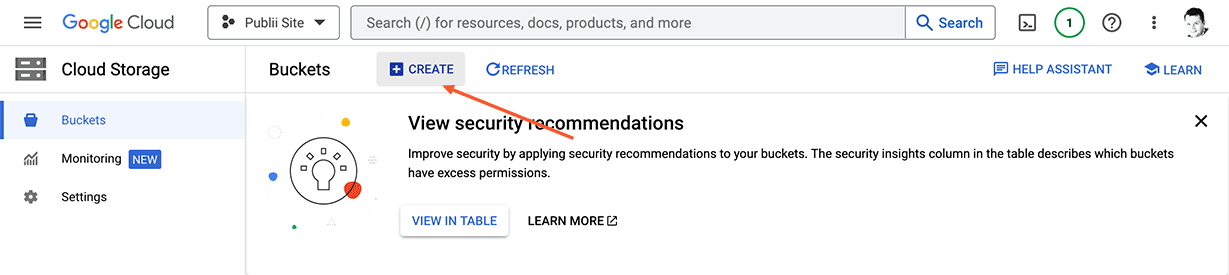
- Once you've successfully activated the trial, you'll be directed to the Welcome screen where you can start exploring the features and functionalities of the Google Cloud products. Now click on the hamburger menu on the left of the toolbar, and select the Cloud Storage option, then click the Bucket option.
- On the Buckets screen click on the Create button to get started.
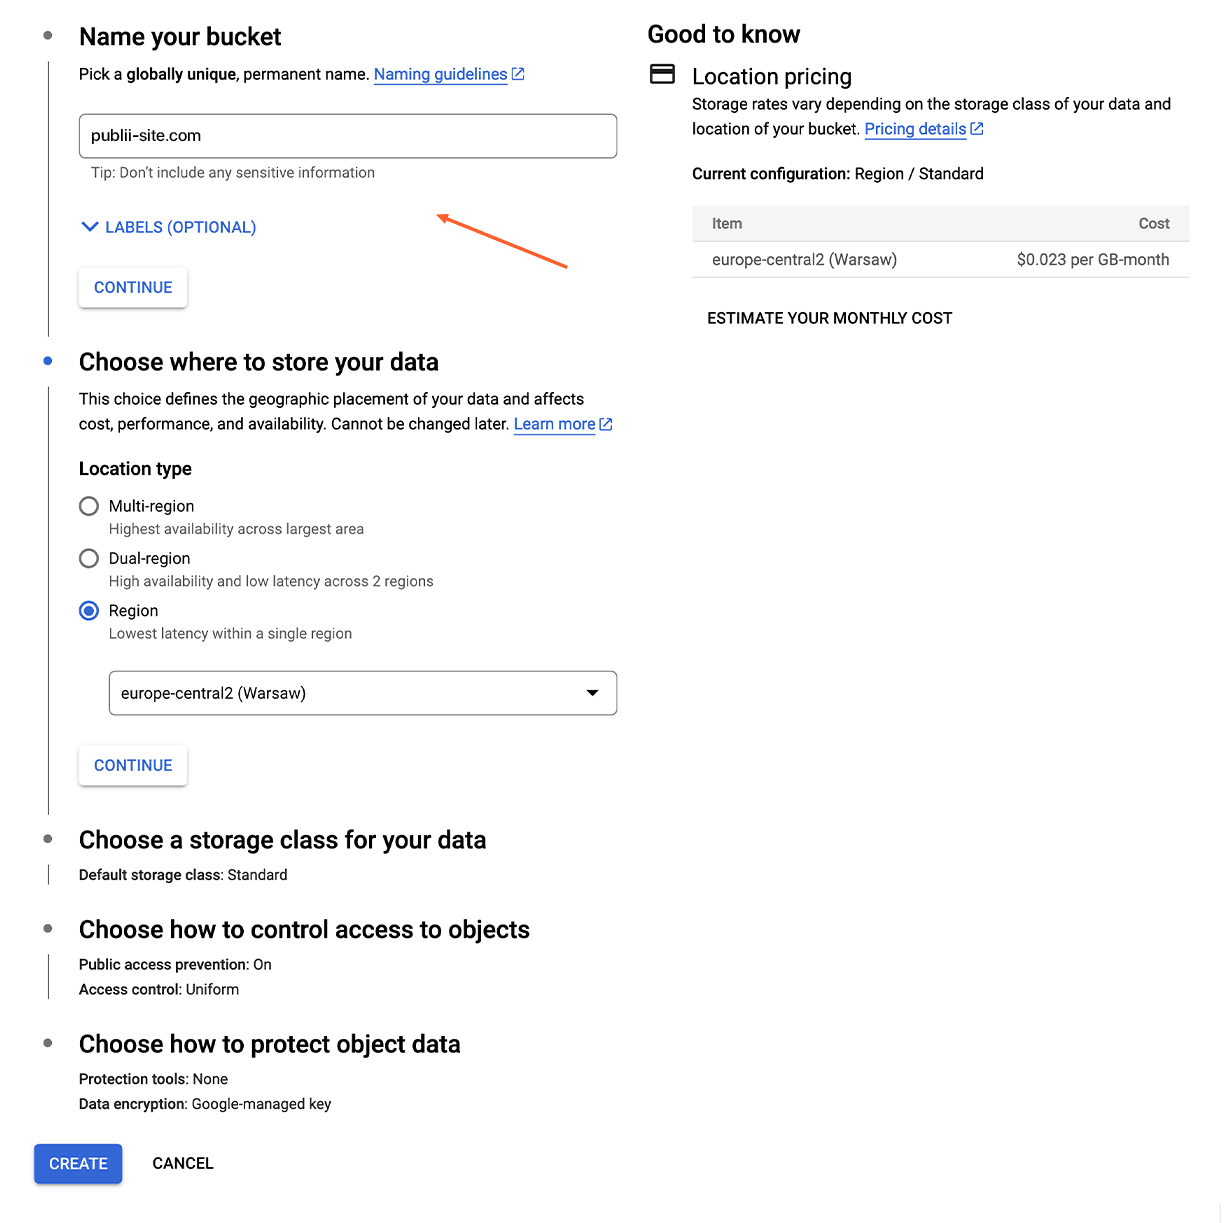
- You'll now need to enter some details for your bucket. For the bucket name, use your previously-verified domain name. For the Choose where to store your data option, choose either Region or Multi-region depending on whether you expect your visitors to be from across the world or just one particular region. Finally, click the Create button to finish creating the bucket.
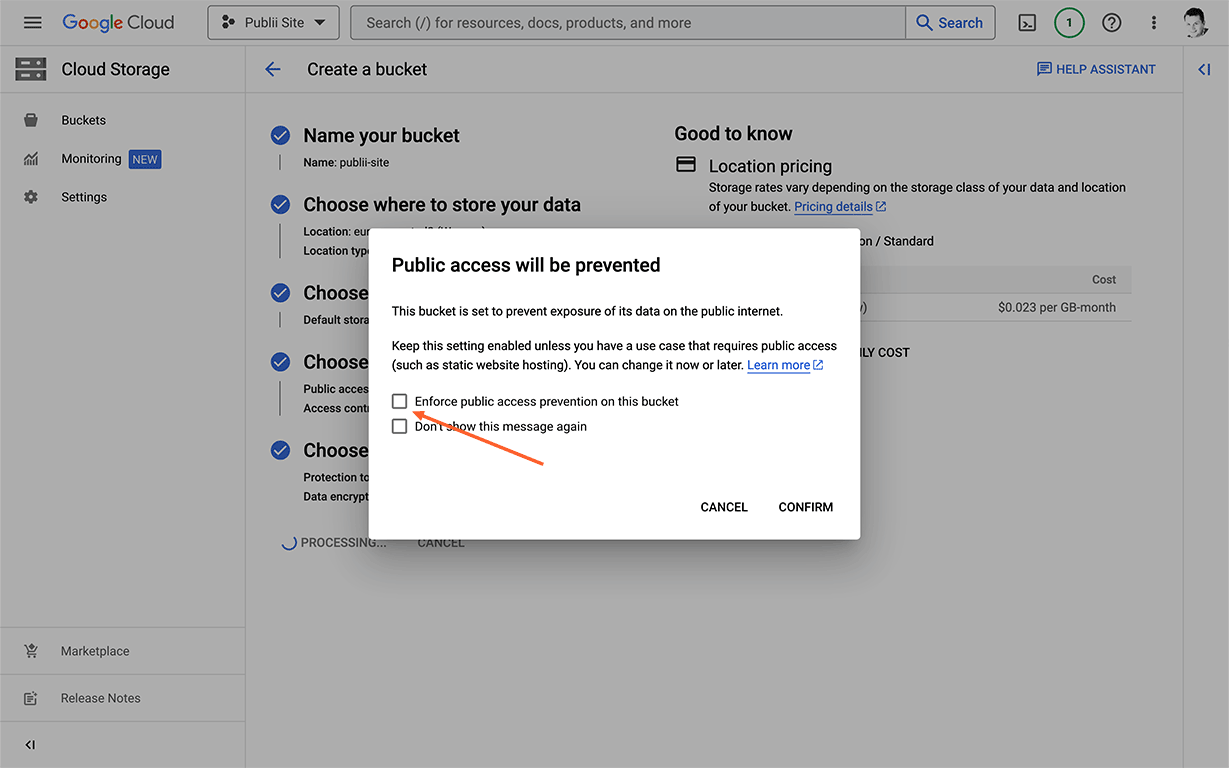
- On the following screen, you'll encounter a pop-up message saying "Public access will be prevented". Ensure that you uncheck the Enforce public access prevention on this bucket option and then click on the Confirm button to proceed.
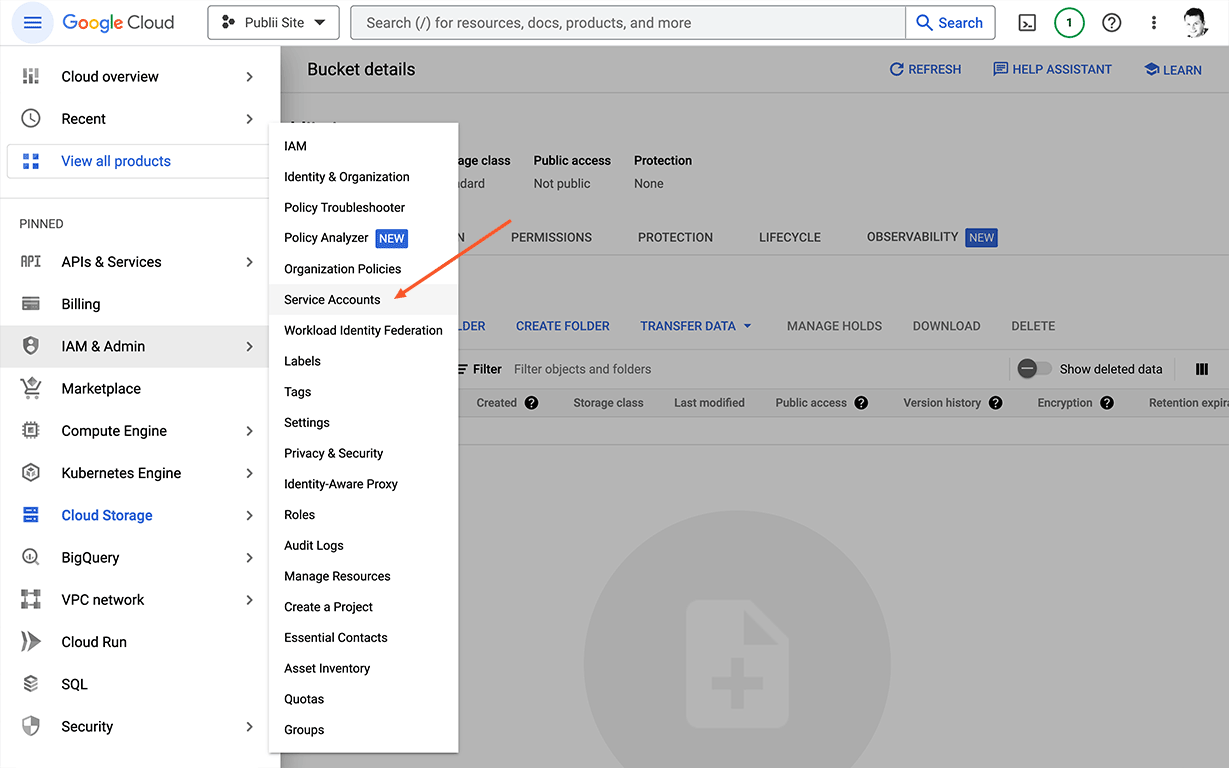
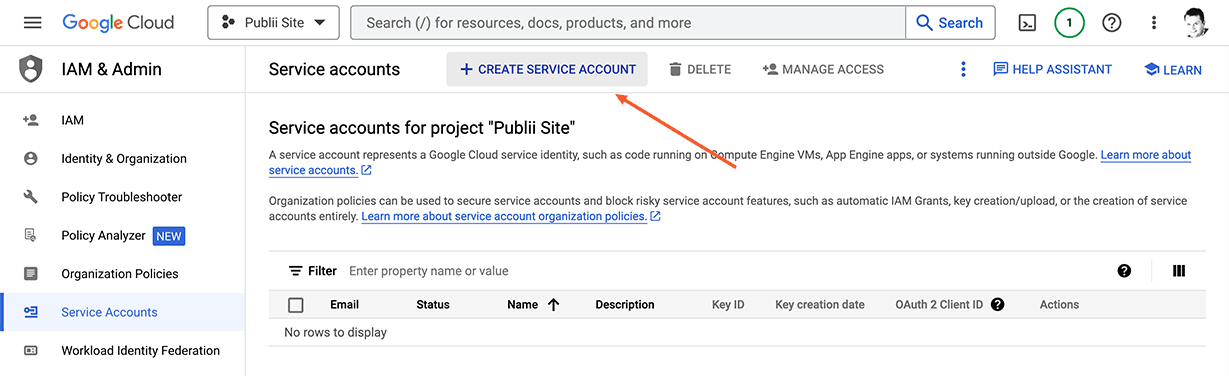
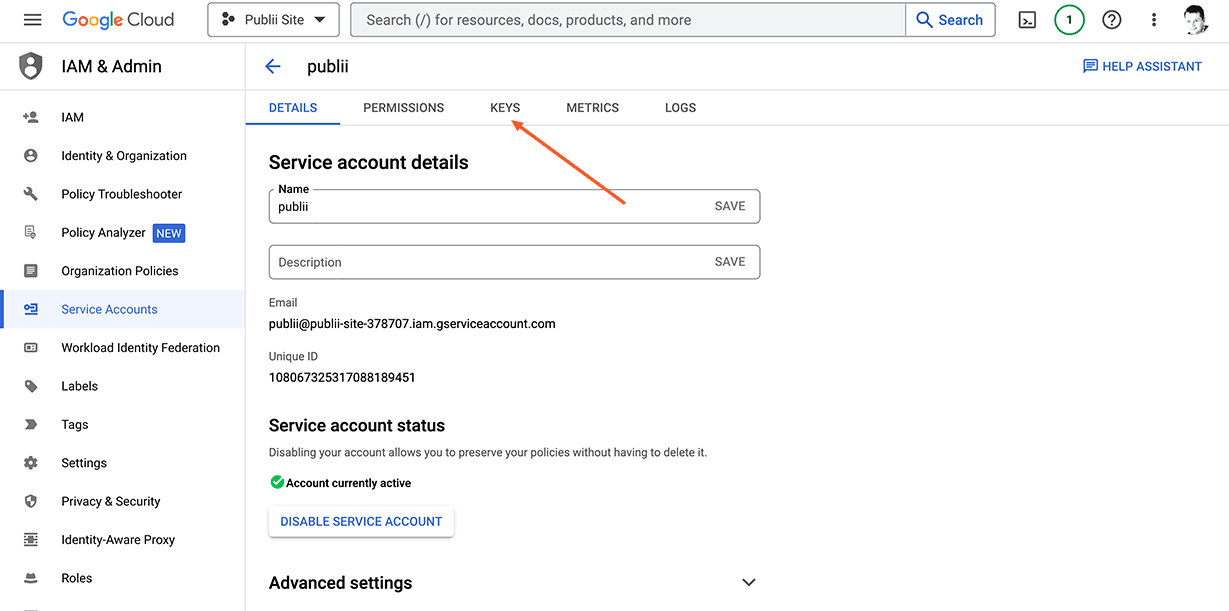
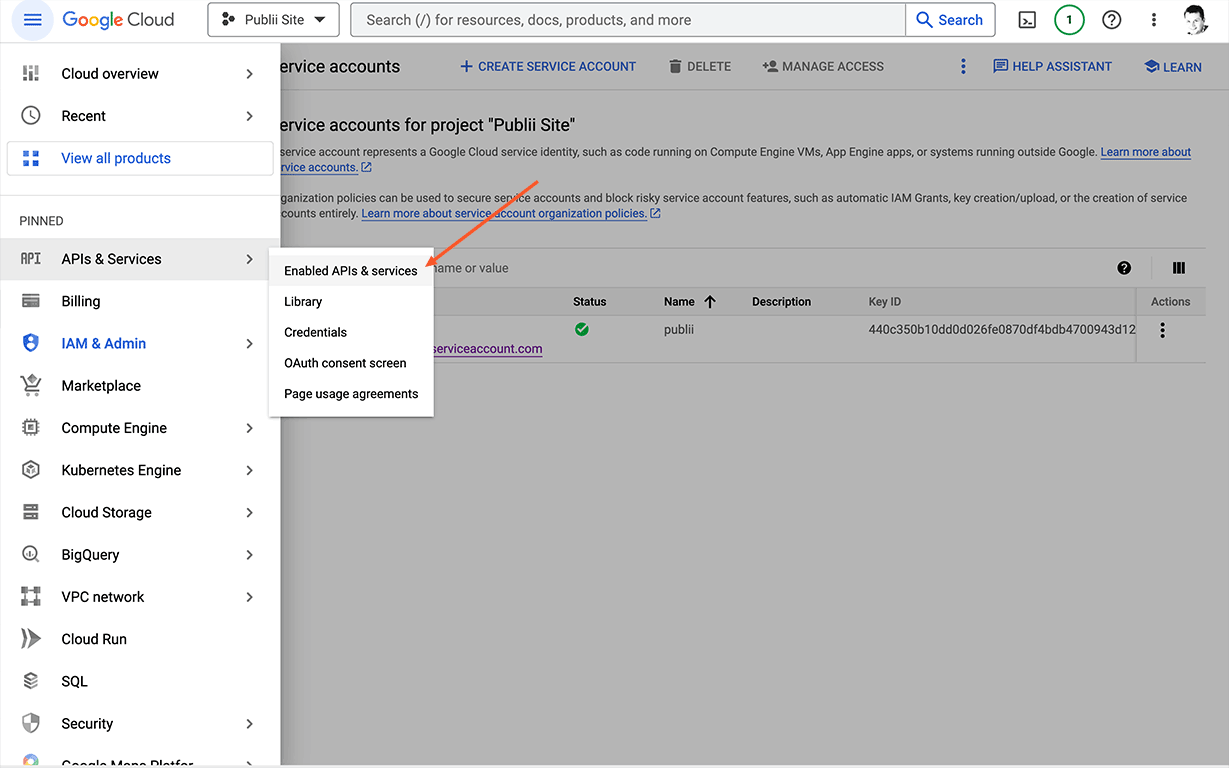
- With the bucket created we now need to create a JSON key file that Publii can use to access the bucket in order to upload or update your website files. In the Google Cloud console, click on the hamburger menu and and choose IAM & Admin → Service accounts option.
- On the Service accounts page click the Create Service Account button.
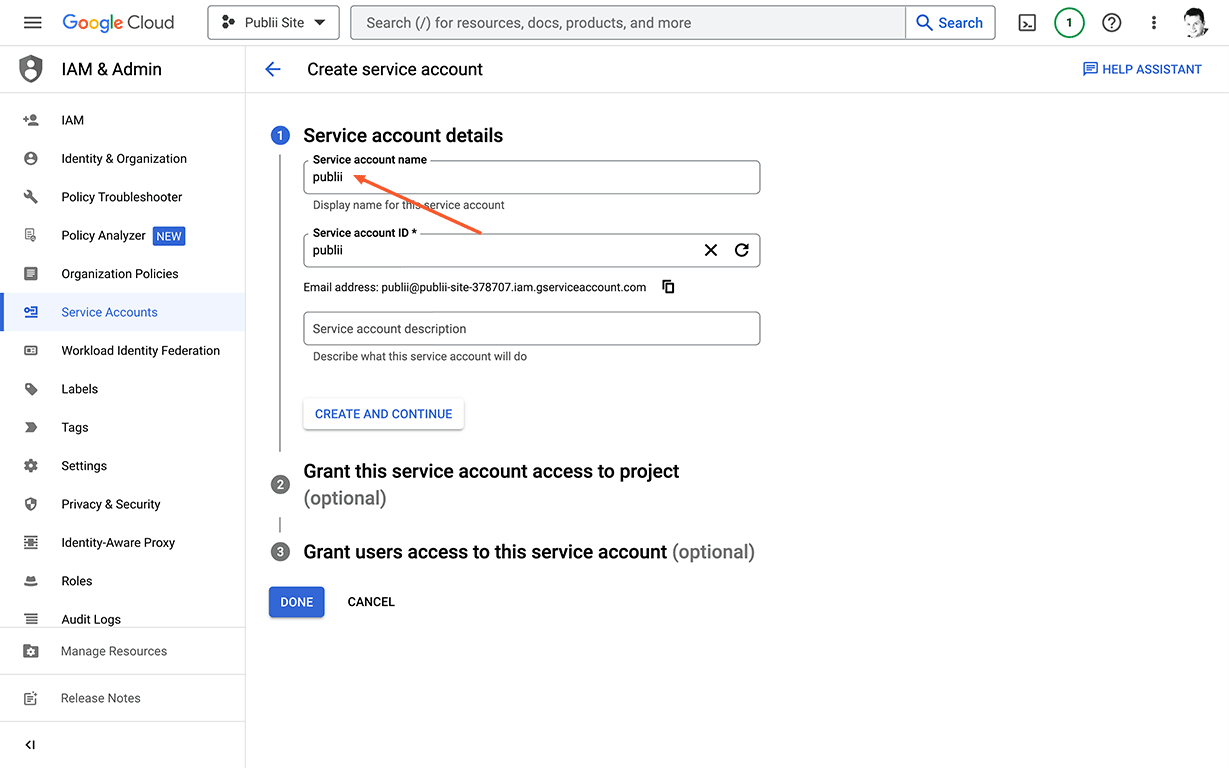
- A Create service account form will appear; in the Service account name option enter a name of your choice (it will not affect functionality). Click the Create and Continue button below.
- On the next Grant this service account access to project screen, type Storage admin in the filter input , and select it on the list below. Then click the Continue button.
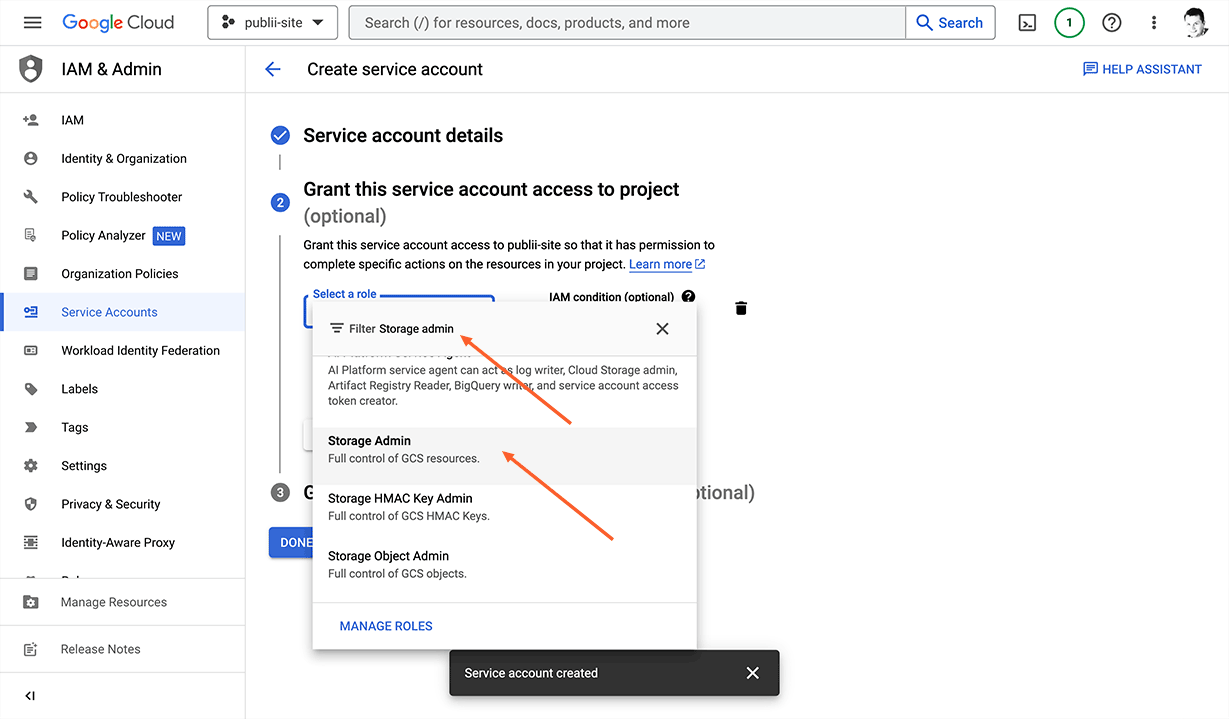
- On the next screen (the third step of creating a service account), simply click the Done button.
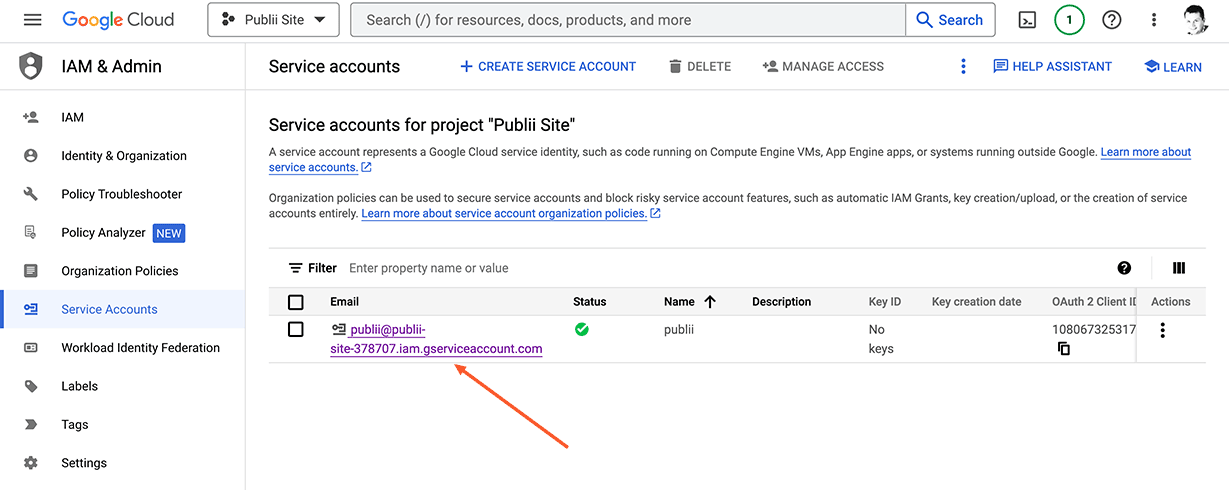
- A Service accounts for project page will apper; click the name of you project.
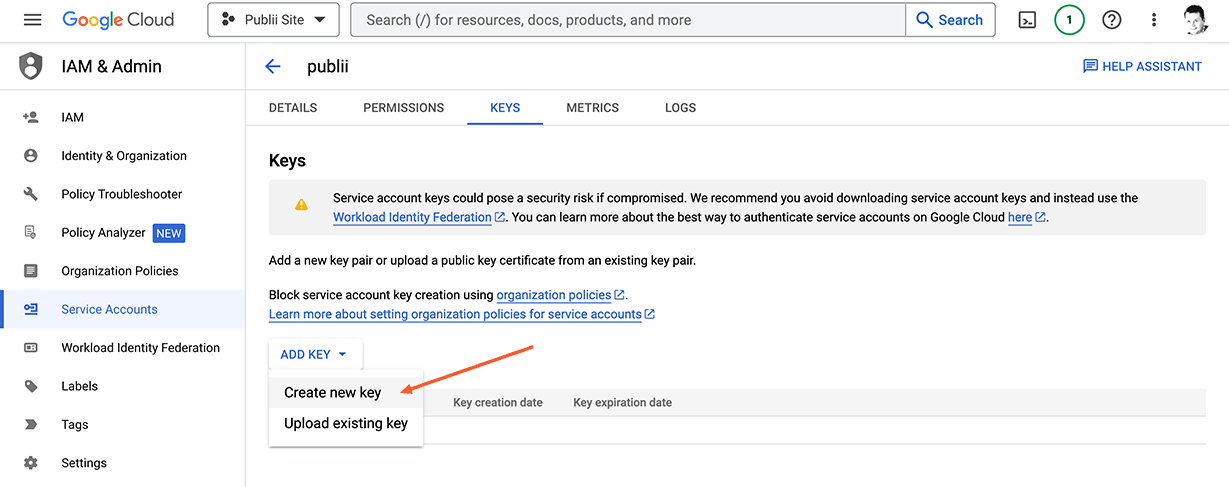
- On the Service account details screen click the Keys tab, after that click the Add Key button and select the Create new Key option.
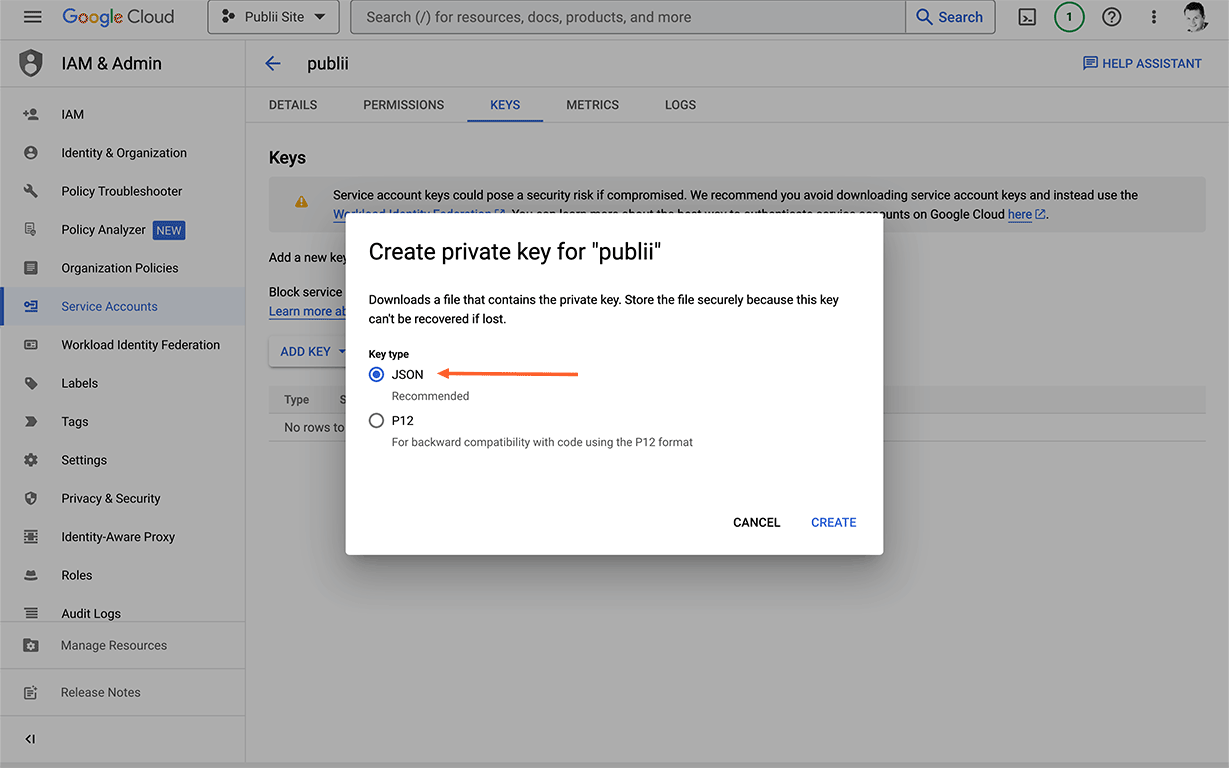
- The "Create private key for ..." popup will apper; select the recommended JSON option and click the Create button.
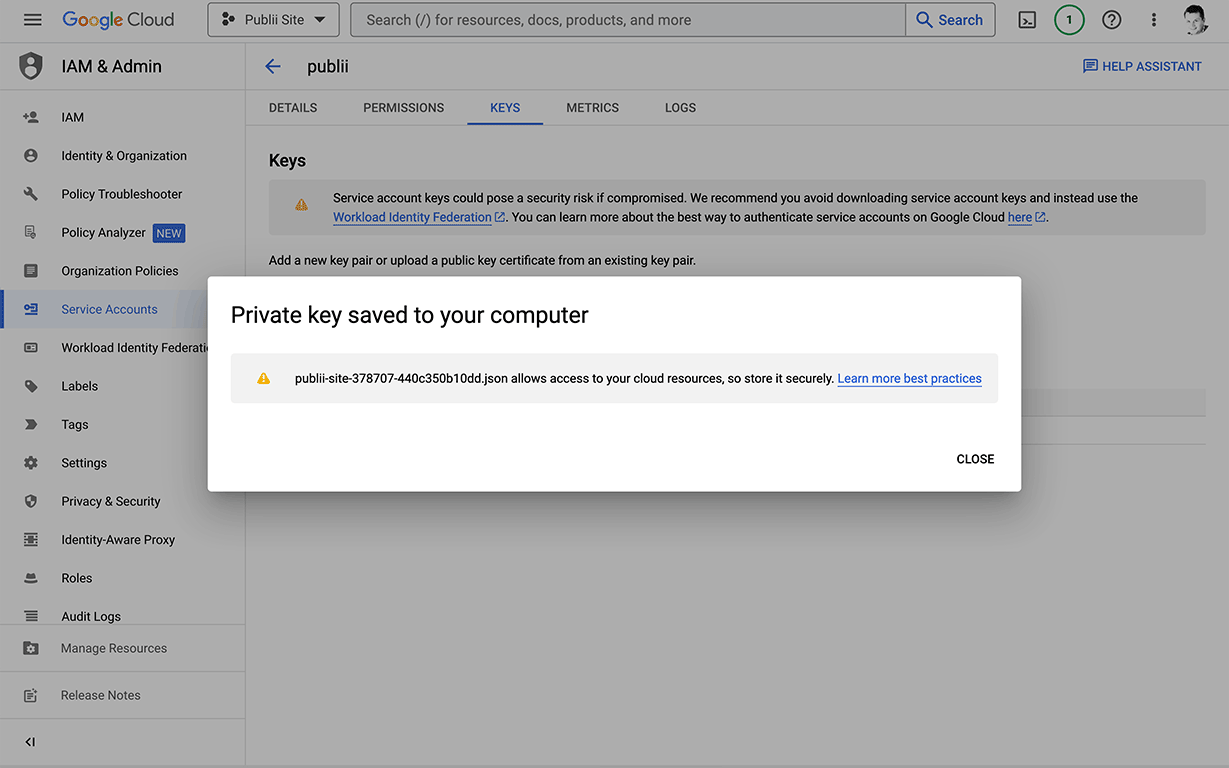
- The JSON file containing the key will be downloaded; make sure to keep it somewhere safe because it will not be possible to download it again later.
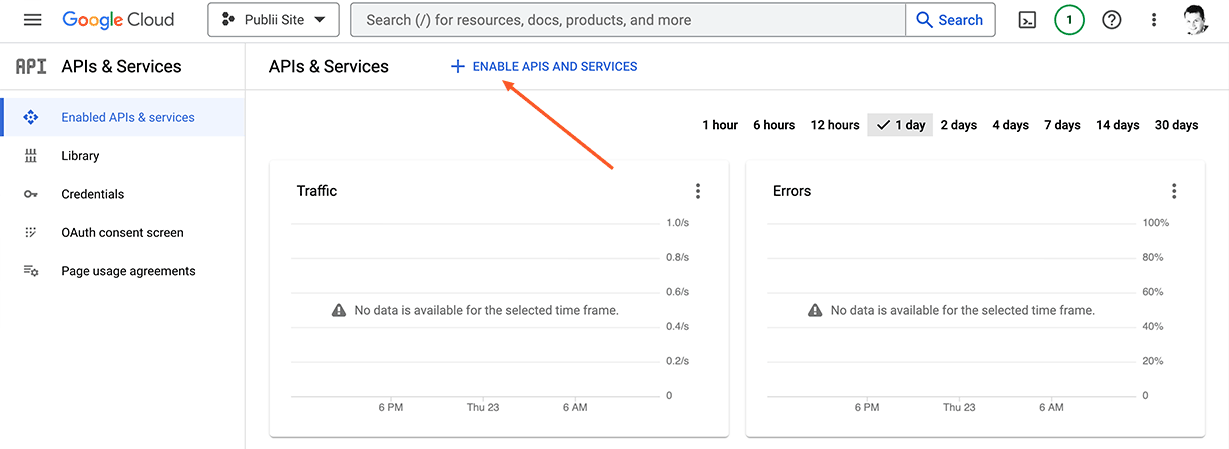
- To enable communication between Publii and Google Cloud we need to enable the Cloud Storage JSON API service; start by clicking on the hamburger menu, then on the APIs & Services and Enabled APIs & Services option.
- In the APIs & Services screen, click on the Enable APIs and Services button near the top of the page; you'll be taken to a list of APIs that you can enable, plus a search bar for ones not already visible.
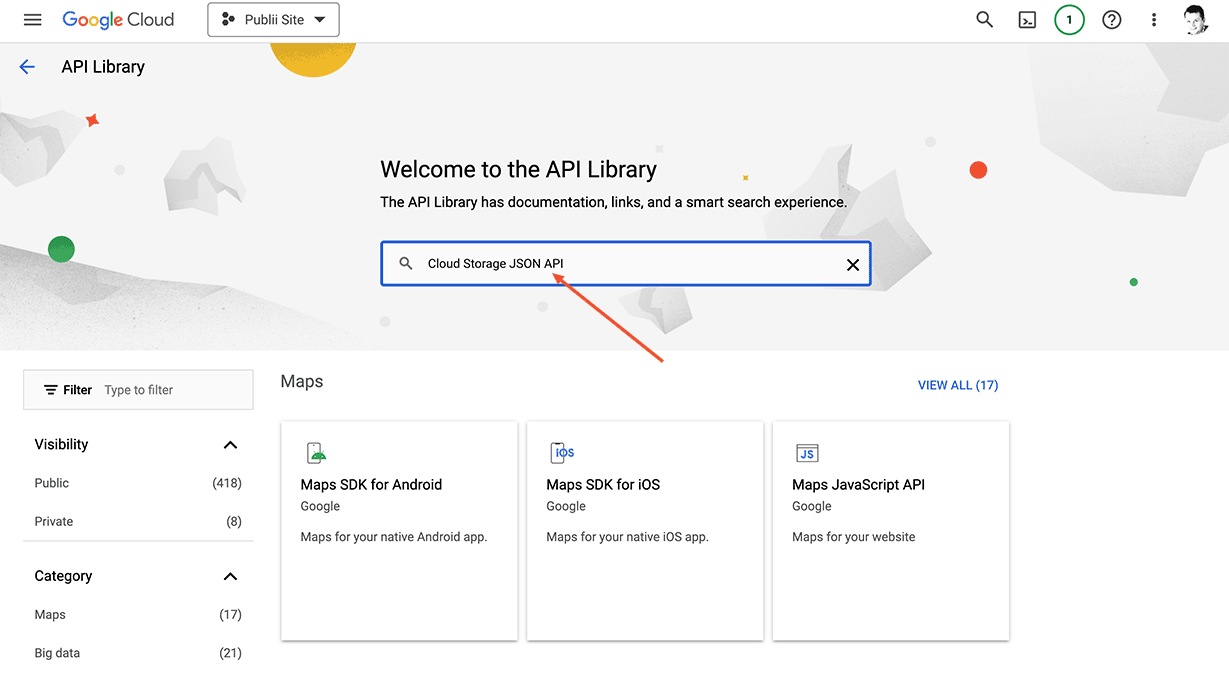
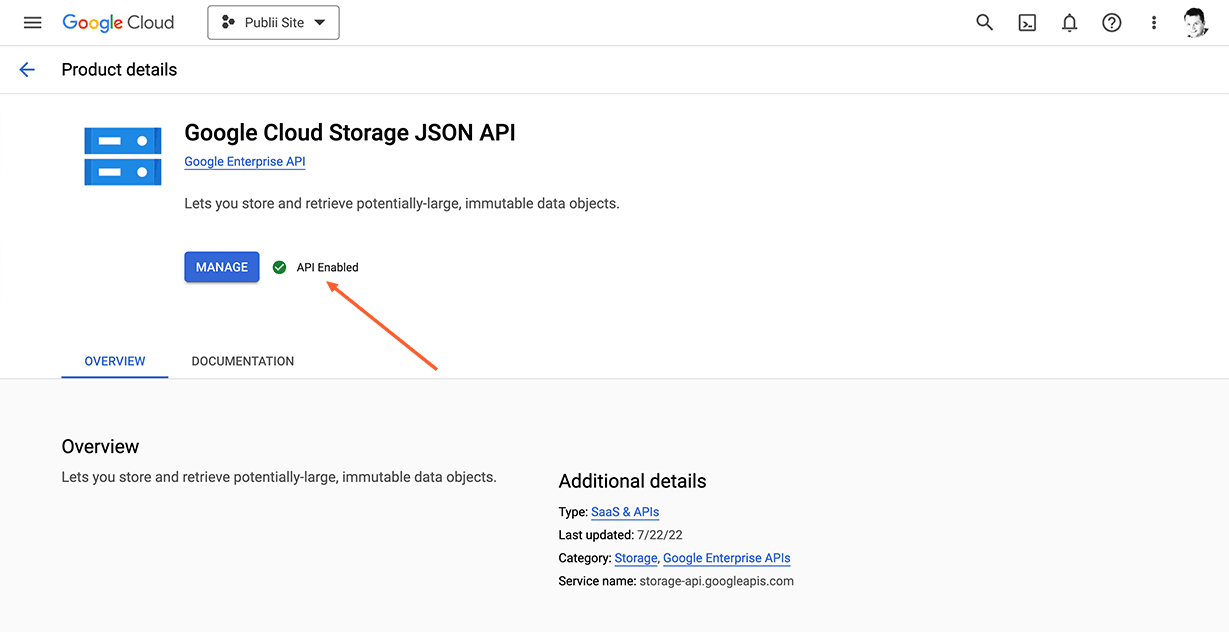
- To locate the required API, use the search feature to search for the Cloud Storage JSON API. Once you locate it, click on it and verify that the API is enabled. If it's not enabled, click on the Enable button.
Google Cloud has now been setup, so we just need to open Publii and configure the server settings to make sure it is able to connect and upload files to the bucket.
Configuring Publii
Google Cloud might be a little fiddly to set up, but rest assured that Publii is not! Open Publii and navigate to the Server Settings screen by clicking on the Server option in the left sidebar menu, then set the options as follows:
- Domain - Enter your verified domain here.
- Protocol - Select Google Cloud from the drop-down list.
- Your JSON key - Browse for your previously-downloaded JSON key for this field.
- Bucket - Enter the bucket name here; this will be your custom domain in most cases.
- Prefix - You can put your website in the subdirectory. Please avoid slash at the beginning (i.e. /blog/) - as it will create additional directory with the empty name. Proper prefix example: blog.

With all fields completed, click on the Save settings button, then click the Test connection button too to make sure that Publii is able to connect to the bucket. With that done, your now ready to start uploading and updating your site!