Creating a GitHub Pages site
Publii includes support for Github Pages, which provide a space for you to build a website that you can use for highlighting your Github projects, or just yourself! Unfortunately, there's little functionality for actually building a website unless you have some know-how and are willing to learn difficult-to-setup tools such as Jekyll, but thanks to Publii you'll be able to create a full-featured, stunning website in just a few minutes that's super-easy to update and maintain.
Creating a Github Page doesn't take long, but there's a few steps we'll need to cover, starting with:
Generating an access token
Before we can start creating a Github Page, we need to generate an access token; this will allow Publii to gain access and make changes to your Github Page so that it can create and edit your website whenever you click the Sync button in the Publii app; think of it as creating a password that Publii can use to get into the Github club!
Generating an access token only takes a few seconds; just follow these steps:
- Start by heading over to the Github frontpage and sign-in to your account; if you don't have an account already just click the Sign up link and complete the registration process.
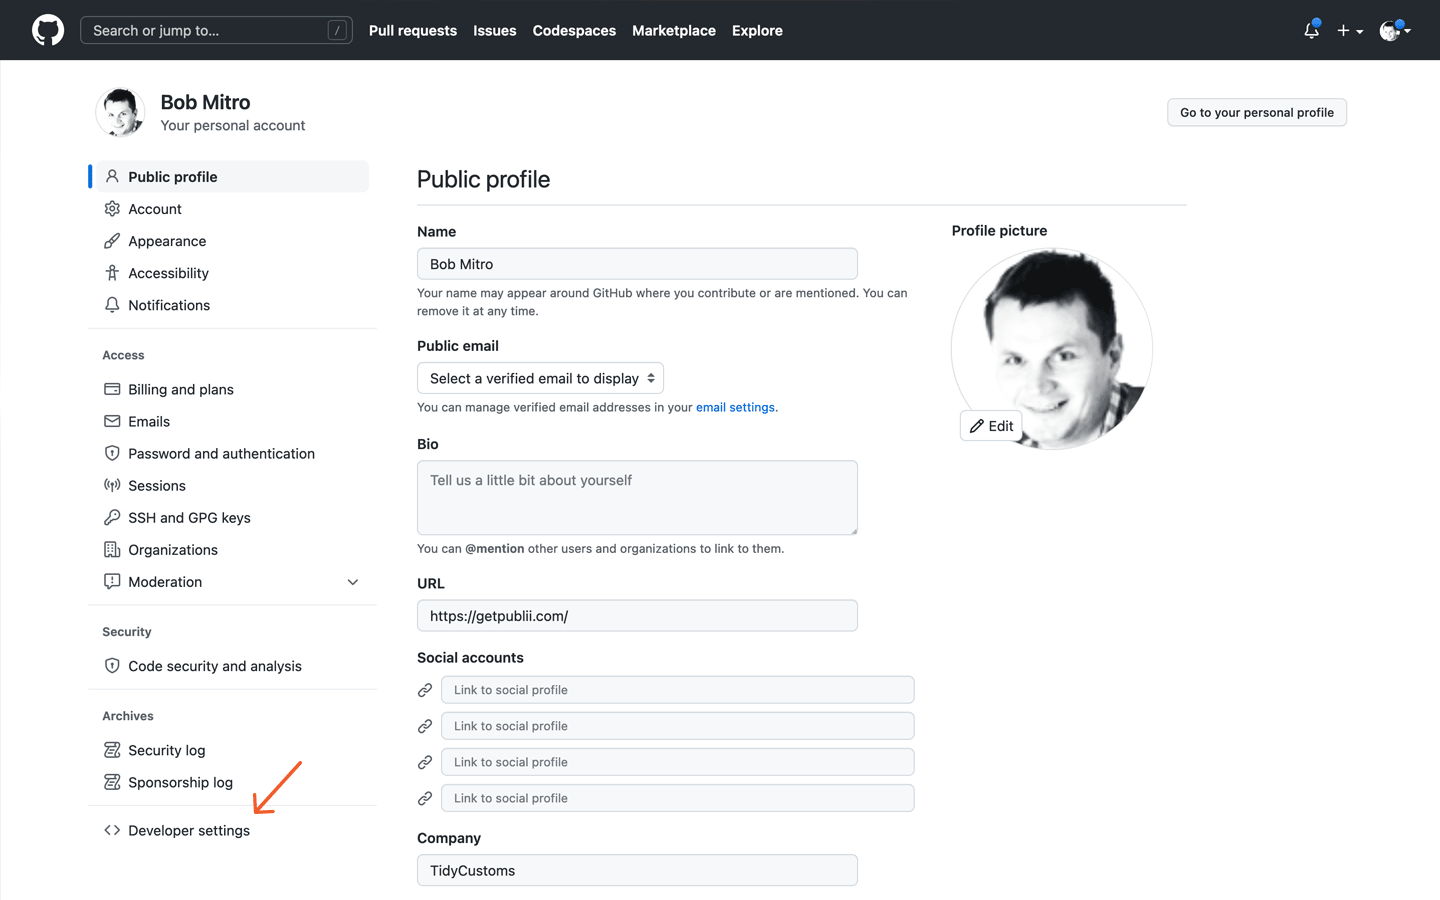
- After logging-in, open your Github profile settings.
- In the left-sidebar of your profile screen, click on the Developer settings.
- On the GitHub Apps page, in the left-sidebar, click on the Personal access tokens option and select the Tokens (classic) option.

- Now we're on the Personal access tokens page; we need to make a new one for our site, so click on the Generate new token button near the top of the screen and select Generate new token (classic) option.

- On the next screen, fill out a name in the Note section e.g. "Publii GitHub Page". Now in the Select scopes section, add a checkmark to the main Repo option, which will give the token access to all aspects of managing your repository. You can also set an Expiration date for your token e.g. "90 days" to help keep your information secure. Finally, click the green Generate token button at the bottom of the screen.

- You'll now be taken back to the Personal access tokens page, but now your new token will be visible at the top of the list. Whatever you do, don't close or refresh this page; the token will only be visible immediately after generation. Click on the Copy icon next to your token (see the image below), and copy it somewhere safe as we'll need it when setting up Publii to work with our Github Page.
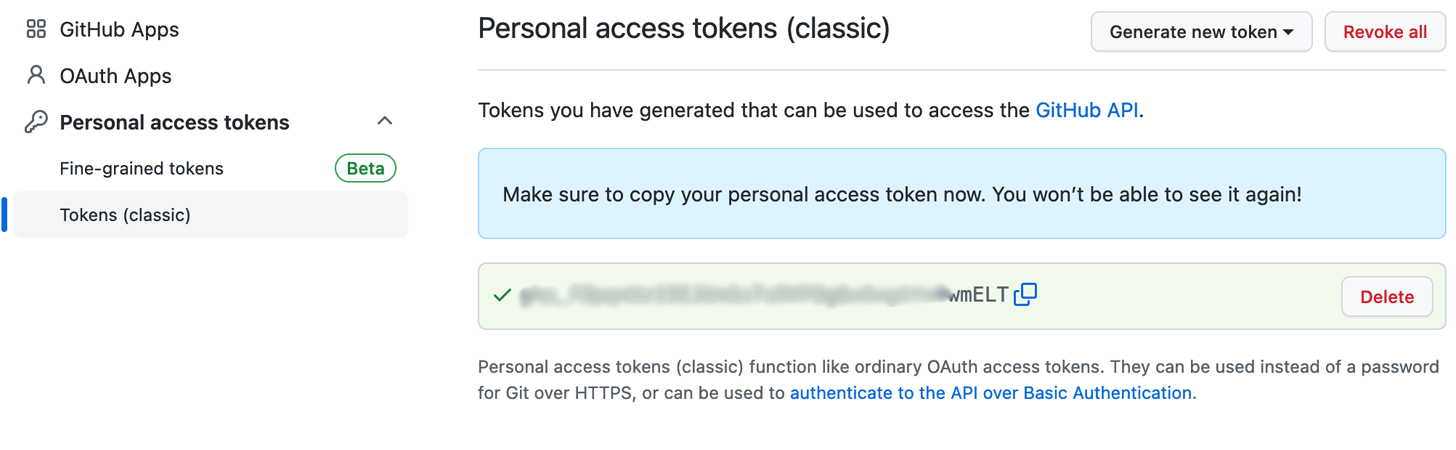
Remember: you won't be able to see the token again so make sure it's saved somewhere.

We now have a token generated, so we can create our website in Publii and give it access to our Github page.
Creating our static website on Github Pages
We already have our access token, so this will allow Publii to access our Github Page to upload the website files, but now we have to actually create the area on Github where our site will go. Let's go back to Github and get started:
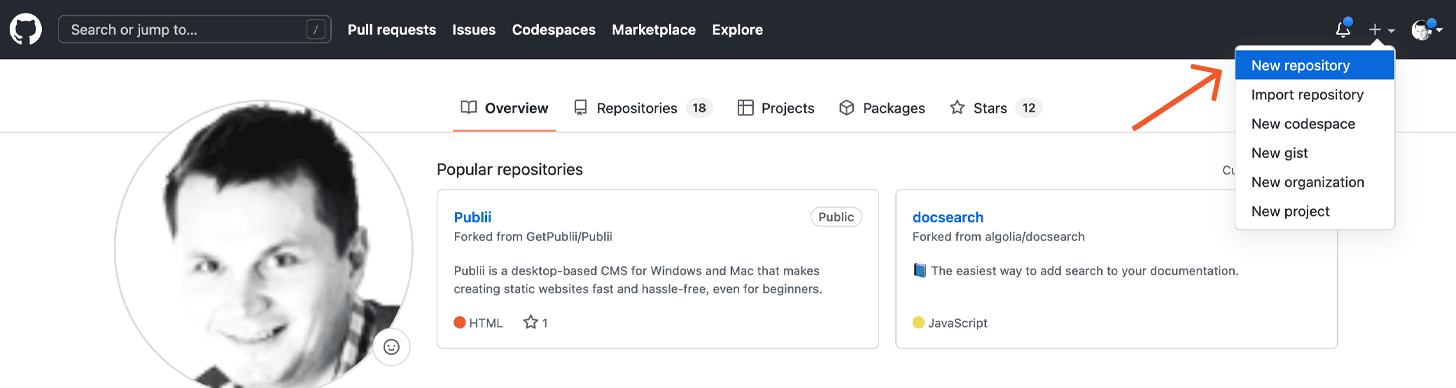
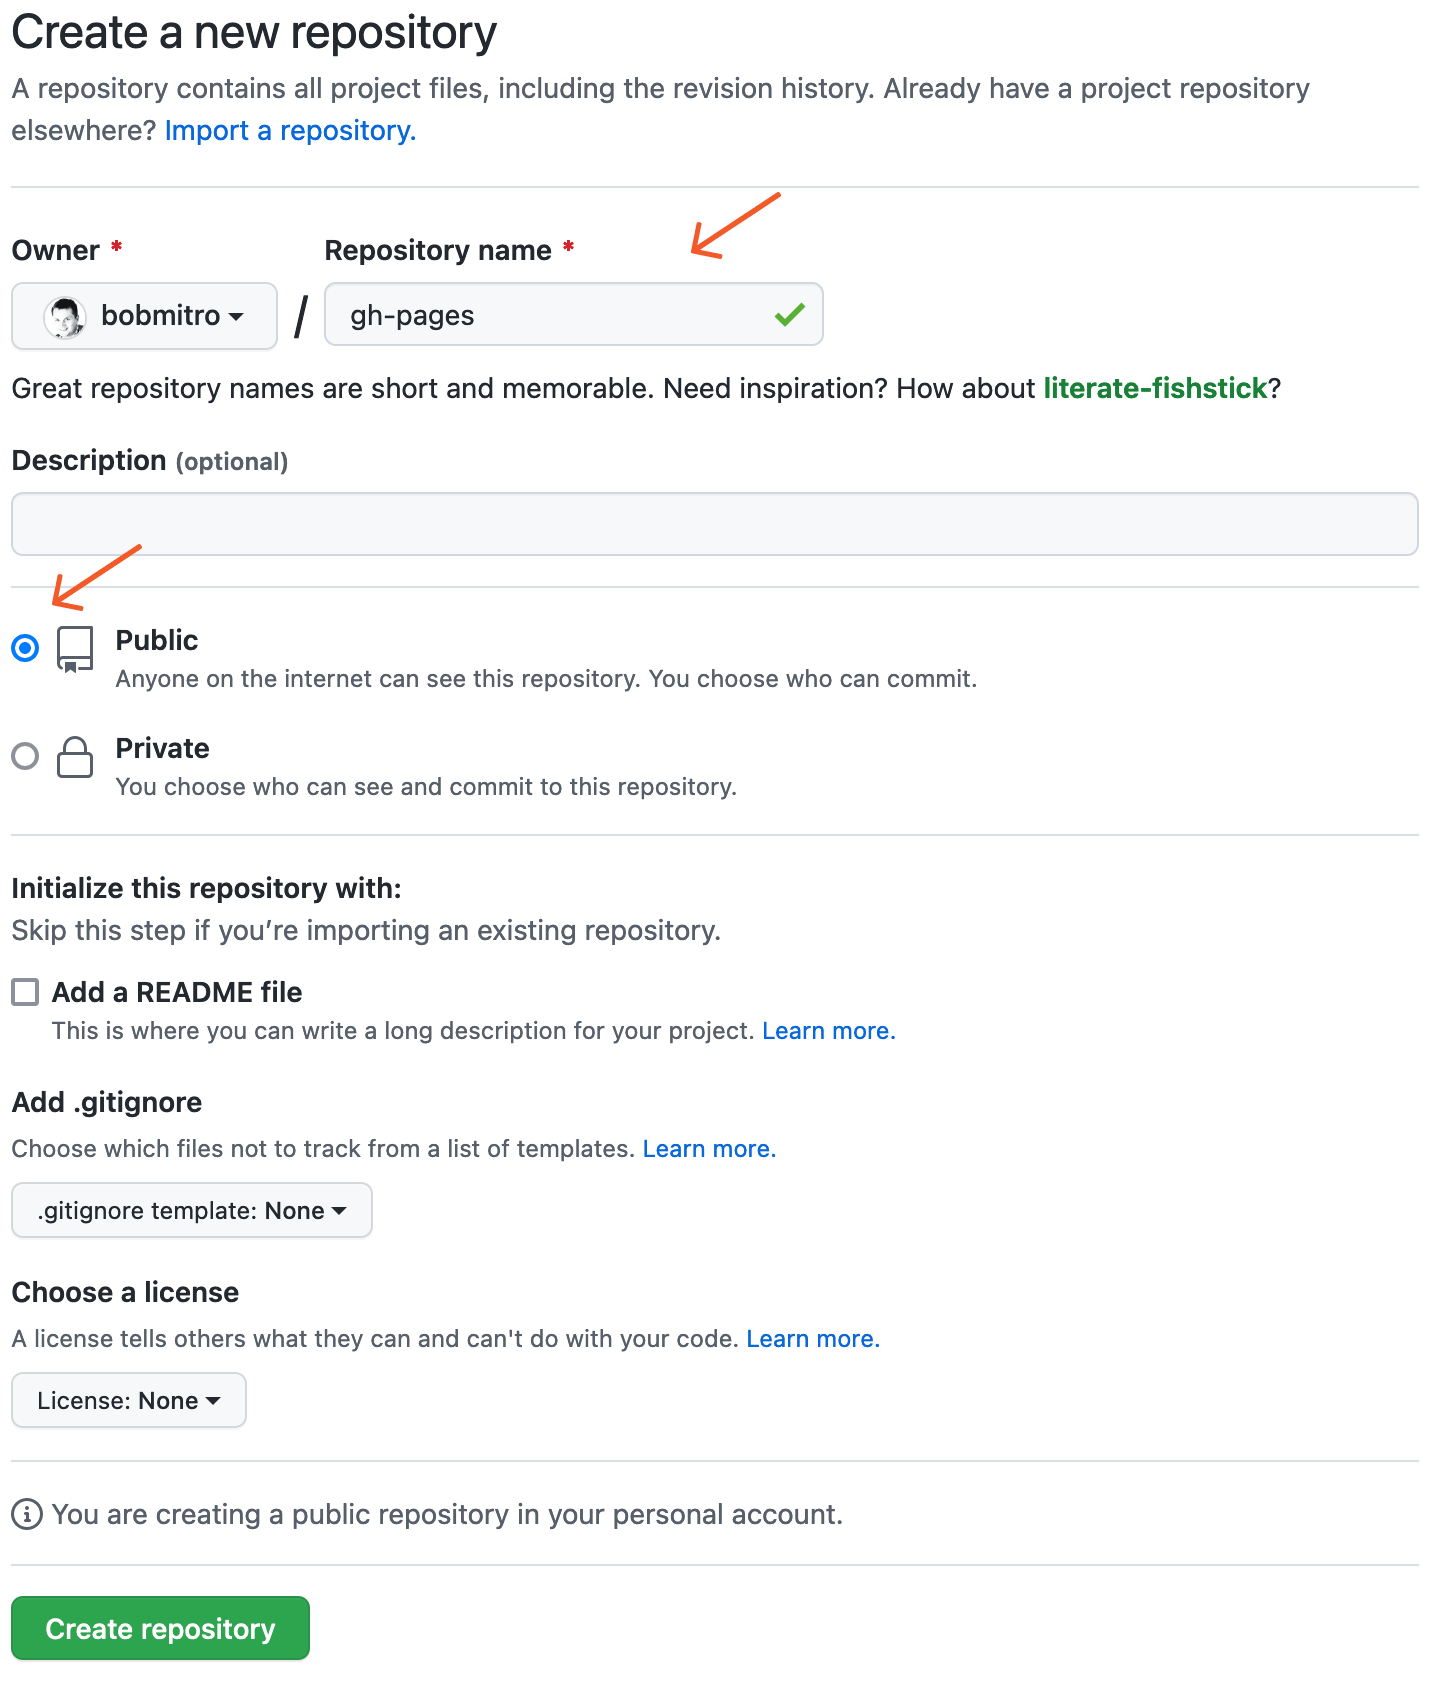
- Log-in to Github as normal, then click the plus icon in the topbar to open a submenu; now click on the New repository option to be taken to the Create a new repository screen.
- On this screen, fill out a Repository name, and leave the repository as Public (Github Pages are always public, even when the repository hosting it is made private). Next, click the green Create repository button at the bottom of the screen.
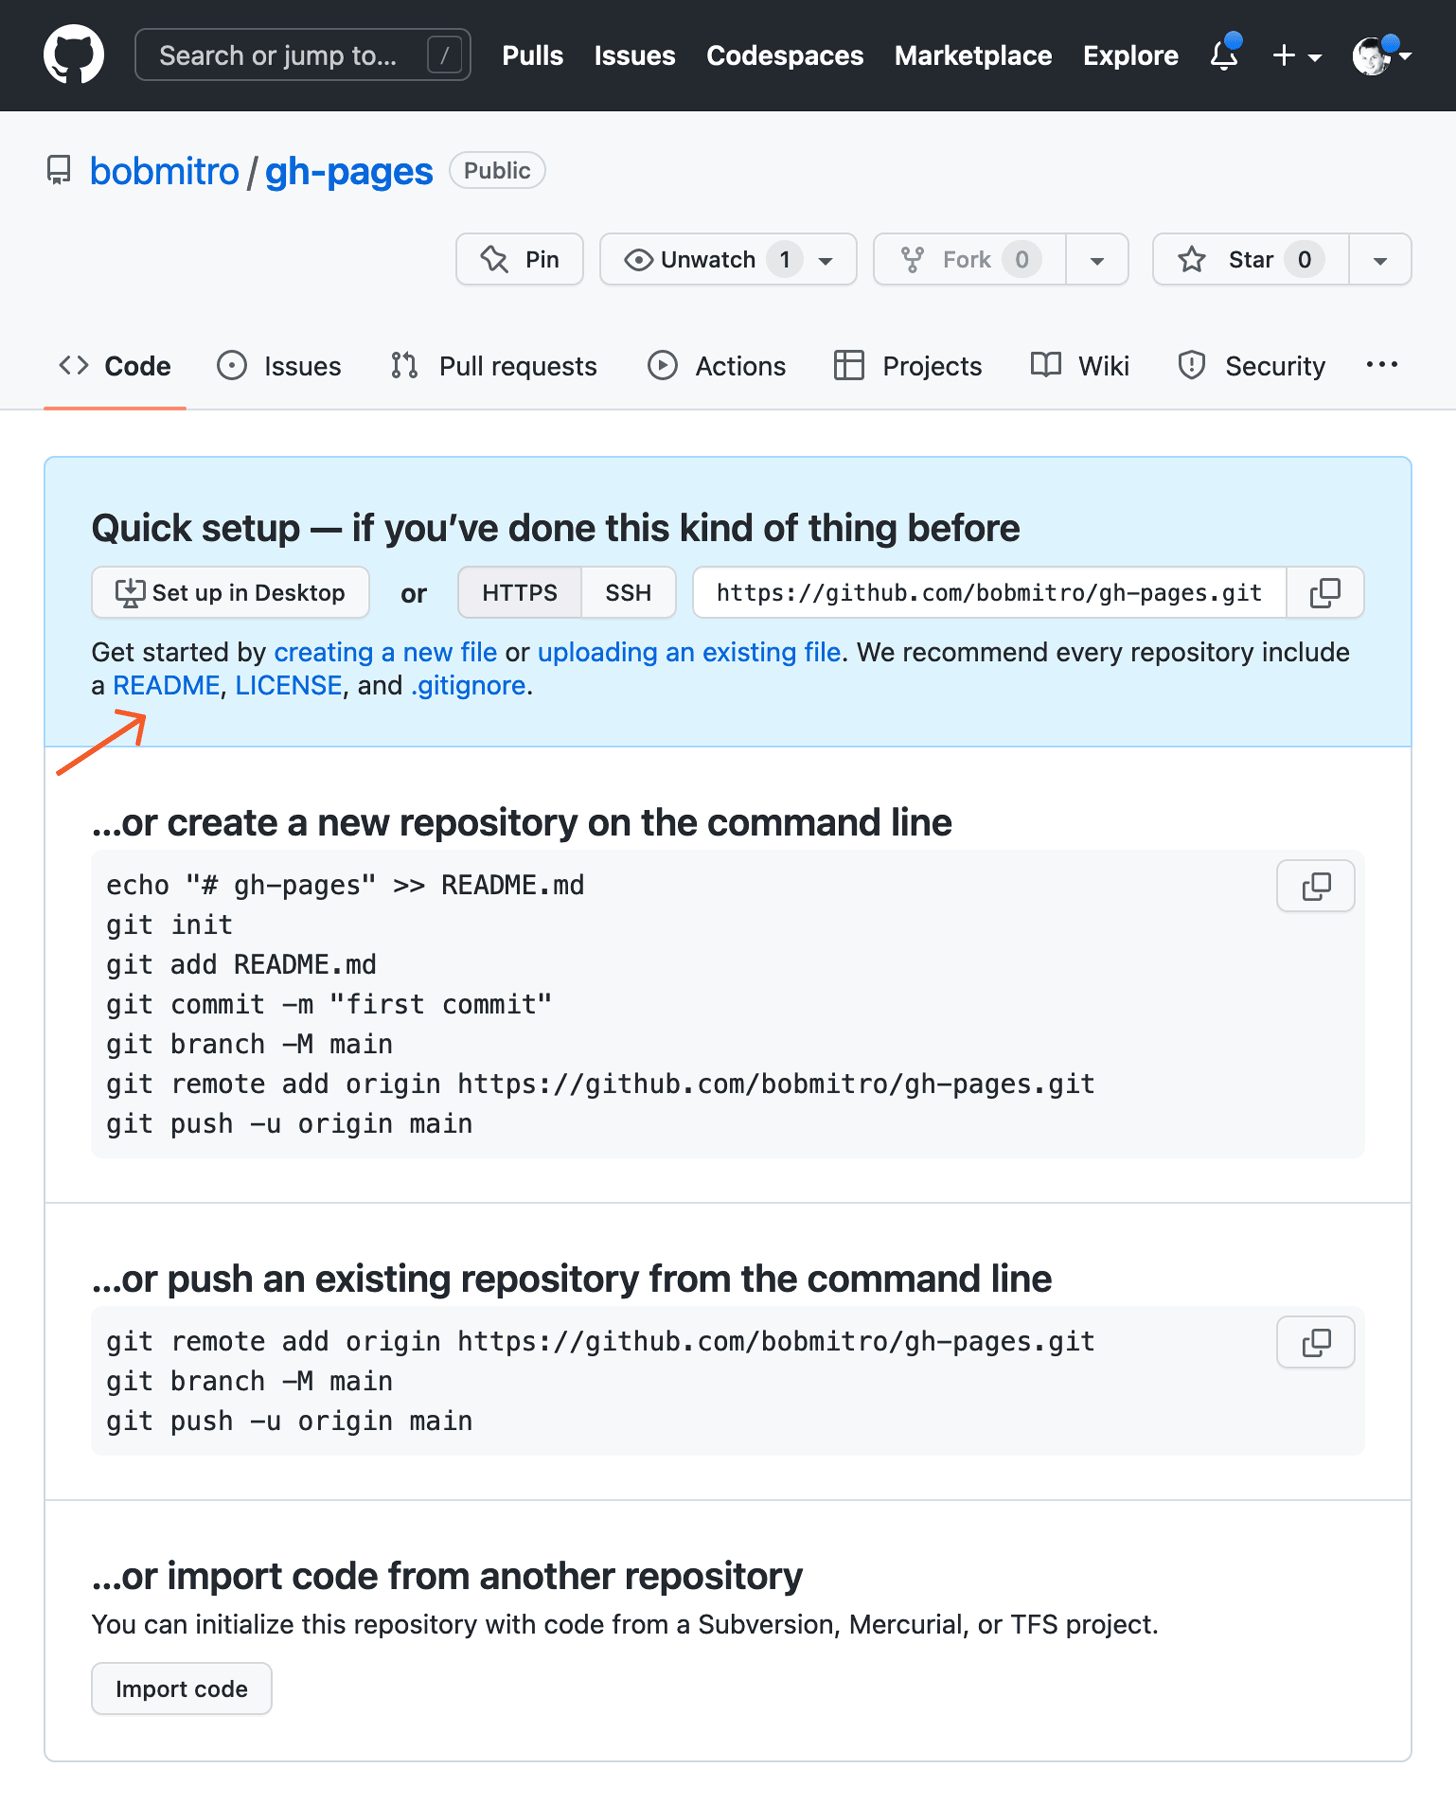
- Now we're on the Quick setup screen; this might seem a little confusing, but we only need to do one simple thing here. Click on the README link as shown in the pic below; this will take us to a screen for creating a readme file.
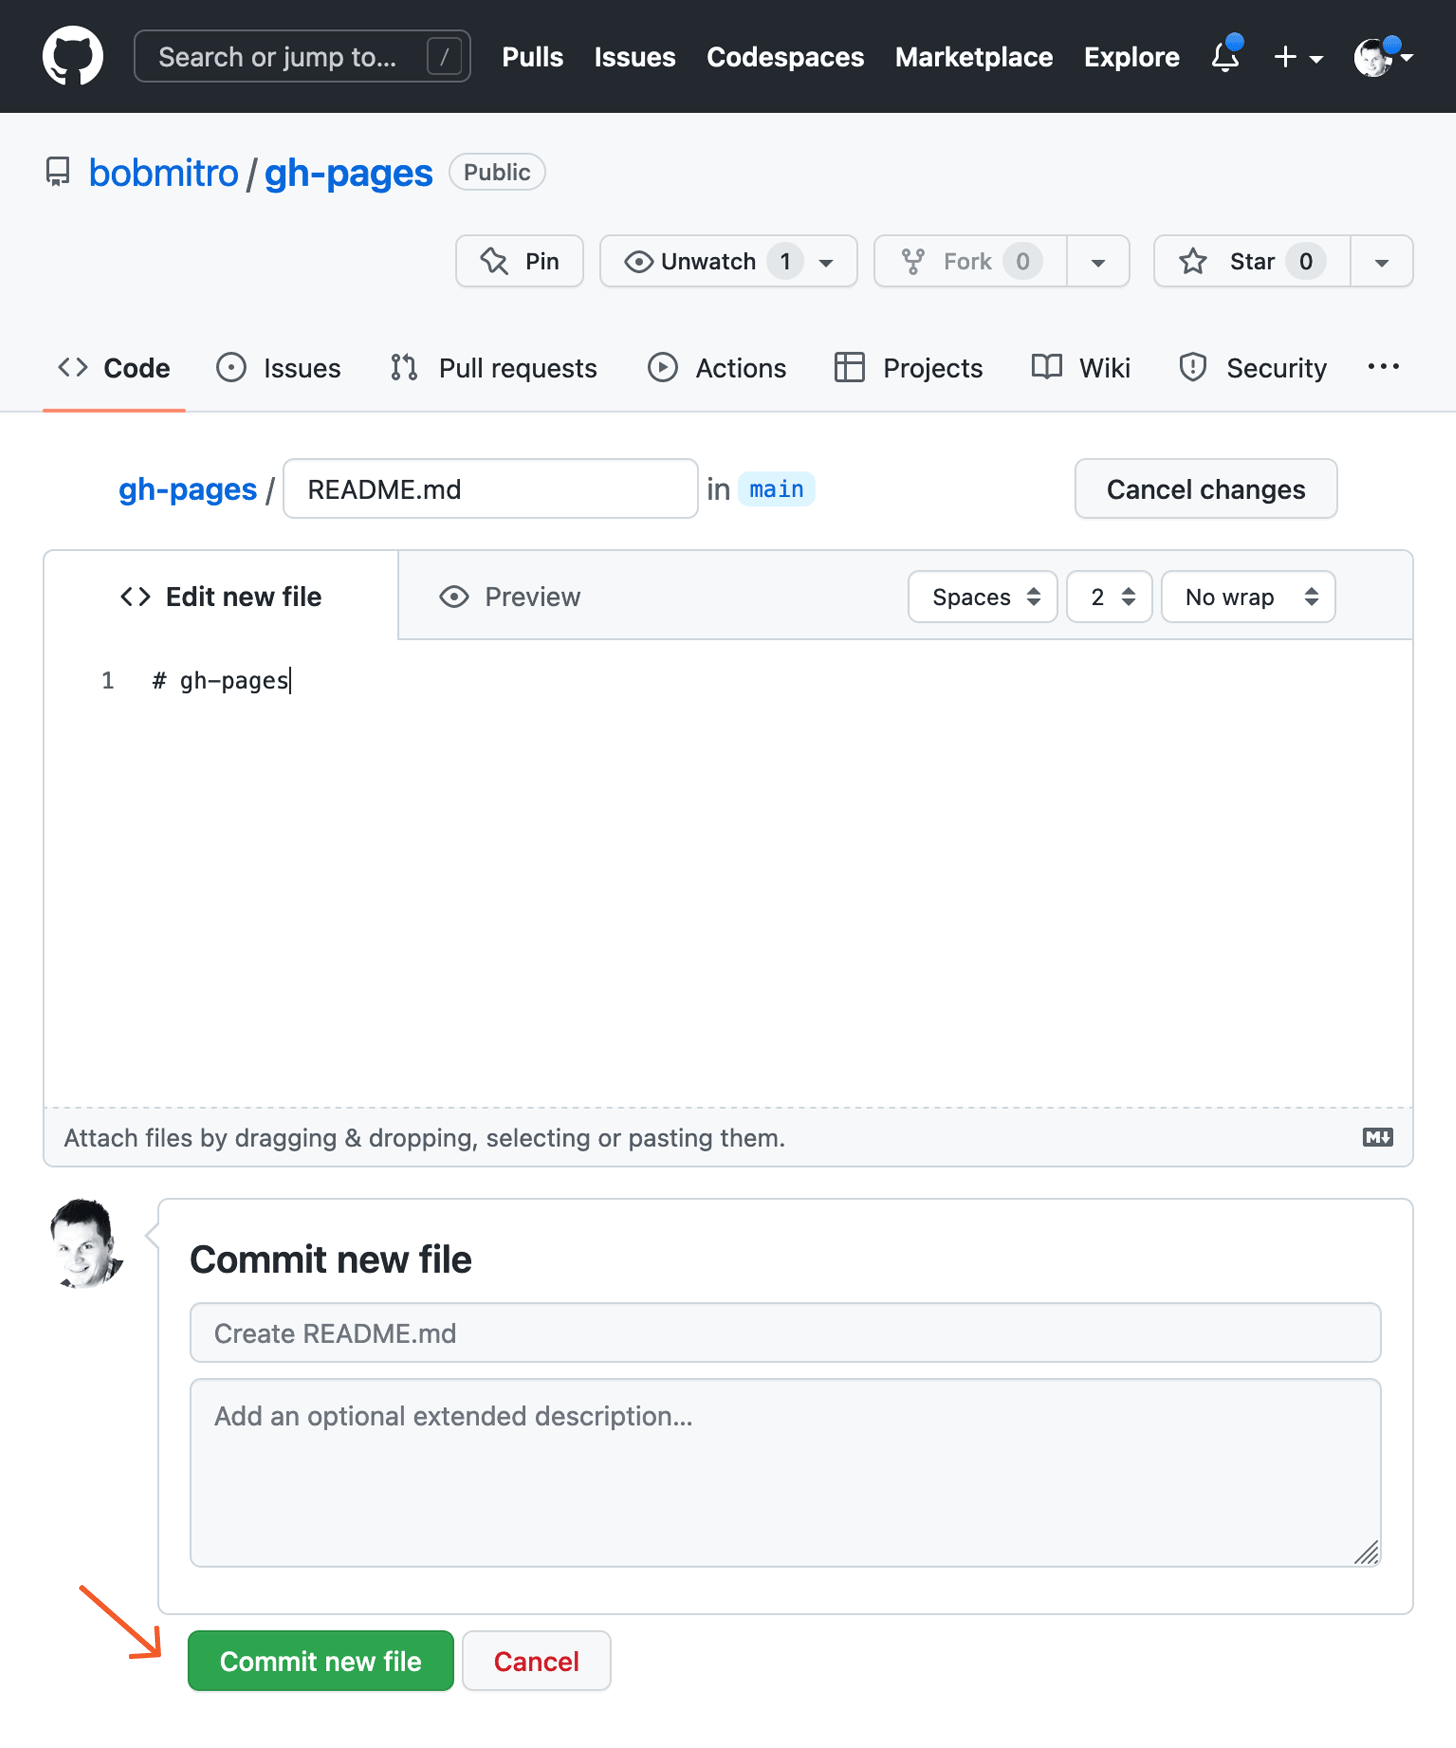
- On the edit screen for the readme, just click the Commit new file button. We're only creating this file because your repository needs at least one item to be added to create your master branch, where all your Publii files will go. This created file will be removed automatically the first time Publii is syned with our Github Page.
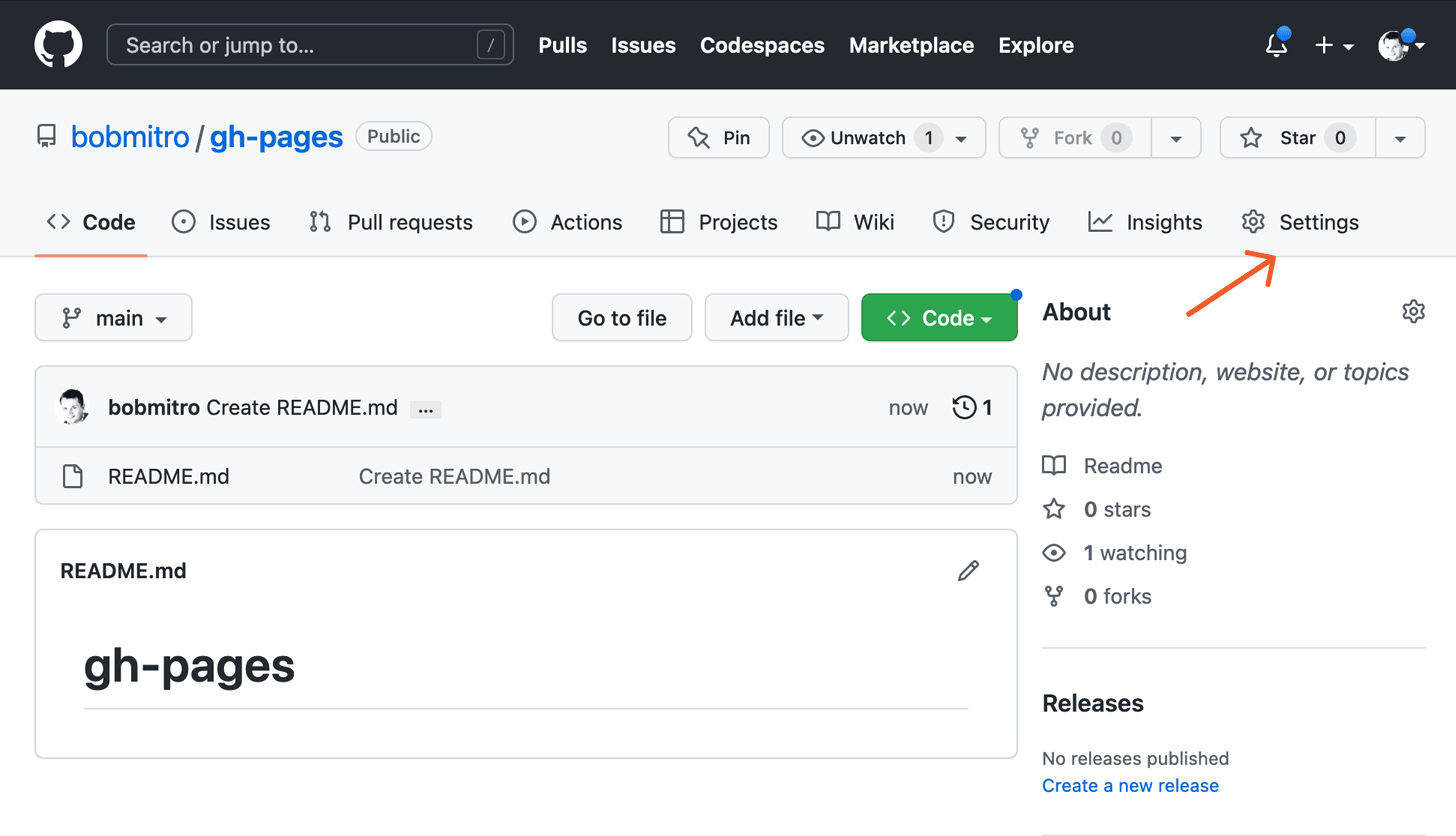
- After committing the file we're taken back to the file listing; click on the Settings tab near the top of the screen.
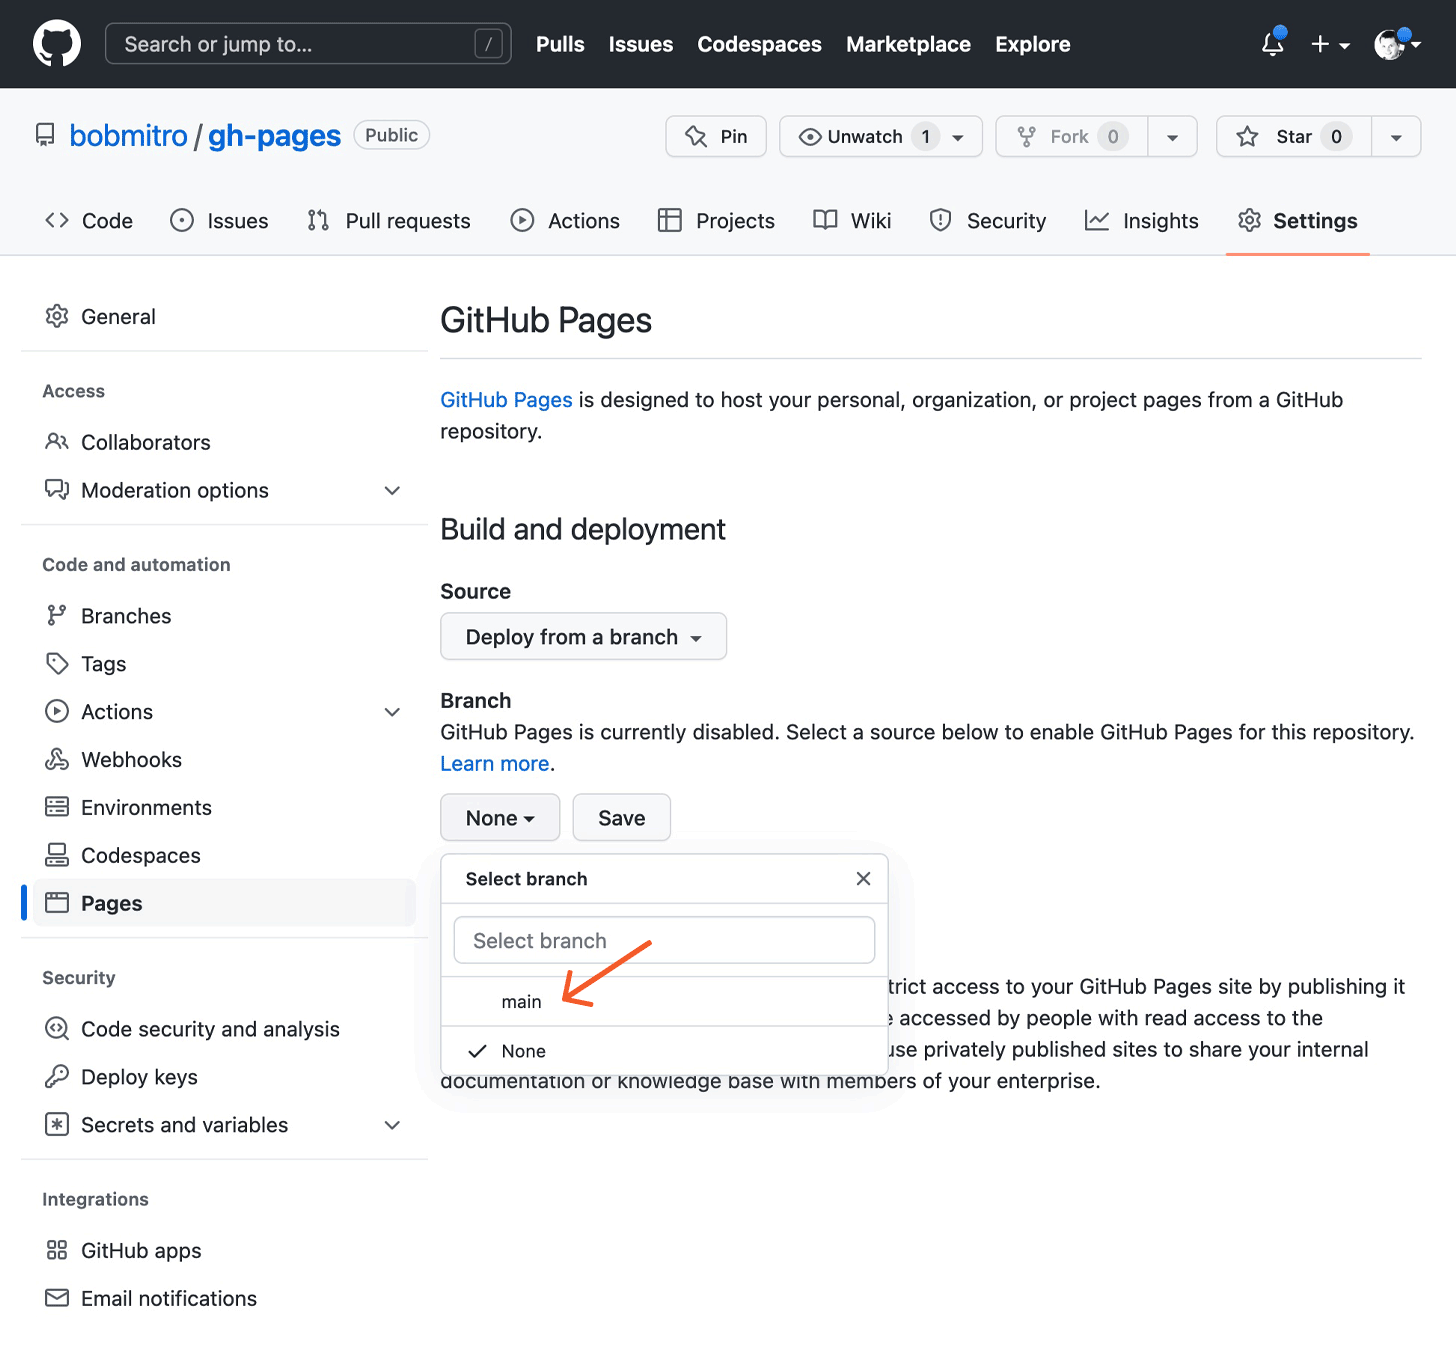
- On the settings screen, in the left-sidebar, click on the Pages; in the Build and deployment section, specifically in the Branch section, click on the drop-down list that by default displays None, and select main branch from the list of options. Now click the Save button to make sure the changes are committed.
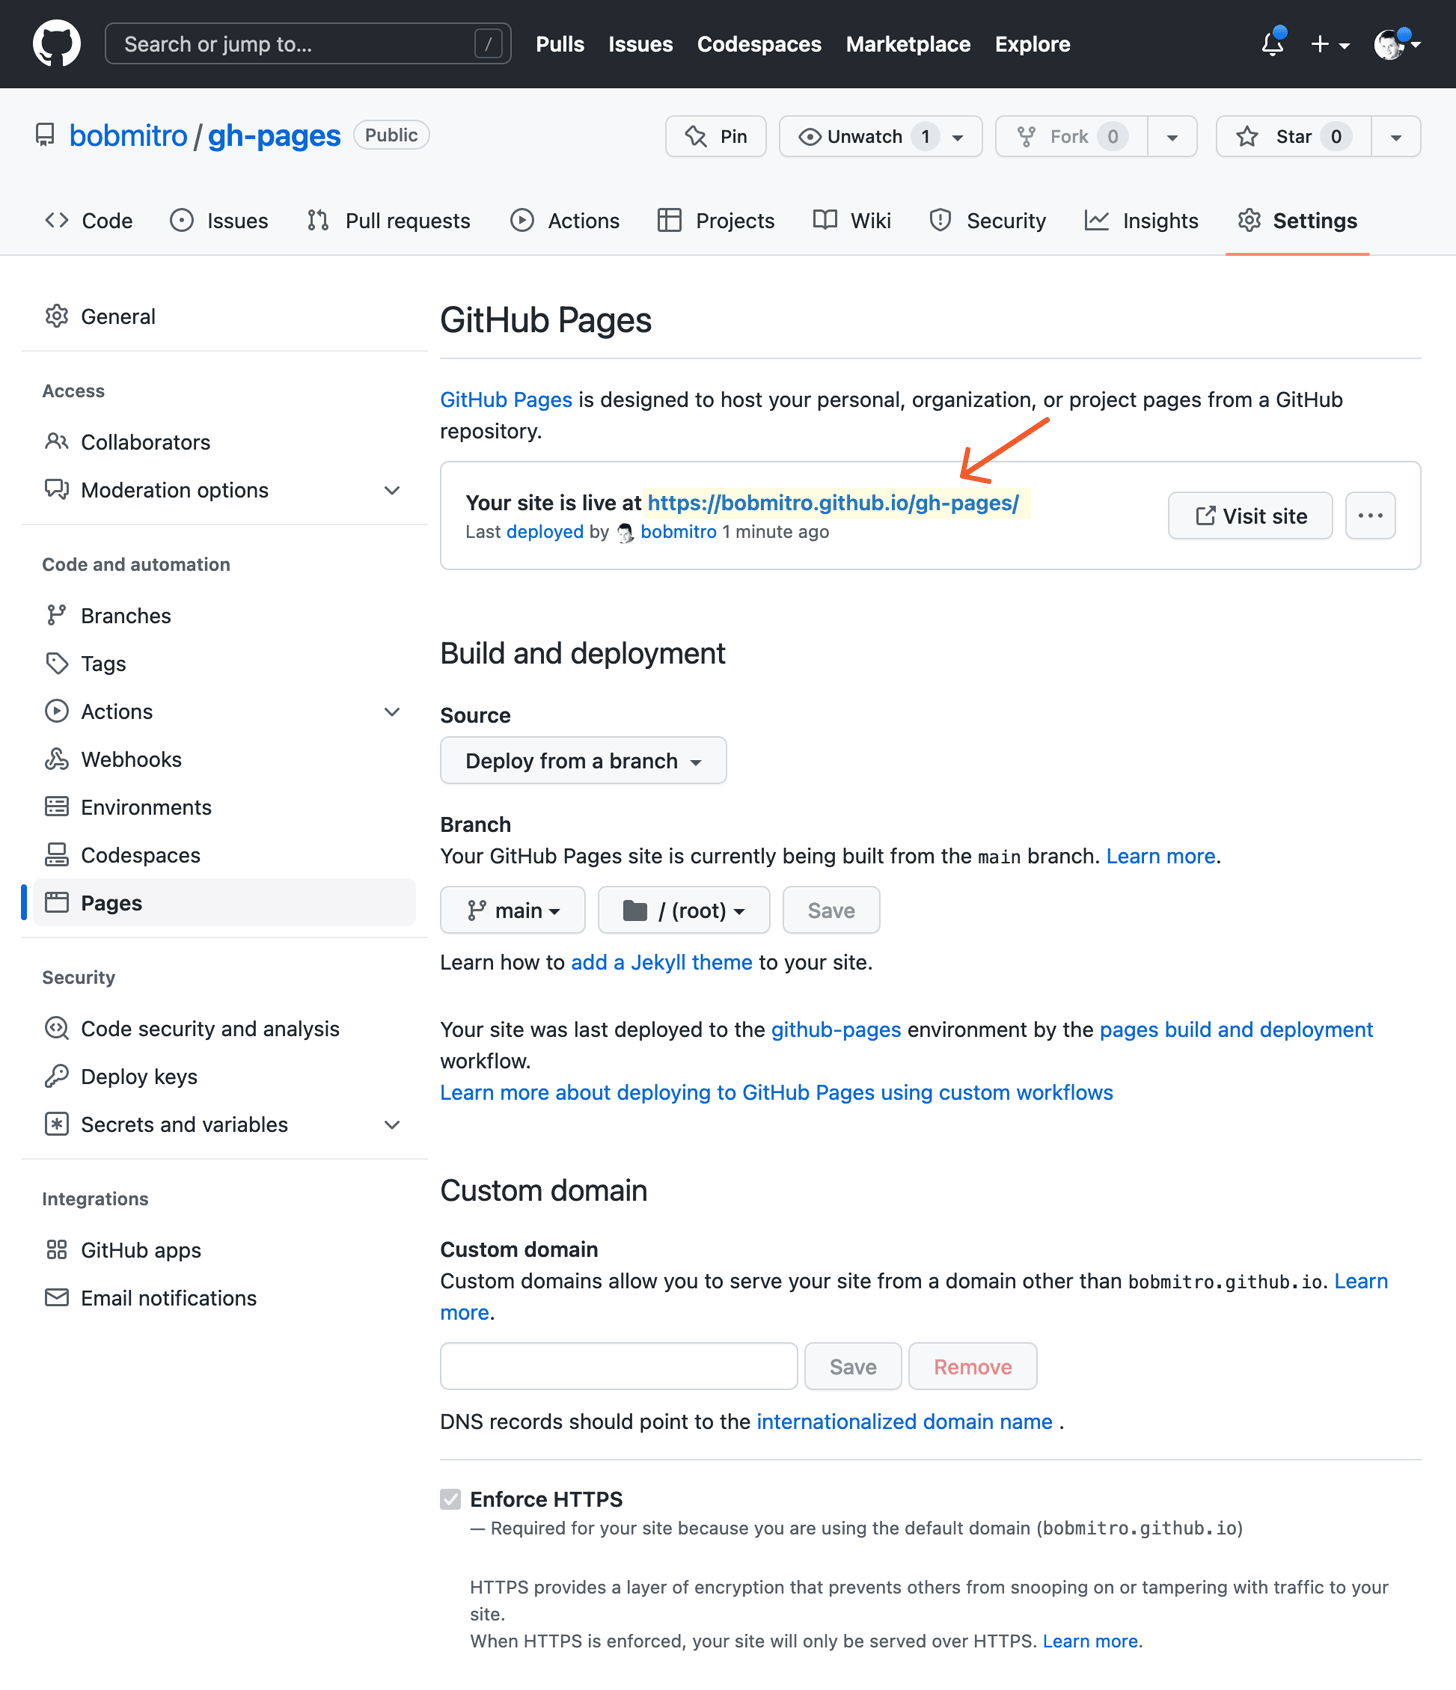
- After saving, your GitHub pages will be ready to be used as a static website host; to view your website you'll need to go to the URL provided in the message box. Sometimes you may need to refresh the page you are currently viewing to see the URL box. Of course, your site doesn't have any files yet, but we're going to change that.
And that's it for the Github side of things; now we can jump over to Publii for the final step.
Syncing your Publii static site with Github
With everything prepared on Github, we can update the connection settings in Publii to sync with the Github Page repository that we just created. First, open up Publii; if you haven't already created your website, create one and add at least one post and ensure that you've selected a theme; without them your site will not be created properly.

Now click on the Server option in the left-sidebar to open the Server Settings screen. Fill out the fields with the following information:
- Website Url - This will be your Github repository path, which uses the format "YOUR_USERNAME.github.io/ YOUR_REPOSITORY_NAME".
- API Server - By default, this field is already completed with the standard API server. However, if you are running your own instance of GitHub, you can change the API server by entering it here.
- Username - Add your Github username here.
- Repository - Enter the name of your Github repository here (we set this in step 2 of the Github Page section above).
- Branch - If you've been following our guide, then write main (case-sensitive) in the text field; experienced users may want to specify other settings such as gh-pages, docs etc...
- Token - Remember the access token we saved in the first part of this guide? Enter that here so that Publii can access the repository.
- Parallel Uploads - Defaults to '1'. Sets the number of upload streams that Publii can use when uploading your site content to GitHub Pages. Higher numbers allows for faster uploads, but can cause errors on slow connections, or an error 403 due to API upload rate limits.
- API rate limiting - Disable this option only if you are using Github Enterprise with disabled API rate limiting. Otherwhise disabling this option can cause deployment errors.
Once all the options are set, click on the Save Settings button to store your changes. Now may be a good time to click the Test Connection button, which will check to see if Publii is able to connect to your Github Page; if not, then some of the fields may have been entered incorrectly.
Everything is now ready, so we can click the Sync your website button in the Publii sidebar to start deployment.
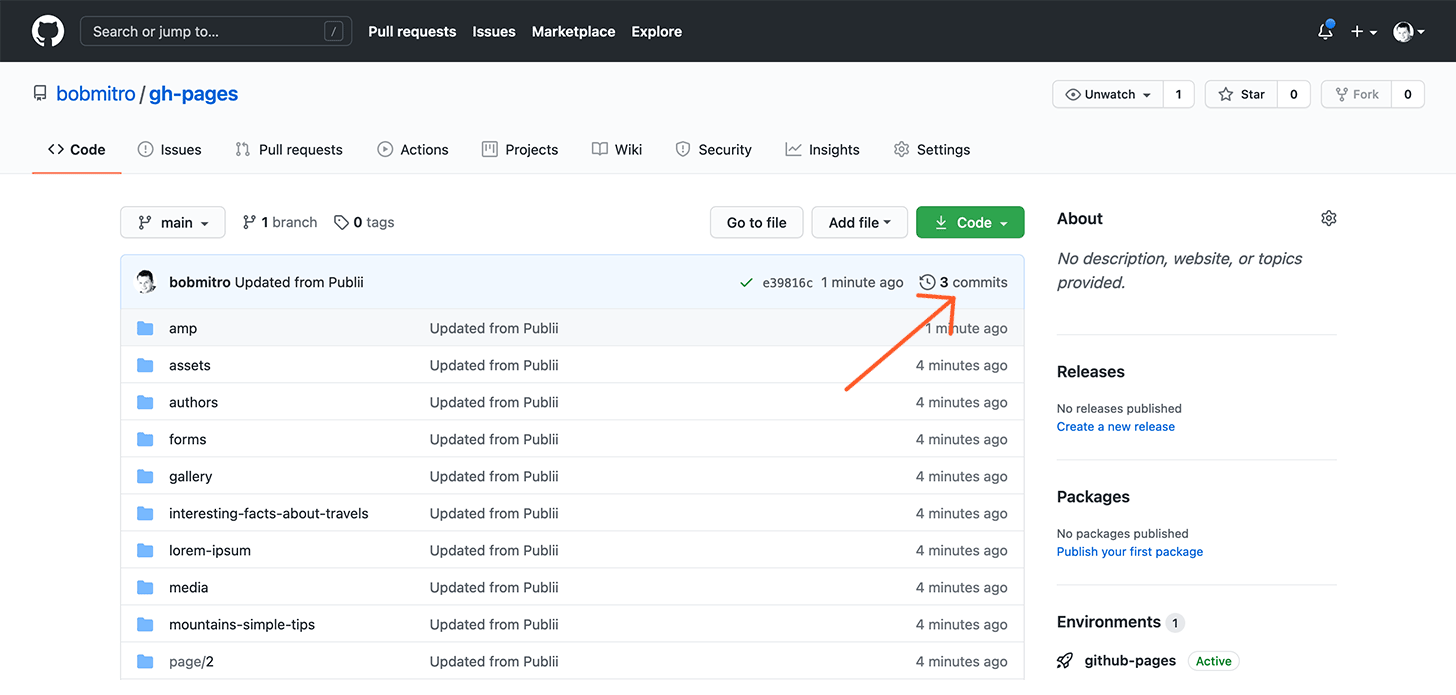
IMPORTANT! Your uploaded Publii site may not be immediately visible once the sync process has completed; it may take approx. 1 minute before you'll see the changes on your website. If you want to double-check that your changes have been applied, you can check the Commits section of your repository and check the icon next to your latest commit in the commit area:
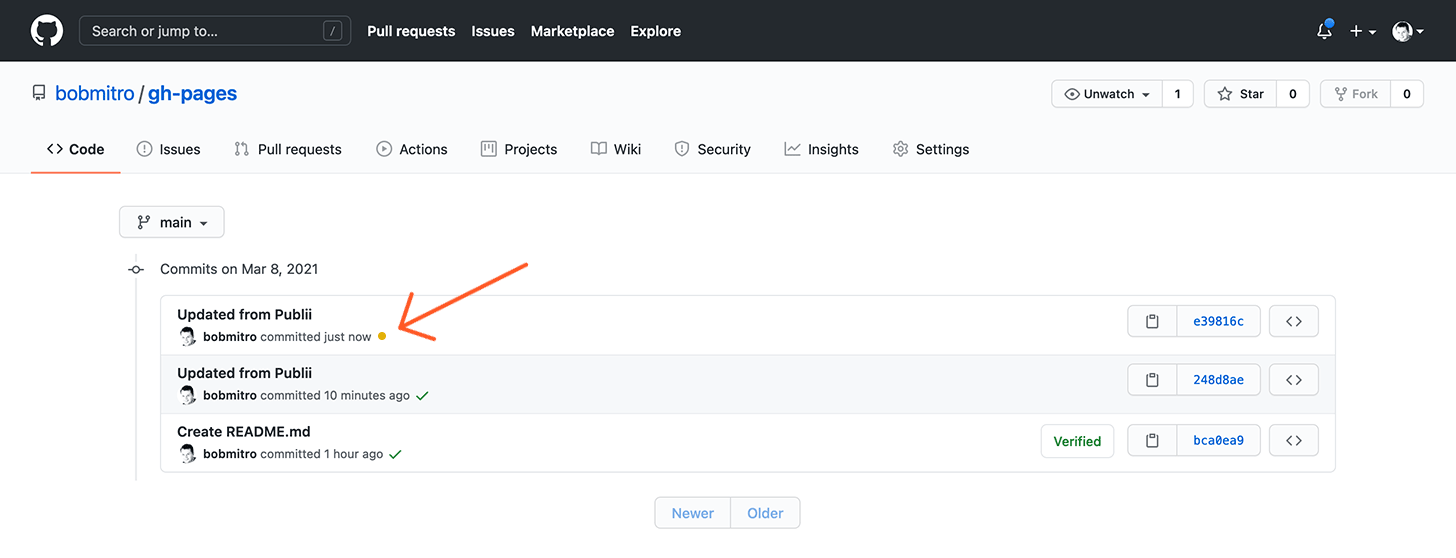
If the icon is an orange dot, this means that the changes have been received, but have not yet been deployed. After a short wait, your changes will be added.
Limitations
The implementation of Github Pages support in Publii does have two limitations in the current iteration:
- It is not possible to upload a website with more than 1000 files, though this will be increased to approx. 5000 files in later releases. This limit is high enough for the vast majority of websites, but it's good to be aware just in case you are running a very large website project through Publii.
- The Github API is limited to 5000 requests per hour; Publii will inform you if your request limit is too low to complete deployment or syncing of your website. This limit also applies if a sync has more than 5000 changes at once; in this case, you should sync your website regularly to avoid amassing too many changes.
Some Useful Tips and Tricks
Looking to get a bit more control over your site? Here's some useful tricks that will help your site get exactly how you want it:
Simplify your website URL to yourusername.github.io
By default your Github page URL will be username.github.io/repository-name, but we can simplify this by creating a repository for our website called yourusername.github.io e.g. if my username is TestName, I would create a repository called TestName.github.io.
Then, instead of duplicating the URL as TestName.github.io/TestName, Github will simplify the URL to TestName.github.io only.
Use a custom domain
If you'd prefer to use your own domain name rather than the default github.io subdomain then Publii will automatically create the CNAME file with your custom domain name that Github Pages look for.
Before doing this you'll need to configure your domain using the third-step from this custom domain tutorial from Github ; if you need further assistance, the tips included in this domain setup article will help.
Is SSL available for your custom domain?
All github.io subdomains have SSL enabled by default, also the HTTPS is supported for Github Pages that have custom domains.
Use different branches in your repo
In our tutorial we specifically use the master branch of our repo, but you are free to use other branches; you could create a documentation website for your existing repository by using a docs branch, for example. Simply create an additional branch and set this new branch as your Github Pages source in your Github settings.
IMPORTANT! If you do use a different branch from master for your Github Page website, make sure that you change the branch name in the Publii settings; if you leave this as "master" and then sync your website Publii remove all the existing files from your master branch!