How to build a static website with Netlify
Netlify is part of a new generation of site and app hosts that are designed to give developers a place for storing files, deploying and developing apps or running a website all in one, similar to other well-known solutions such as Amazon S3 and GitHub. Though these services might seem complex to use at first, once you're set-up you can let Publii take care of everything.
So how do you set it up? By following this simple step-by-step guide! We'll take you through everything needed to create a space and link Publii to it.
Creating a website on Netlify
Follow these steps to create an area for your website.
- Go to the main Netlify page and log-in to your account, or click the Sign-Up button to register if you haven't already. To get started you'll only need to provide a username, password and email address; no payment information will be required.
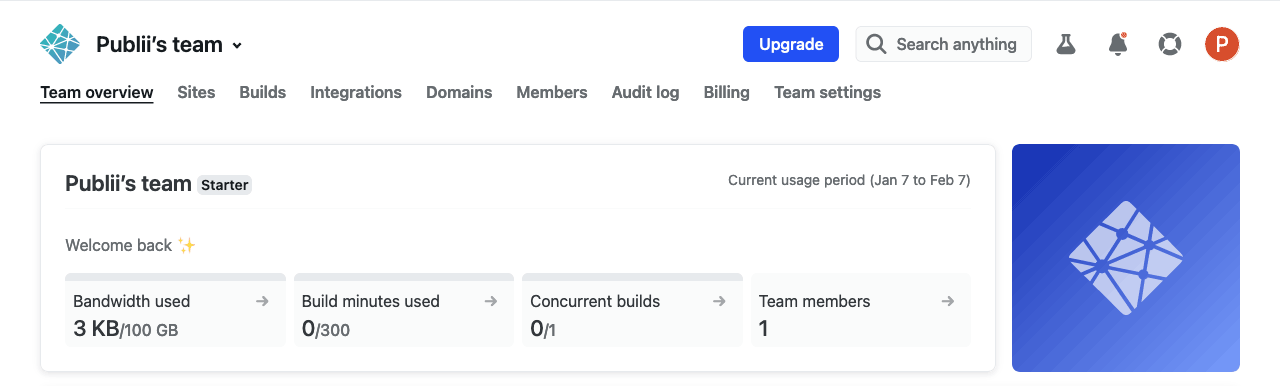
- After logging-in you'll see the Your Sites screen, which should be empty since we haven't created a site yet!
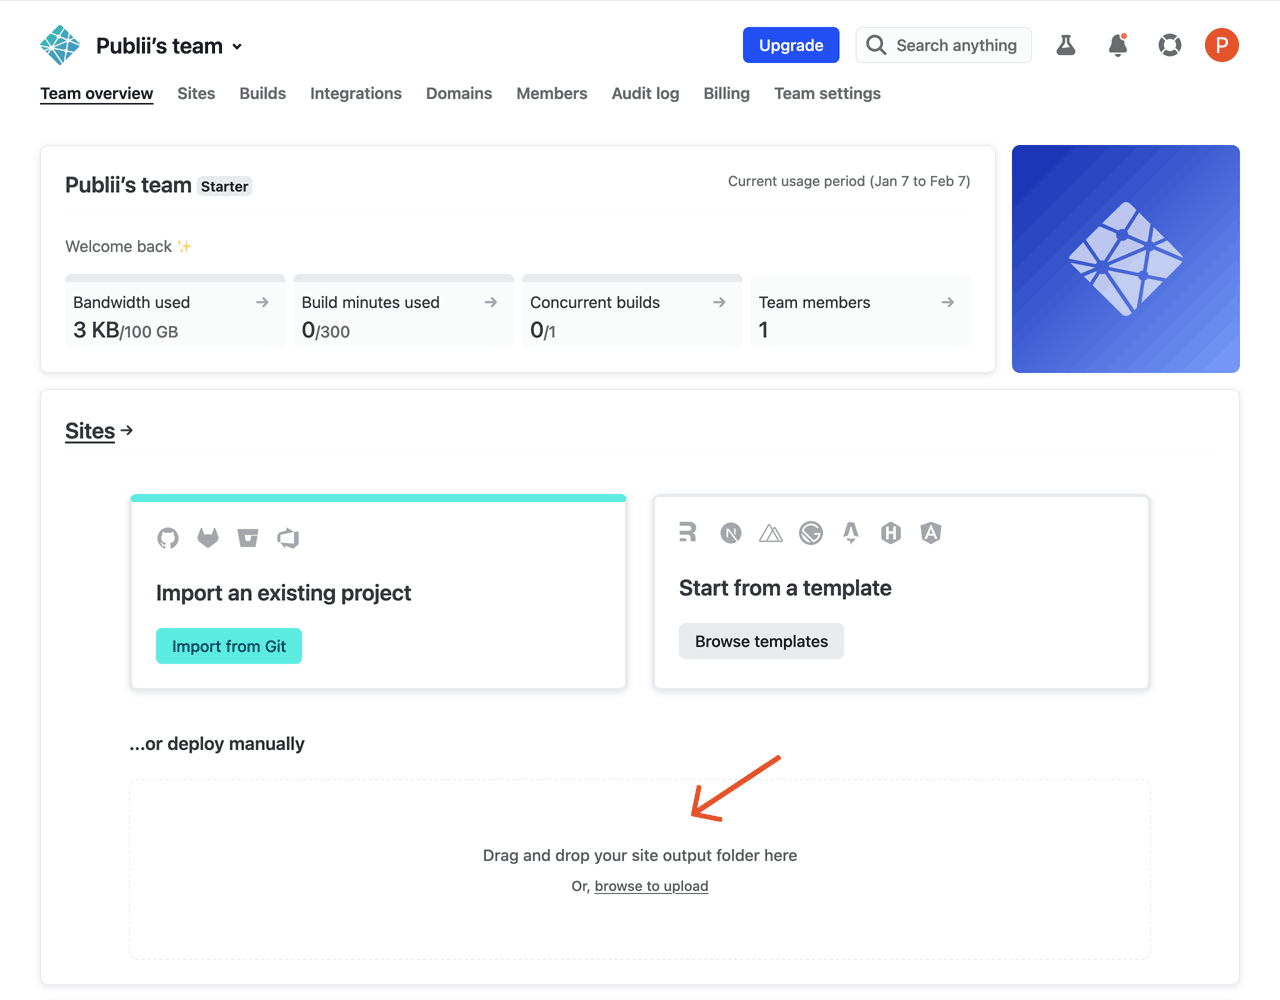
- To create a new site, we need to drag and drop a zipped folder containing an empty index.html file onto the box in the Your Sites section, and Netlify will set it up for us. You can get a ready-prepared file from our CDN; just download and drag the zipped folder to the box (don't unzip it!).
- Once the file has been uploaded, you'll see the Deploys screen; Netlify automatically creates a site name for you, which you can see at the top.
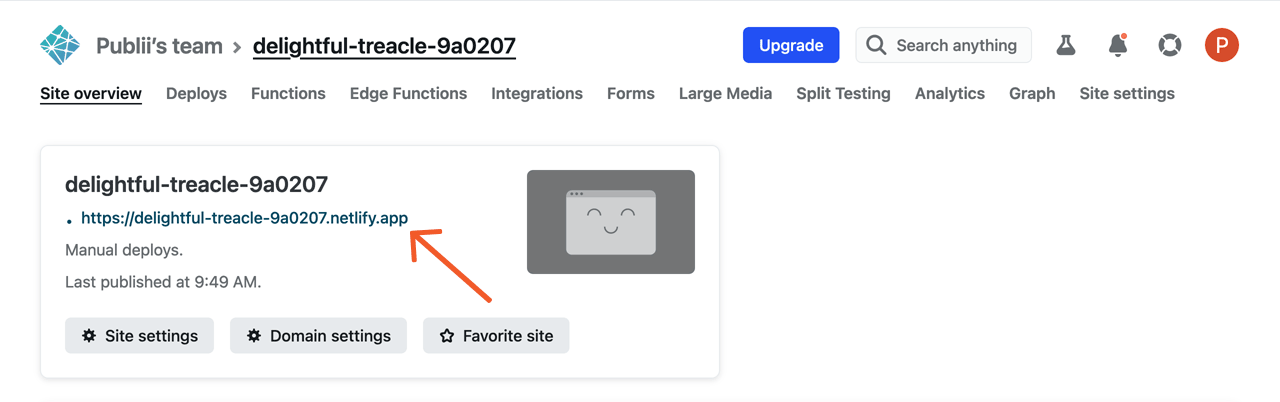
- Click the Site configuration. Please note the Netlify URL for your site, which you can see in the boxout on the next page with the format https://siteName.netlify.com; we'll need this for the Publii settings.
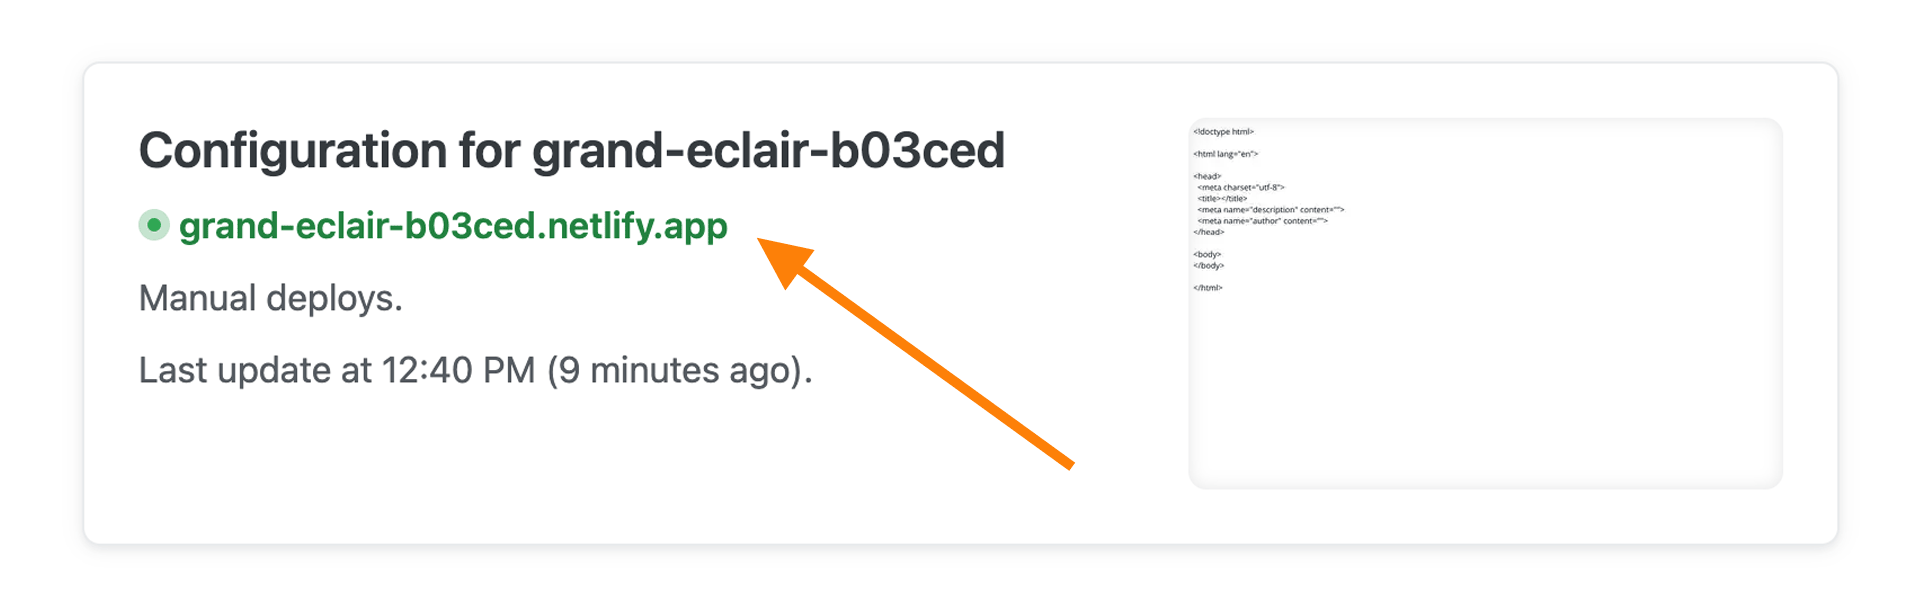
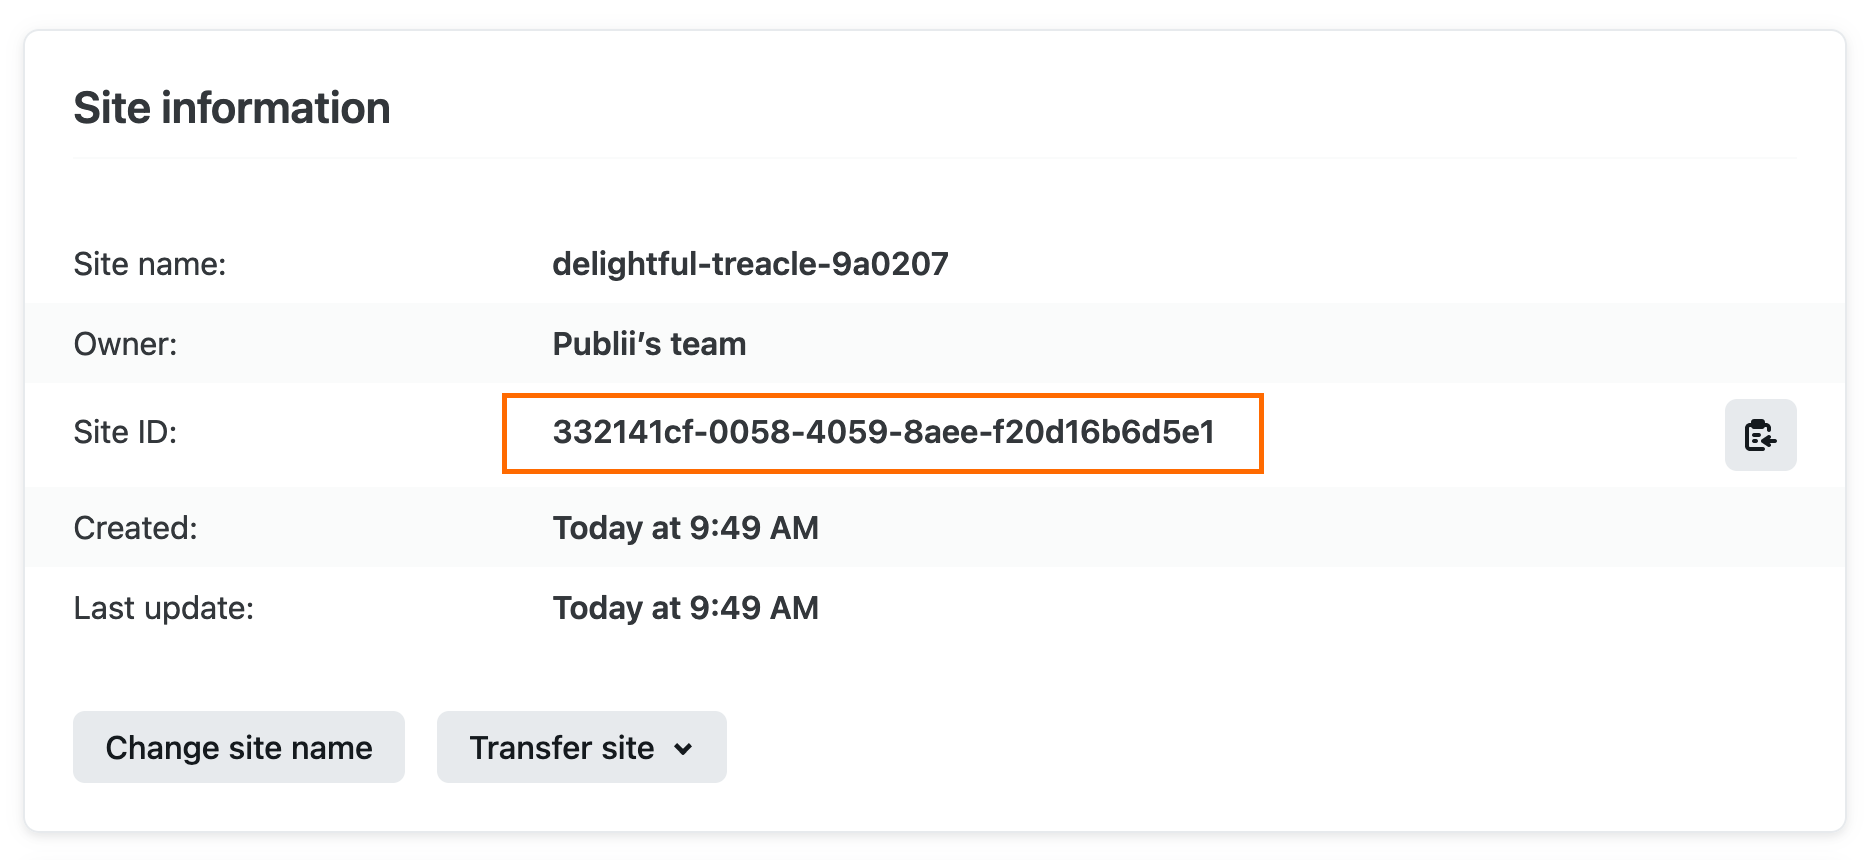
- Now scroll further down the page to the Site details section; note the Site ID, which will be a string of characters and numbers as in the below example, as we'll also need it when configuring Publii (Site ID option).
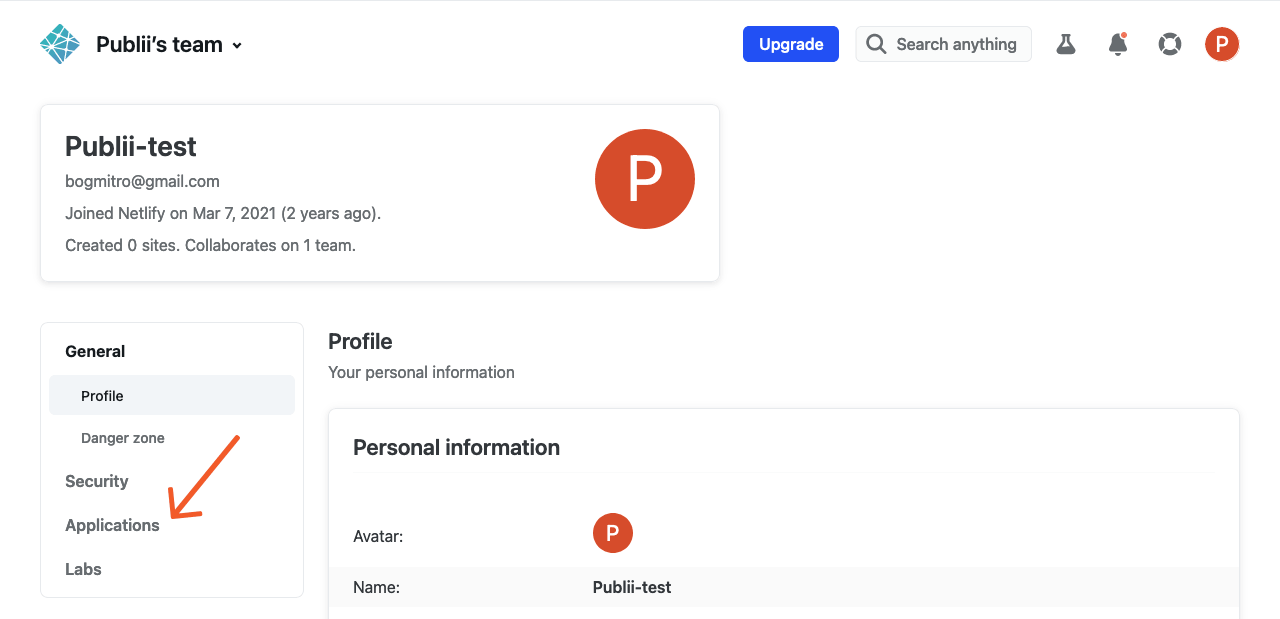
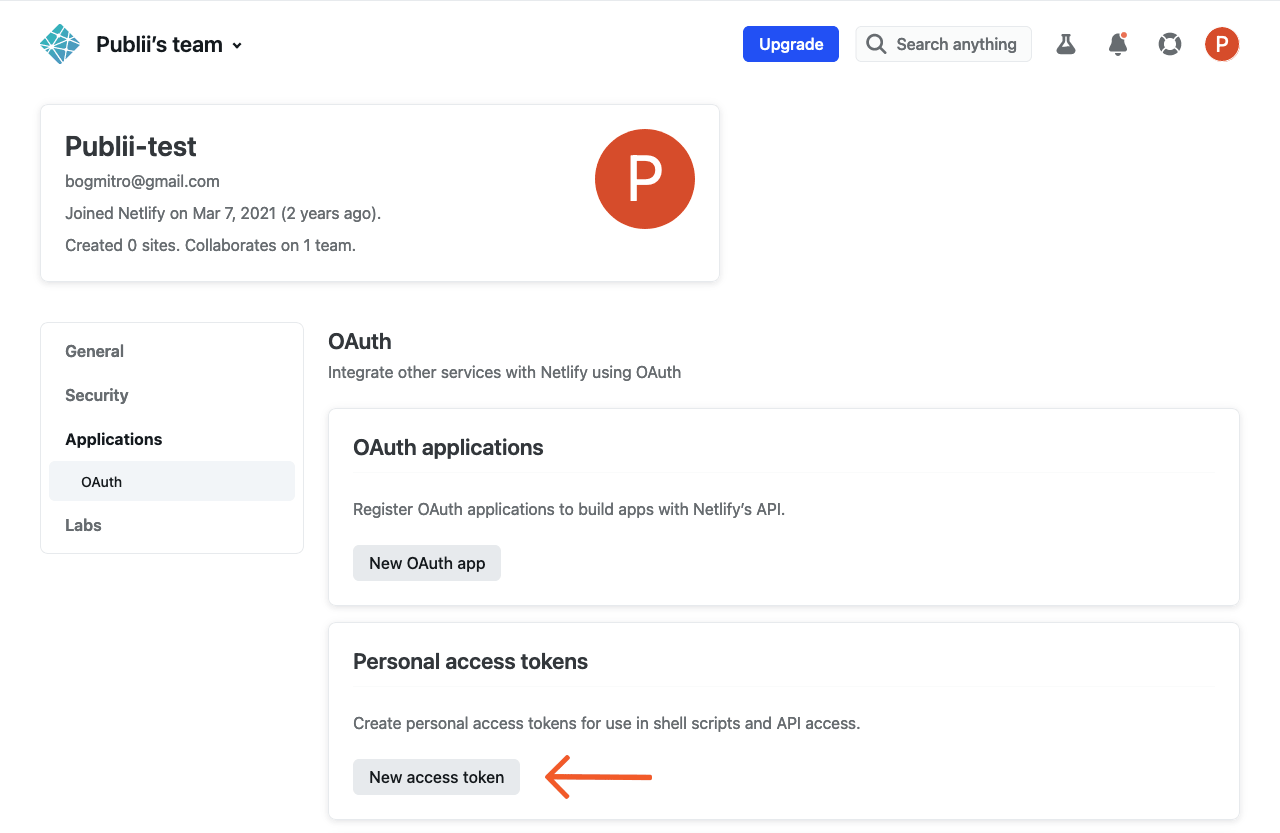
- Now we're going to generate an access token which Publii can use to gain access to our Netlify site; it's a little security precaution. Click on the your account name option at the bottom-left of the screen.

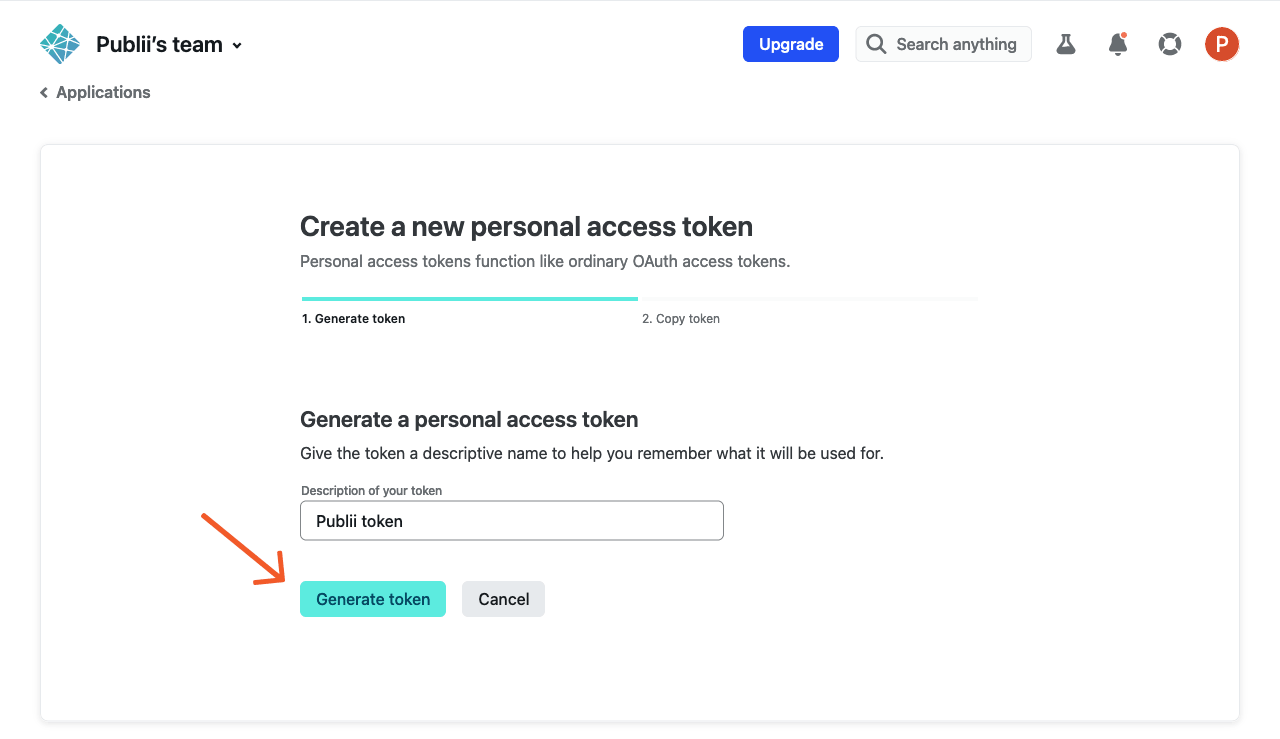
- In the Profile section, click on the Application tab, then, on the OAuth screen, click the New access token button; this will take you to the Token generation screen.
- In the token description field, add a name of your choice; it's just to help you remember what you generated the token for! Next, click the Generate token button.
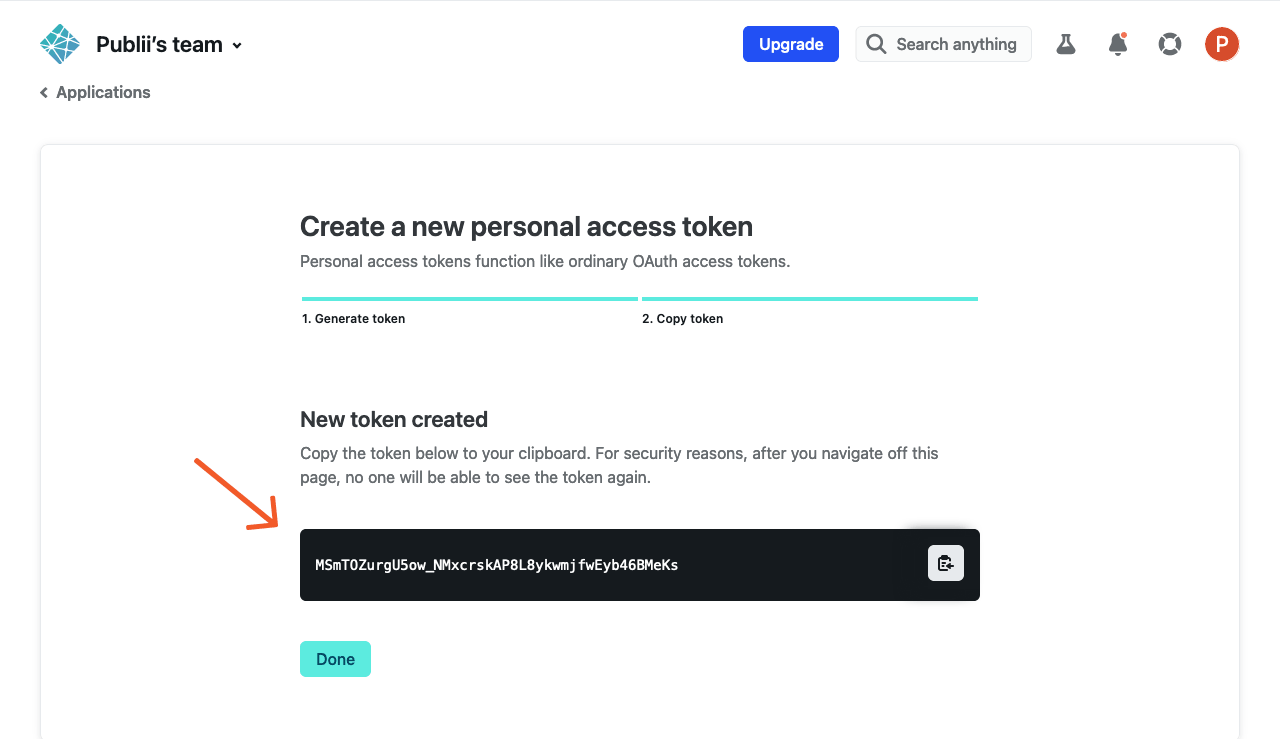
- The token will be created, and you'll see a New token created message. Below that will be your new token; Make sure to copy this token and store it in a safe place as you will not be able to retrieve it later!
We now have everything we need from Netlify, so we can move on to configuring Publii to update our site.
Configuring Publii for Netlify
To configure your Netlify site in Publii, follow these steps:
- Open the Publii app and click on the Server option in the left-sidebar to open the Server Settings screen.
- Set the Domain to your Netlify URL we saw in the previous section (yourSitename.netlify.com); don't forget to choose https:// from the drop-down list.
- Enter the string of characters from the API ID of your Netlify site into the Site ID field.
- Finally, enter the Netlify token we created at the end of the last section in the Netlify token field, and click the Save settings button to save changes.

Publii is now configured; if you want you can click the Test connection button to make sure that all the options were configured properly. If they are, you are ready to sync your website!