Reading Time Plugin
Introduction
The Reading Time plugin calculates how long it takes to read your posts and pages, then adds that estimate right into your HTML. No JavaScript. No client-side processing. Just clean, fast-loading pages with reading time already baked in.
This happens during site generation. The plugin scans your content, counts words based on your reading speed settings, optionally factors in images and videos, then injects a formatted label wherever you want it. Your visitors see the final result - no waiting, no extra requests.
You get control over what gets counted, how the math works, and where the label shows up. The plugin handles complex HTML structure, works with nested elements, and includes smart fallbacks so it keeps working even if your theme changes.
Enabling the Plugin
Open Publii and head to the Tools & Plugins section. Find Reading Time in your plugin list and flip the switch at the bottom-left corner of its tile to turn it on.
Once enabled, you'll see configuration options. The plugin ships with sensible defaults that work out of the box, but you can adjust everything to match your needs.
Plugin Configuration
Selectors
This section controls where the plugin looks for content and where it places the reading time label.
Content container selector - This is one of the most important settings in the plugin. Here you tell the plugin which part of your HTML contains the actual post content that should be counted. Without pointing to the correct container, the plugin will count everything - including menus, sidebars, and comments - which ruins your reading time estimates.
The default is
.content__entry, which works with many Publii themes. You can list multiple selectors separated by commas. The plugin only counts words inside these containers. If your theme uses a different class - like.post-contentor.entry-wrapper- update this field. You can combine multiple classes in one selector, like.entry-wrapper.content__entry.If nothing matches, the plugin falls back to common HTML5 elements:
article, thenmain, thenbody. This keeps things working even if your theme structure is unusual.Exclude selector - Sometimes you don't want to count certain sections. Table of contents, sidebars, author bios - these add HTML bulk but aren't part of the reading experience. List any selectors you want ignored, separated by commas. The default excludes
.post__tocand.content__footer. You can use HTML tags (blockquote,figure,figcaption), classes (.sidebar), or IDs (#comments). The plugin removes entire nested structures matching these selectors before counting anything.Target selector - This is where the reading time label gets inserted. The default is
.content__meta, which typically sits near post titles in Publii themes. You can use multiple selectors here too. The plugin tries each one in order and uses the first match it finds. Common alternatives includeh1,.content__title, or.content__header.Need help finding the right selector? Jump to Finding the Right Target Selector.
If no target selector matches, the plugin skips injection entirely and logs a warning to the render log. This prevents the reading time label from appearing in unexpected locations.
Insert mode - Once the plugin finds your target element, this setting controls label placement. Four options:
after- places the label right after the target element (outside it)before- places the label right before the target element (outside it)append- places the label inside the target, at the endprepend- places the label inside the target, at the beginning
The plugin is smart about inline vs. block elements. If your target is an inline element like
<a>or<span>and your wrapper (see below) is a block element like<div>, the plugin automatically switchesappendtoafterandprependtobefore. This prevents broken layouts.Wrapper tag - The HTML tag that wraps your reading time label. Default is
span, which works well for inline placement. Usedivif you want block-level styling, or any other valid HTML tag that fits your design.For security reasons, certain HTML tags are not allowed as wrappers:
script,style,iframe,object,embed,form,input,button,select,textarea. If you specify one of these, the plugin defaults to div.CSS class - A custom class applied to the inserted label, so you can style it however you like in your theme. Default is
reading-time.You can specify multiple classes separated by spaces (up to 10). Class names are sanitized to include only letters, numbers, hyphens, and underscores.
Counting
These settings control how reading time is calculated.
Words per minute - Average reading speed. Default is 210 words per minute, which research suggests is typical for English readers. The field accepts values from 60 to 600. If your audience reads different languages or you want more conservative estimates, adjust this. Slower speeds (180–200) work well for technical content. Faster speeds (240–260) fit lighter material.
Count images - When enabled, each image adds a few seconds to the total time. Off by default. Turn this on if your posts include meaningful images that readers will pause to look at. Leave it off if images are purely decorative.
Seconds per image - How much time each image adds. Default is 12 seconds. Only appears when "Count images" is enabled. Research on image viewing varies widely. Twelve seconds works for most content. Increase it for infographics or complex diagrams. Decrease it for simple icons or decorative photos.
Count videos - Similar to images - adds time for video elements in your posts. Off by default.
Seconds per video - Time added per video element. Default is 20 seconds. Only appears when "Count videos" is enabled. Twenty seconds gives readers time to decide whether to play the video. If you embed full-length videos, you might want to increase this significantly - or leave video counting off entirely, since actual viewing time varies so much.
Count iframes as video - Treats
<iframe>elements (YouTube embeds, Vimeo, etc.) as videos for time calculation. Uses the "Seconds per video" value. Off by default. Enable this if you embed videos via iframe. Keep it off if you use iframes for other purposes like interactive maps or widgets.Count image alt text - Includes words from image
altattributes in the word count. Off by default. Turn this on if you write detailed alt text that readers with screen readers would actually "read." Skip it if your alt text is minimal.Rounding - Controls how fractional minutes are rounded. Three options:
ceil(default) - always round up (2.1 becomes 3)round- round to nearest (2.4 becomes 2; 2.5 becomes 3)floor- always round down (2.9 becomes 2)
Most blogs use
ceilbecause readers prefer slight overestimates to underestimates. Butroundgives the most accurate feel.Minimum minutes - The lowest number of minutes displayed. Default is 1. Set to 0 to disable. This prevents showing "0 min read" for very short posts. With a minimum of 1, anything under a minute rounds to 1.
Maximum minutes - The highest number of minutes displayed. Default is 0 (disabled). Set any positive number to cap the maximum. Useful if you have occasional very long posts and don't want to display "73 min read." Setting a max of 30 or 60 keeps estimates reasonable.
Plural
These templates control what readers actually see. The plugin selects templates based on the rounded minute value using simple rules:
- 1 minute → uses "one" template
- 2–4 minutes → uses "few" template
- 5+ minutes → uses "many" template
- anything else → uses "other" template (fallback)
This system works well for languages with complex plural forms, like Polish or Czech. Even if you're writing in English, you get complete control over label text.
All templates support three placeholders:
{m}— rounded whole minutes (e.g., 3){exact}— exact minutes with one decimal (e.g., 2.7){sec}— total seconds, rounded (e.g., 162)
Available template options:
- < 1 minute text — Shown when estimated time is under one minute. Default is "less than a minute." You can use
{sec}or{exact}here: "about {sec} seconds" or "just {exact} minutes." - Plural: one — Template for 1 minute. Default is "{m} min read."
- Plural: few — Template for 2–4 minutes. Default is "{m} min read."
- Plural: many — Template for 5+ minutes. Default is "{m} min read."
- Plural: other — Fallback template. Default is "{m} min read." You can customize any of these. Examples:
{m} minute read(singular feel){m}-minute read(hyphenated)About {exact} minutes(shows decimal precision){m} min(minimal)Reading time: {m} minutes(explicit)
Behavior
Controls where the plugin runs and whether it logs debug information.
Enable on posts - Shows reading time on single post pages. Enabled by default.
Enable on pages - Shows reading time on static pages like About or Contact. Disabled by default. Most sites want reading time on blog posts but not on standalone pages. Adjust these checkboxes to match your needs.
Debug logs - When enabled, the plugin writes detailed information to Publii's Log Viewer (specifically
rendering-process.log). For each page, you'll see:- Page title
- Words counted
- Image and video counts
- Total seconds calculated
- Exact minutes (with decimal)
- Final rounded minutes
- Generated label text
Turn this on if the plugin isn't working as expected or if you want to verify calculations. Leave it off for normal operation.
Using the Plugin
Once configured, the plugin works automatically. Every time you generate your site, it scans posts and pages (based on your enable settings), calculates reading time, and injects the label.
The label appears wrapped in your chosen tag with your specified class. For example, with default settings:
<span class="reading-time" aria-label="5 min read">5 min read</span>The aria-label ensures screen readers announce the reading time properly. The class lets you style the label with CSS in your theme.
Styling the Label
Add CSS rules targeting the class you configured. With the default reading-time class, you can add styles via Publii's built-in Custom CSS tool (found in Tools & Plugins):
.reading-time {
  color: #666;
  font-size: 0.9em;
  font-style: italic;
}
You can style it however you like - change color, size, spacing, add icons, whatever fits your design.
Finding the Right Target Selector
The default .content__meta works with most Publii themes right out of the box. But if you're using a custom theme or want to place the reading time somewhere specific, here's how to find the right selector.
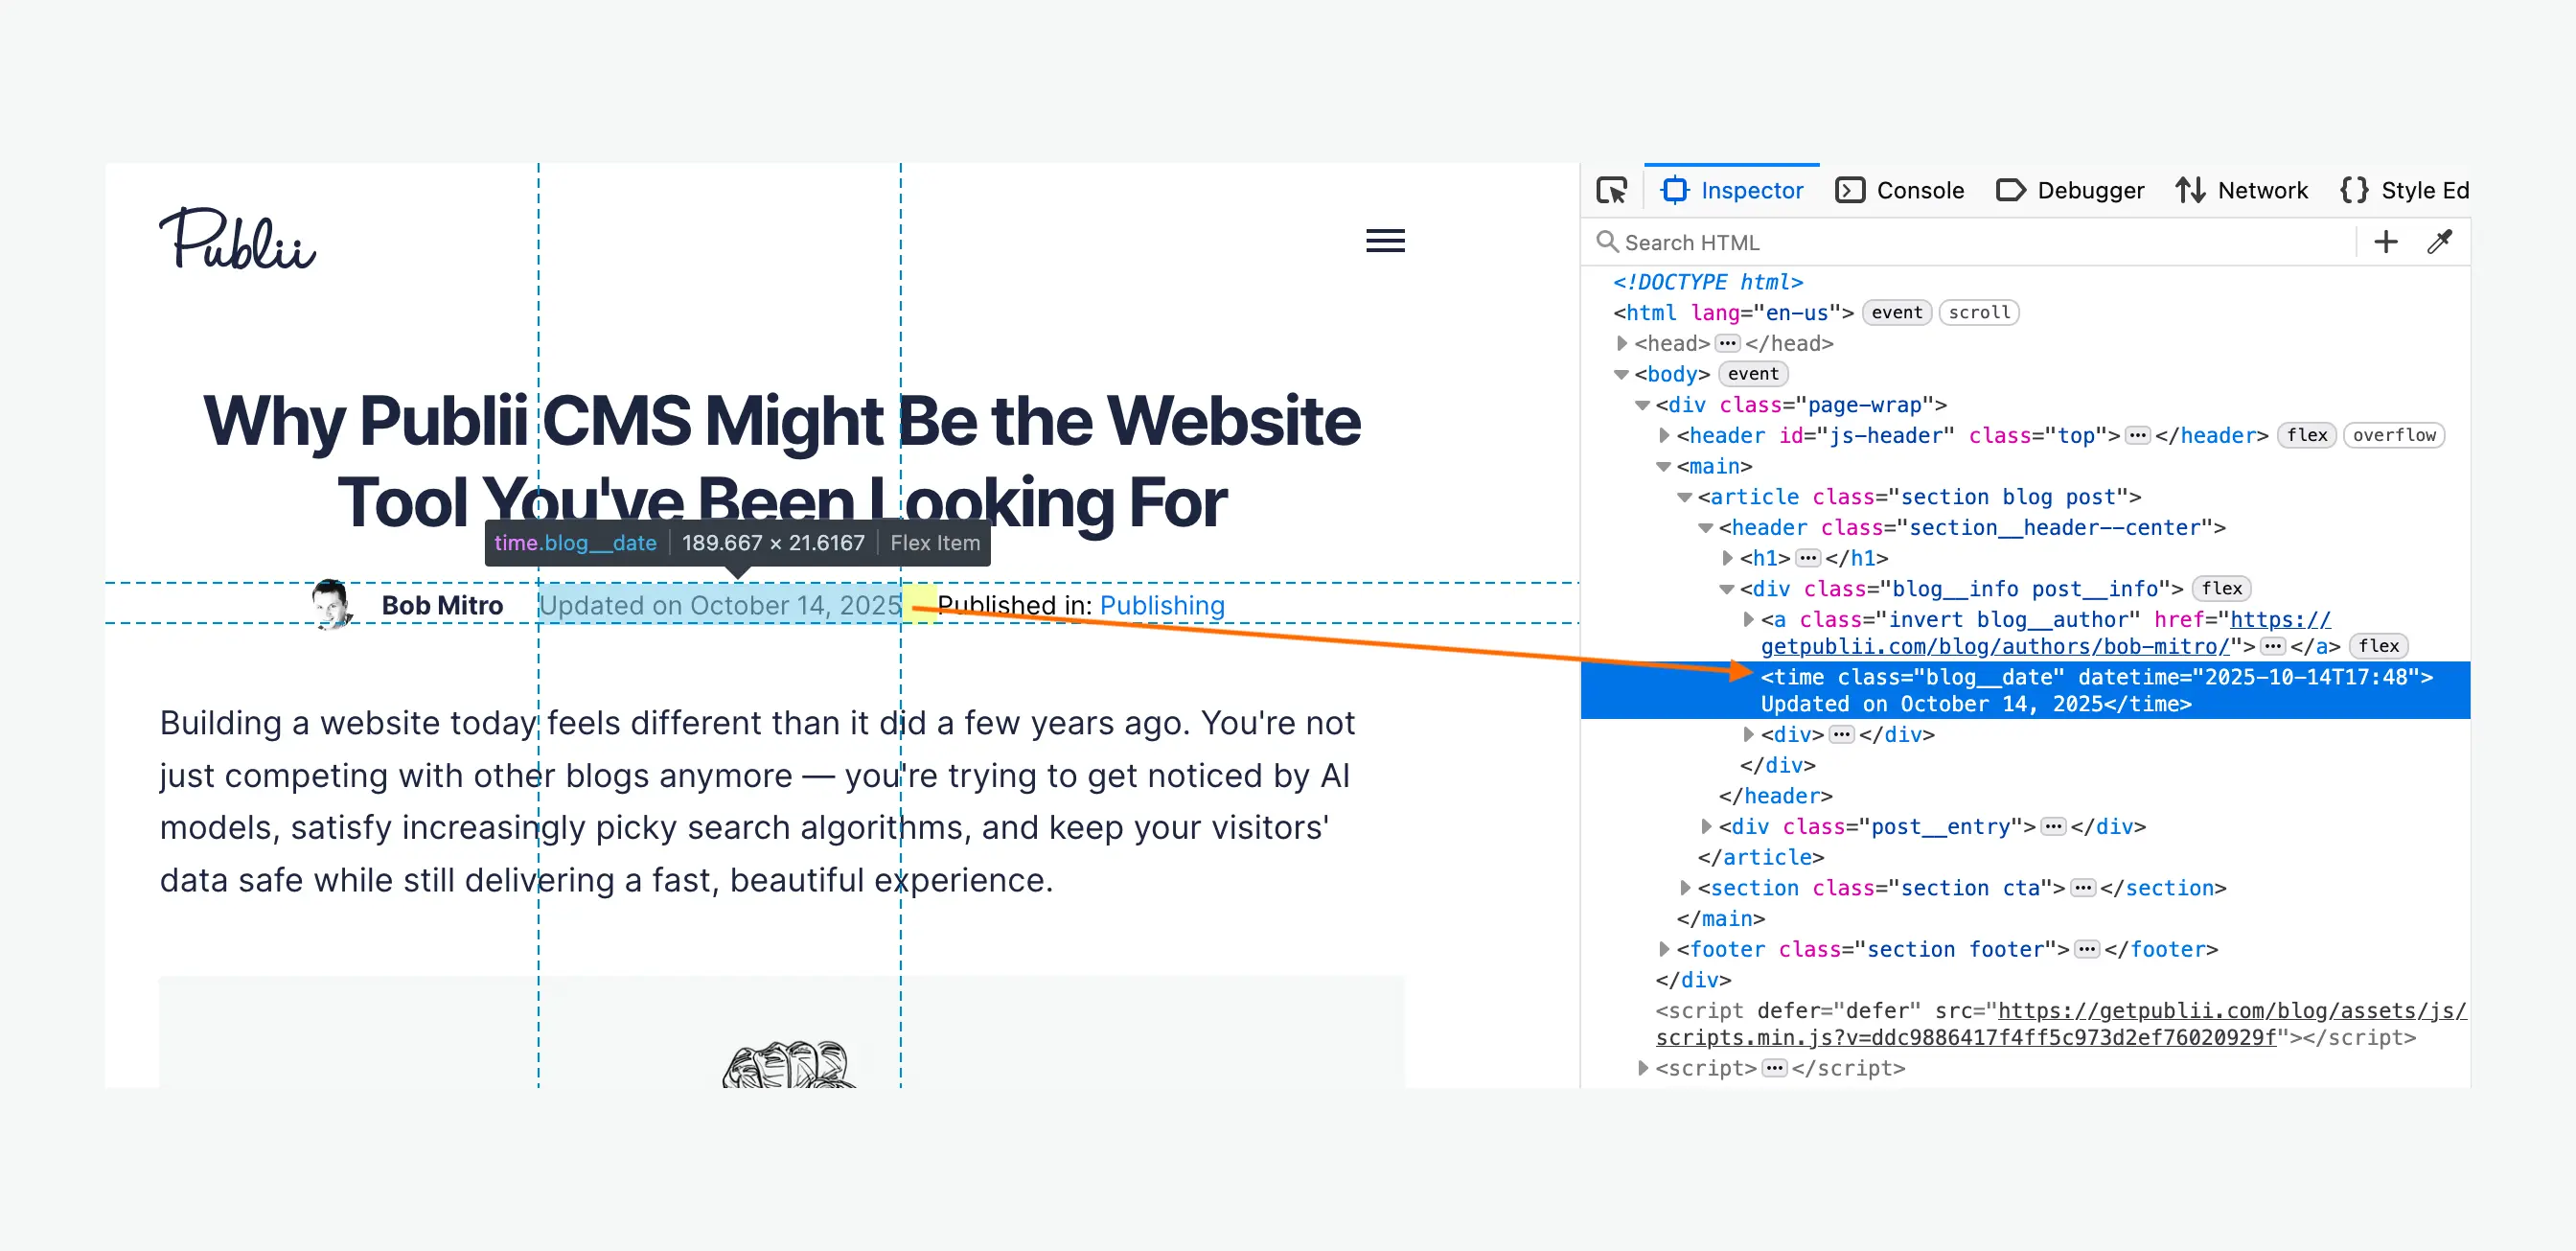
Open your published site in Chrome (or any browser with developer tools). Right-click on the element where you want the reading time to appear - maybe near your post title, in the meta section, or in the header. Select Inspect or Inspect Element from the menu.
The browser will open developer tools and highlight the HTML for that element. Look for:
- Classes - attributes that start with
class="..." - IDs - attributes that start with
id="..." - HTML tags - like
<h1>,<div>,<header>
Pick the most specific selector that identifies your target element. For classes, add a dot before the name (like .post-meta). For IDs, add a hash (like #article-header). For HTML tags, just use the tag name (like h1).
Copy that selector into the "Target selector" field in plugin settings. Generate your site and check if the reading time appears where you wanted. If not, try a different selector or adjust the "Insert mode" setting.
Common Configuration Examples
Minimal setup - just word count - Leave images and videos unchecked. Set "Words per minute" to 210. Use default selectors if they match your theme. Done.
Include images - Check "Count images." Set "Seconds per image" to 12 (or adjust based on your content). If you embed YouTube videos via iframe, check "Count iframes as video" too.
Technical blog with slower reading speed - Set "Words per minute" to 180–200. Technical content often includes code, diagrams, and dense explanations that slow reading.
Magazine-style with exact placement - Change "Target selector" to your specific element (maybe
.article-headeror.post-meta). Set "Insert mode" toprependto place the label at the start of that element.Multilingual label - Customize the plural templates to match your language. For example, in Polish:
- Plural: one →
{m} minuta czytania - Plural: few →
{m} minuty czytania - Plural: many →
{m} minut czytania
- Plural: one →
Hide very short posts - Set "Minimum minutes" to 2. Anything under 2 minutes displays as "2 min read." Or customize "< 1 minute text" to "Quick read" for better feel.
Troubleshooting
Label doesn't appear
Check these:
- Is the plugin enabled?
- Are you generating posts or pages, and is the matching "Enable on" option checked?
- Does your "Target selector" actually exist in your theme? View page source and search for it.
- Turn on "Debug logs" and check
rendering-process.login Publii's Log Viewer to see what the plugin is doing.
Reading time seems wrong
Enable debug logs to see word counts and calculations. Verify:
- "Content container selector" matches where your actual content lives.
- "Exclude selector" isn't removing too much (or too little).
- "Words per minute" reflects your audience's reading speed.
Label appears in wrong place
Adjust "Target selector" to a different element, or change "Insert mode" to before, after, append, or prepend until it looks right.
HTML looks broken
Make sure your "Wrapper tag" choice makes sense with your "Insert mode." If you're inserting inside an inline element, use span as the wrapper, not div.
Final Thoughts
The Reading Time plugin gives you complete control over reading time estimates without touching your theme code or slowing down your site. Configure it once, generate your site, and it just works.
If you need to adjust settings later, change the config and sync your site. The plugin never stores data - everything happens fresh during each build, so you can experiment freely.
Most users find the defaults work well. But if you want precise control over every detail - from content selection to plural forms to debug output - all the options are there.