Creating an email newsletter subscription form with GDPR compliance
 Bob Mitro
By having a subscription form on our website, we will of course be collecting personal data from our subscribers. With the new rules being introduced via the GDPR (General Data Protection Regulation) this May, we must obtain explicit consent from our users to process their data and send them our newsletters, and to send them any other materials.
A simple, effective solution for this is to add separate consent checkboxes to our sign-up forms, with a double-opt-in when adding new subscribers. There’s no specific requirement for double-opt-in under GDPR (the regulation is intentionally not specific in many ways), but generally this is recommended to ensure the quality of the data being collected; double opt-ins provide additional proof of consent, preventing online bots or other automated or unscrupulous users from spamming sign-ups to your lists automatically.
In addition, when dealing with personal data it is reasonable to operate a "better safe than sorry" approach; if it's possible to better protect users' data or improve the user experience, then we should do so regardless of whether there is a specific regulation requiring us to do so. By having two layers of consent we make sure that only users that are truly interested in receiving our communications will get our newsletters.
In short, technically, we have to:
- add a double-opt-in
- add the relevant checkboxes to our sign up form
- add contact information for the newsletter owner to our newsletter
- add a statement that recipients can unsubscribe or update their data/consent at any time
- send newsletters and other emails only to users who have agreed to the opt-in
In this example, we'll show you how to achieve all of the above using Mailchimp - one of the most popular newsletter services available.
Enabling double opt-in in Mailchimp
On 31 October 2017 Mailchimp added a single step opt-in as the default option for mailing lists, so users would only need to click a consent checkbox to be added to a mailing list. But they didn't forget about the situation for EU users; all users with a contact address in the EU kept the existing two-step opt-in which requires users to verify their email address.
This means that no action will probably need to be taken here, as Mailchimp should already have you covered. However, if you need to manually enable two-step opt-in you can do so by following these steps:
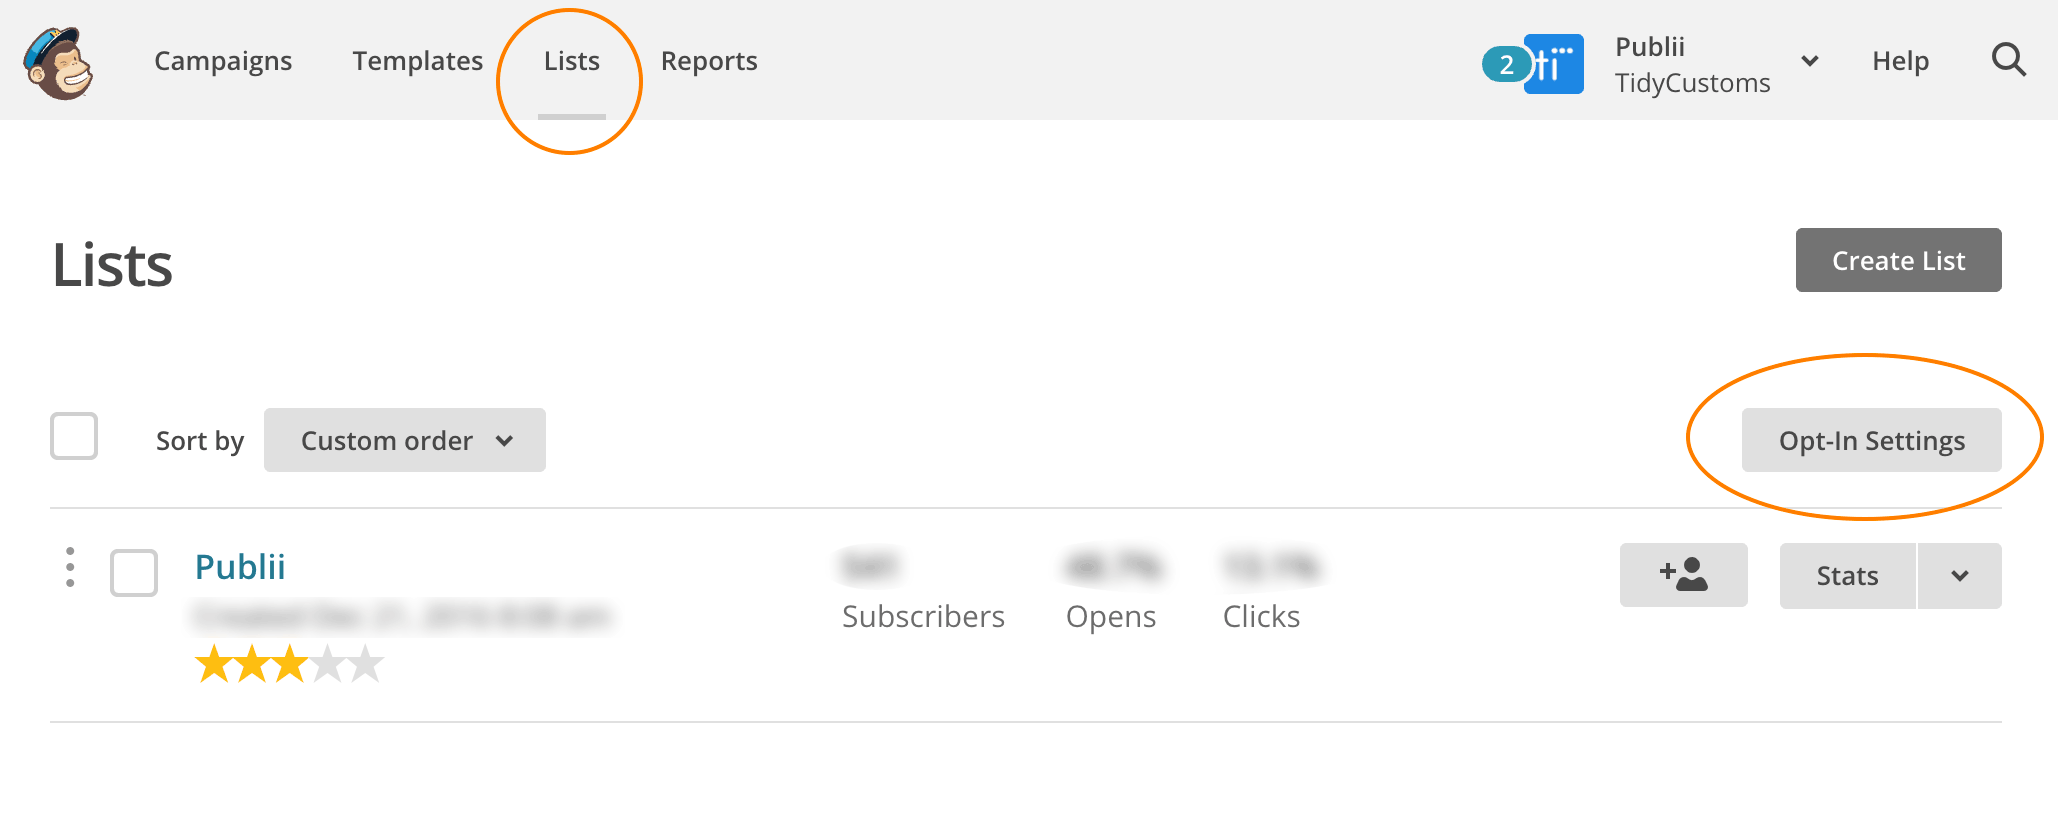
- Log-in to your Mailchimp account and choose the Lists option from the top menu.
- On the Lists screen, click the Opt-In Settings button on the right-hand side.
- In the list of sign-up forms, check the box next to the list name you want to make double-opt-in and click Save.
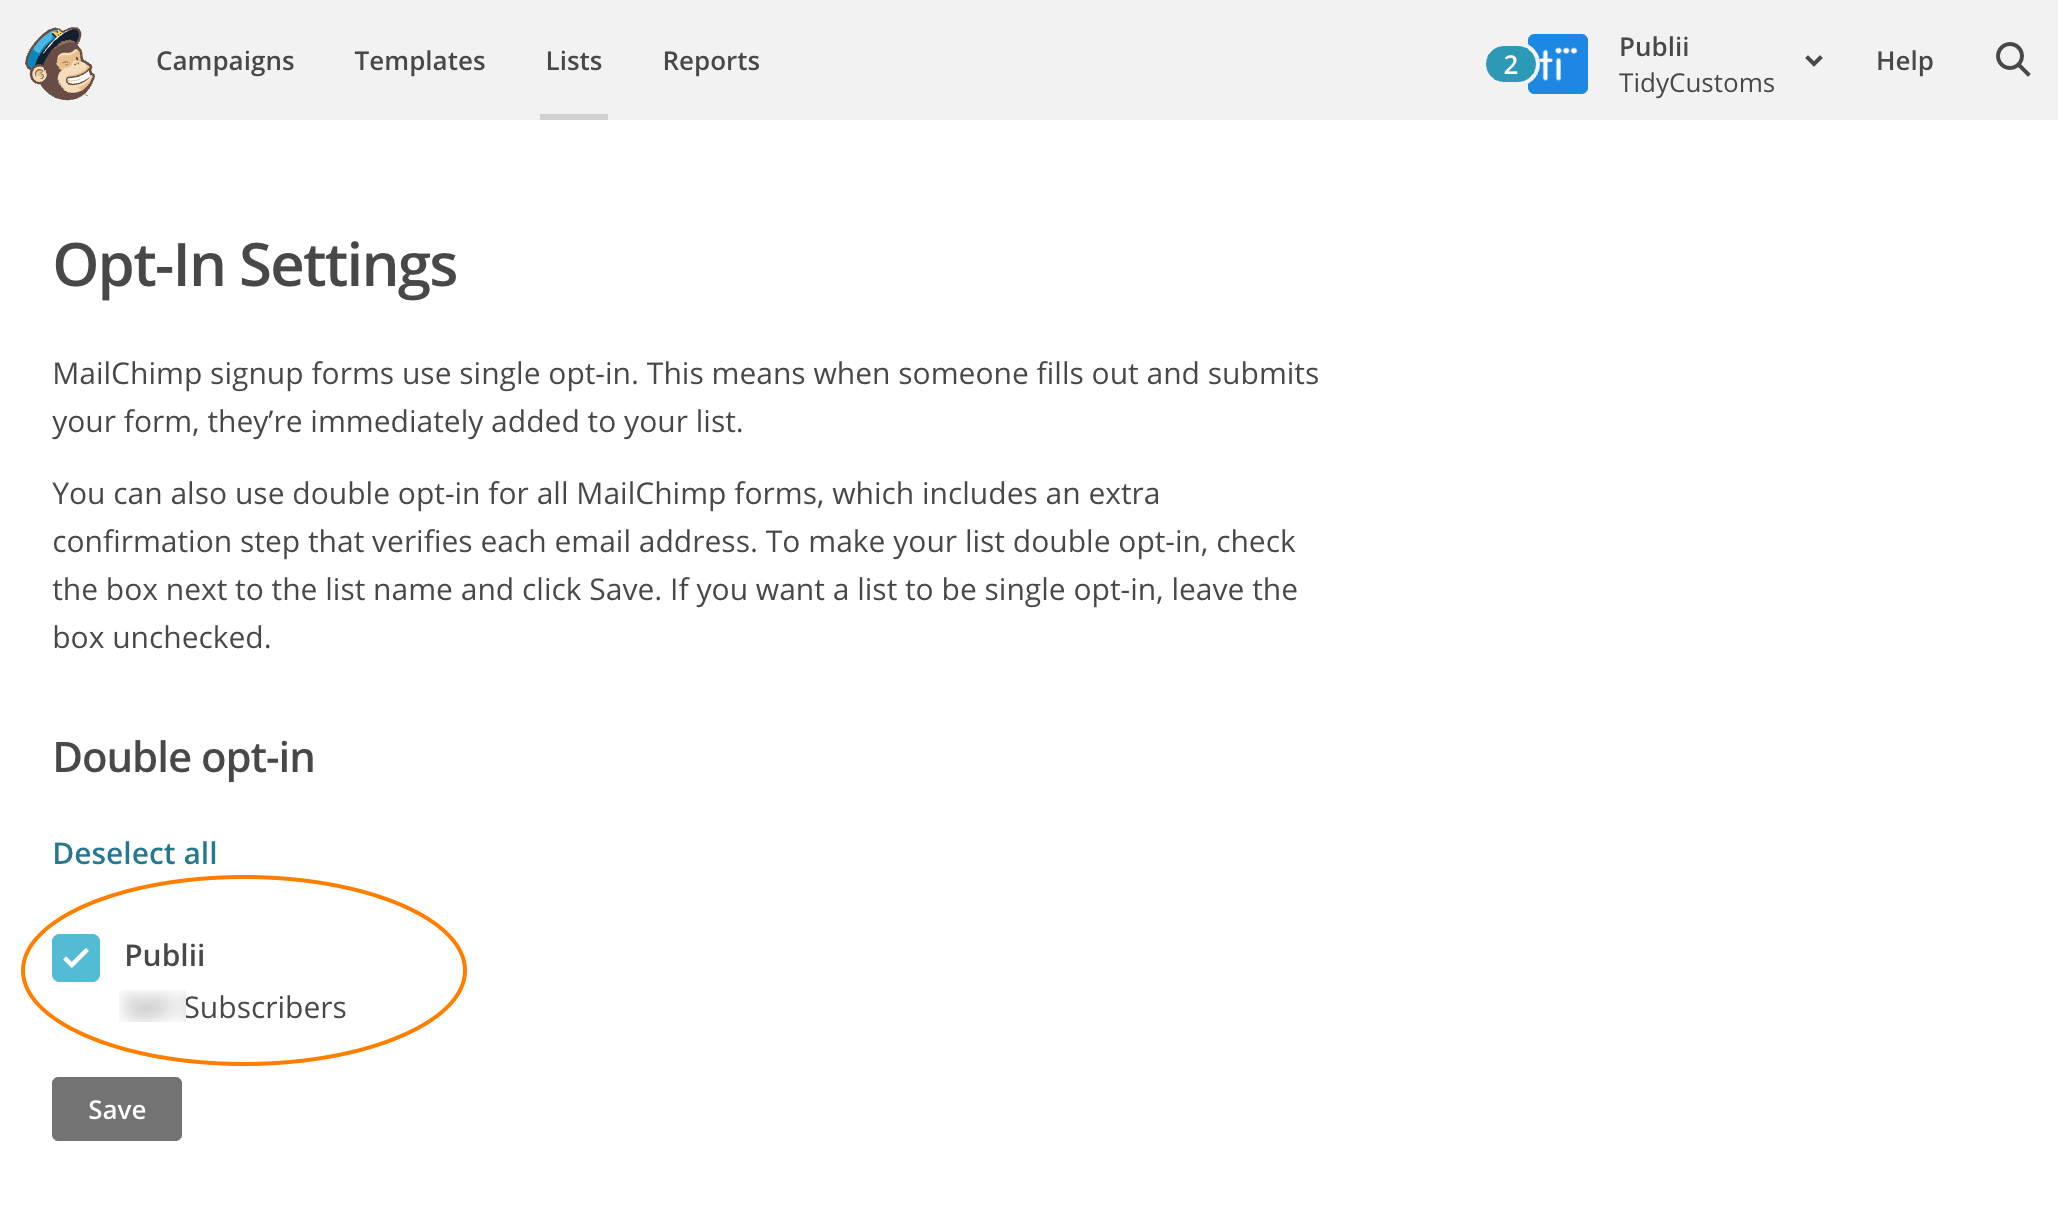
...And your done; now your users will be sent an email after signing-up to your newsletter requesting a secondary confirmation that they consent to their data being used.
Adding consent checkboxes to the newsletter form
One area where the GDPR is clear on what is required is the matter of consent; users must give explicit consent to receive specific types of communication from us, and to their personal data being kept and processed, separately. In addition, users must be informed, clearly and concisely, about what they are agreeing to in plain, understandable language.
In practice, this means that we can't have a single checkbox for the user to click that lets them agree to you storing their data and sending them all types of marketing emails and newsletter; we need a separate checkbox for each agreement. Also, we can't be vague or unspecific about who's collecting their data and what they are doing with it; we must include full details of the owner/operator of the newsletter, and a link to a privacy policy that covers how data is used and handled. We could of course include all of this information as part of the checkbox, but we may end up with a consent form that's longer than many of our articles!
In Mailchimp, it will be relatively easy to add secondary consent checkboxes and information; let's look at how to do it:
First, we have to create Consent Groups for our mailing list
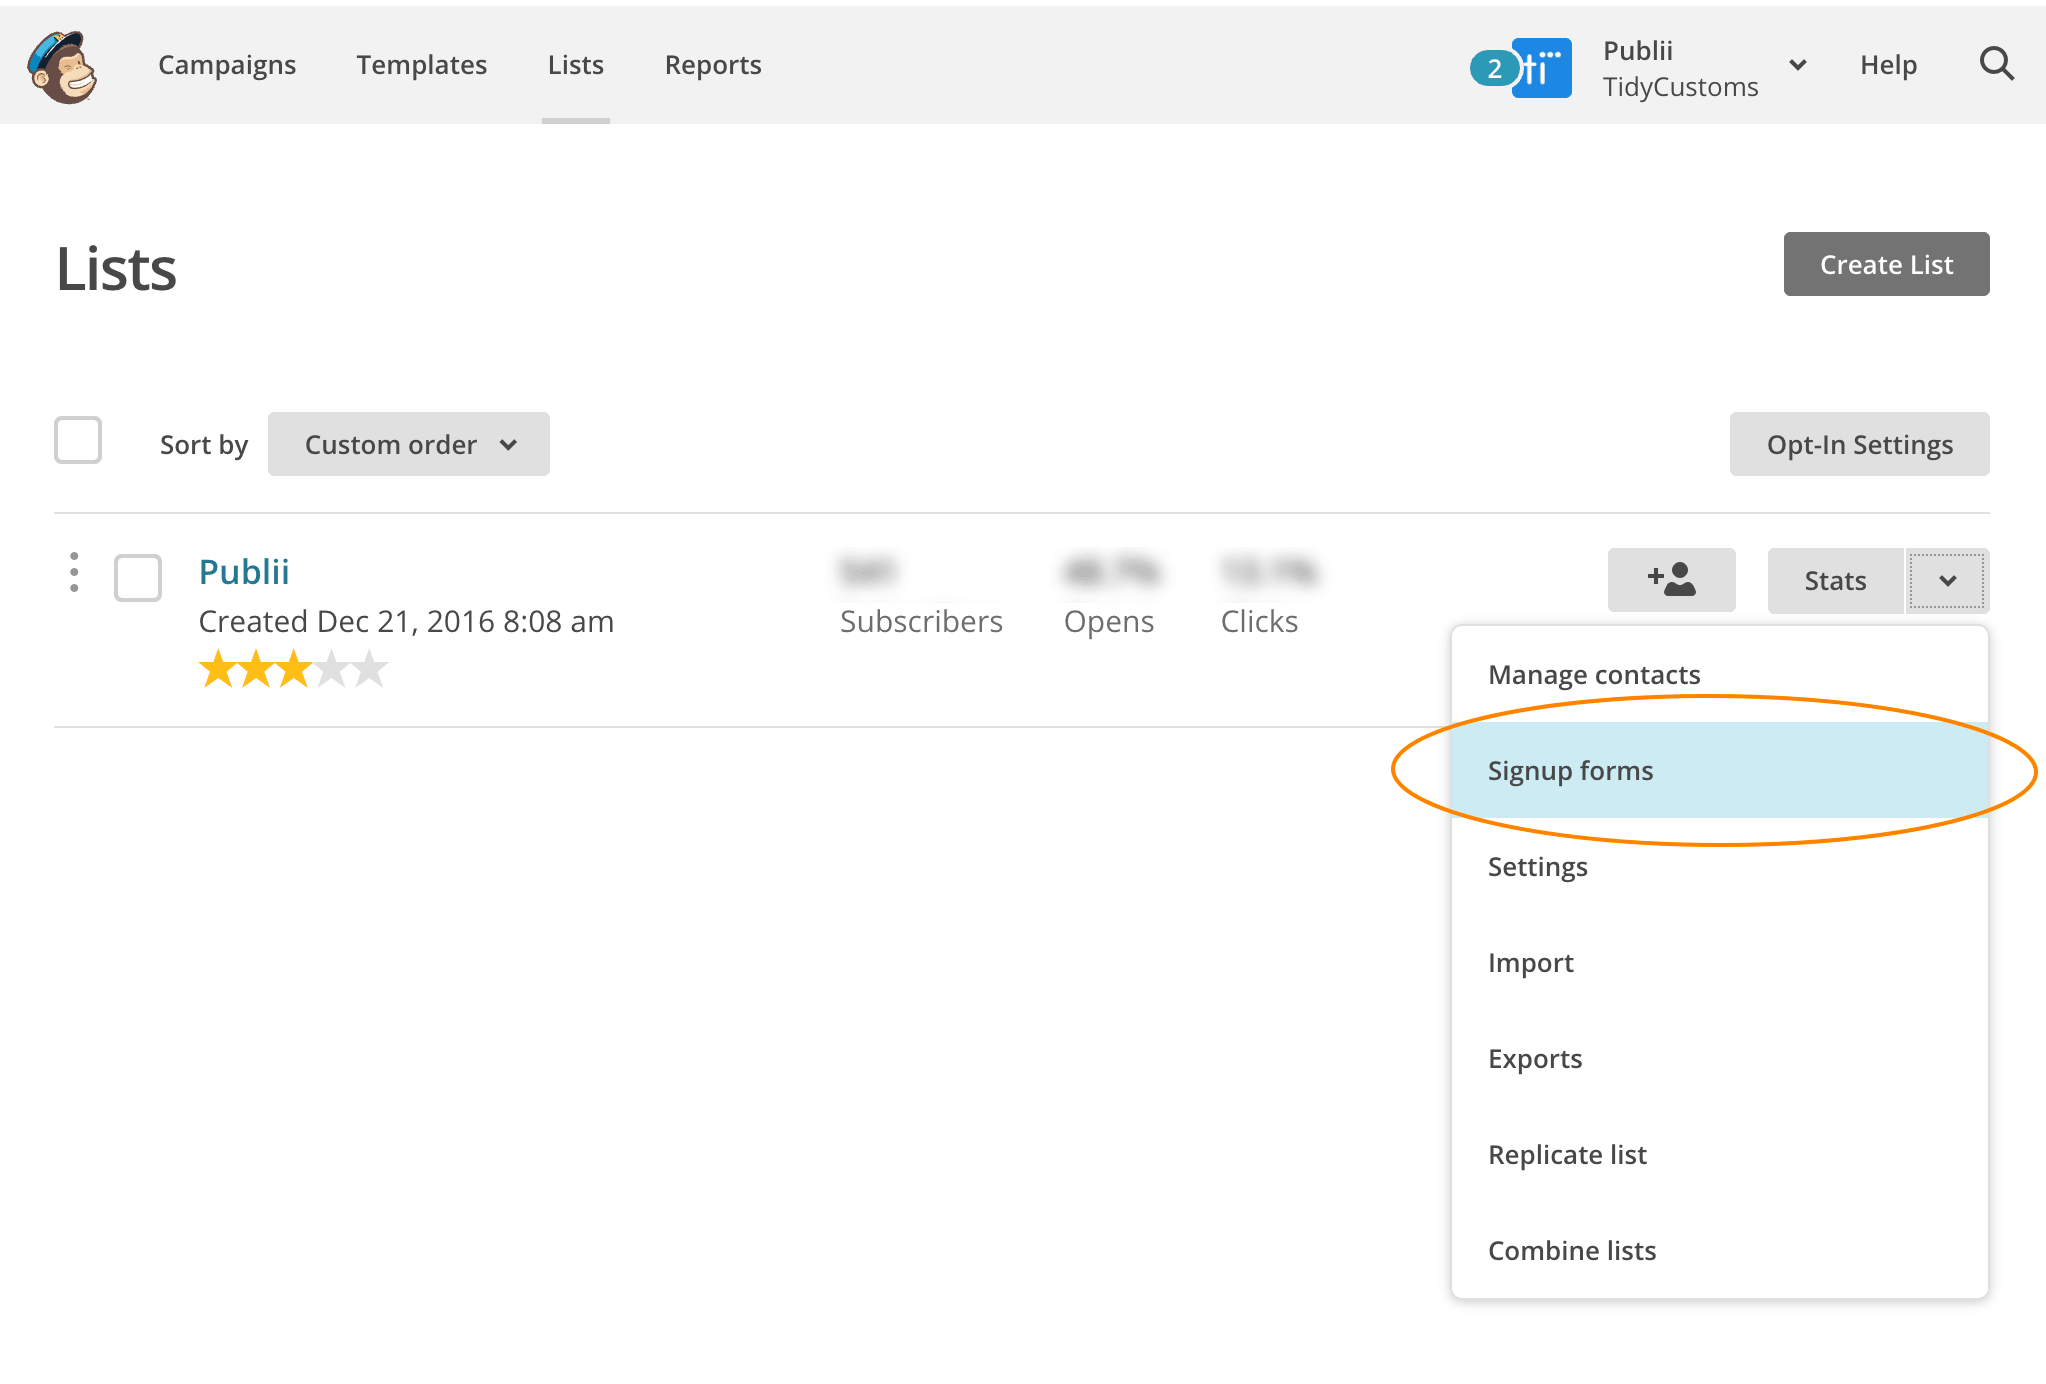
- Go to the Lists page as before, then choose Manage contacts from the drop-down menu next to the list you want to work with.
- Next, click the Groups option.

- Create new groups by clicking the Create Groups button

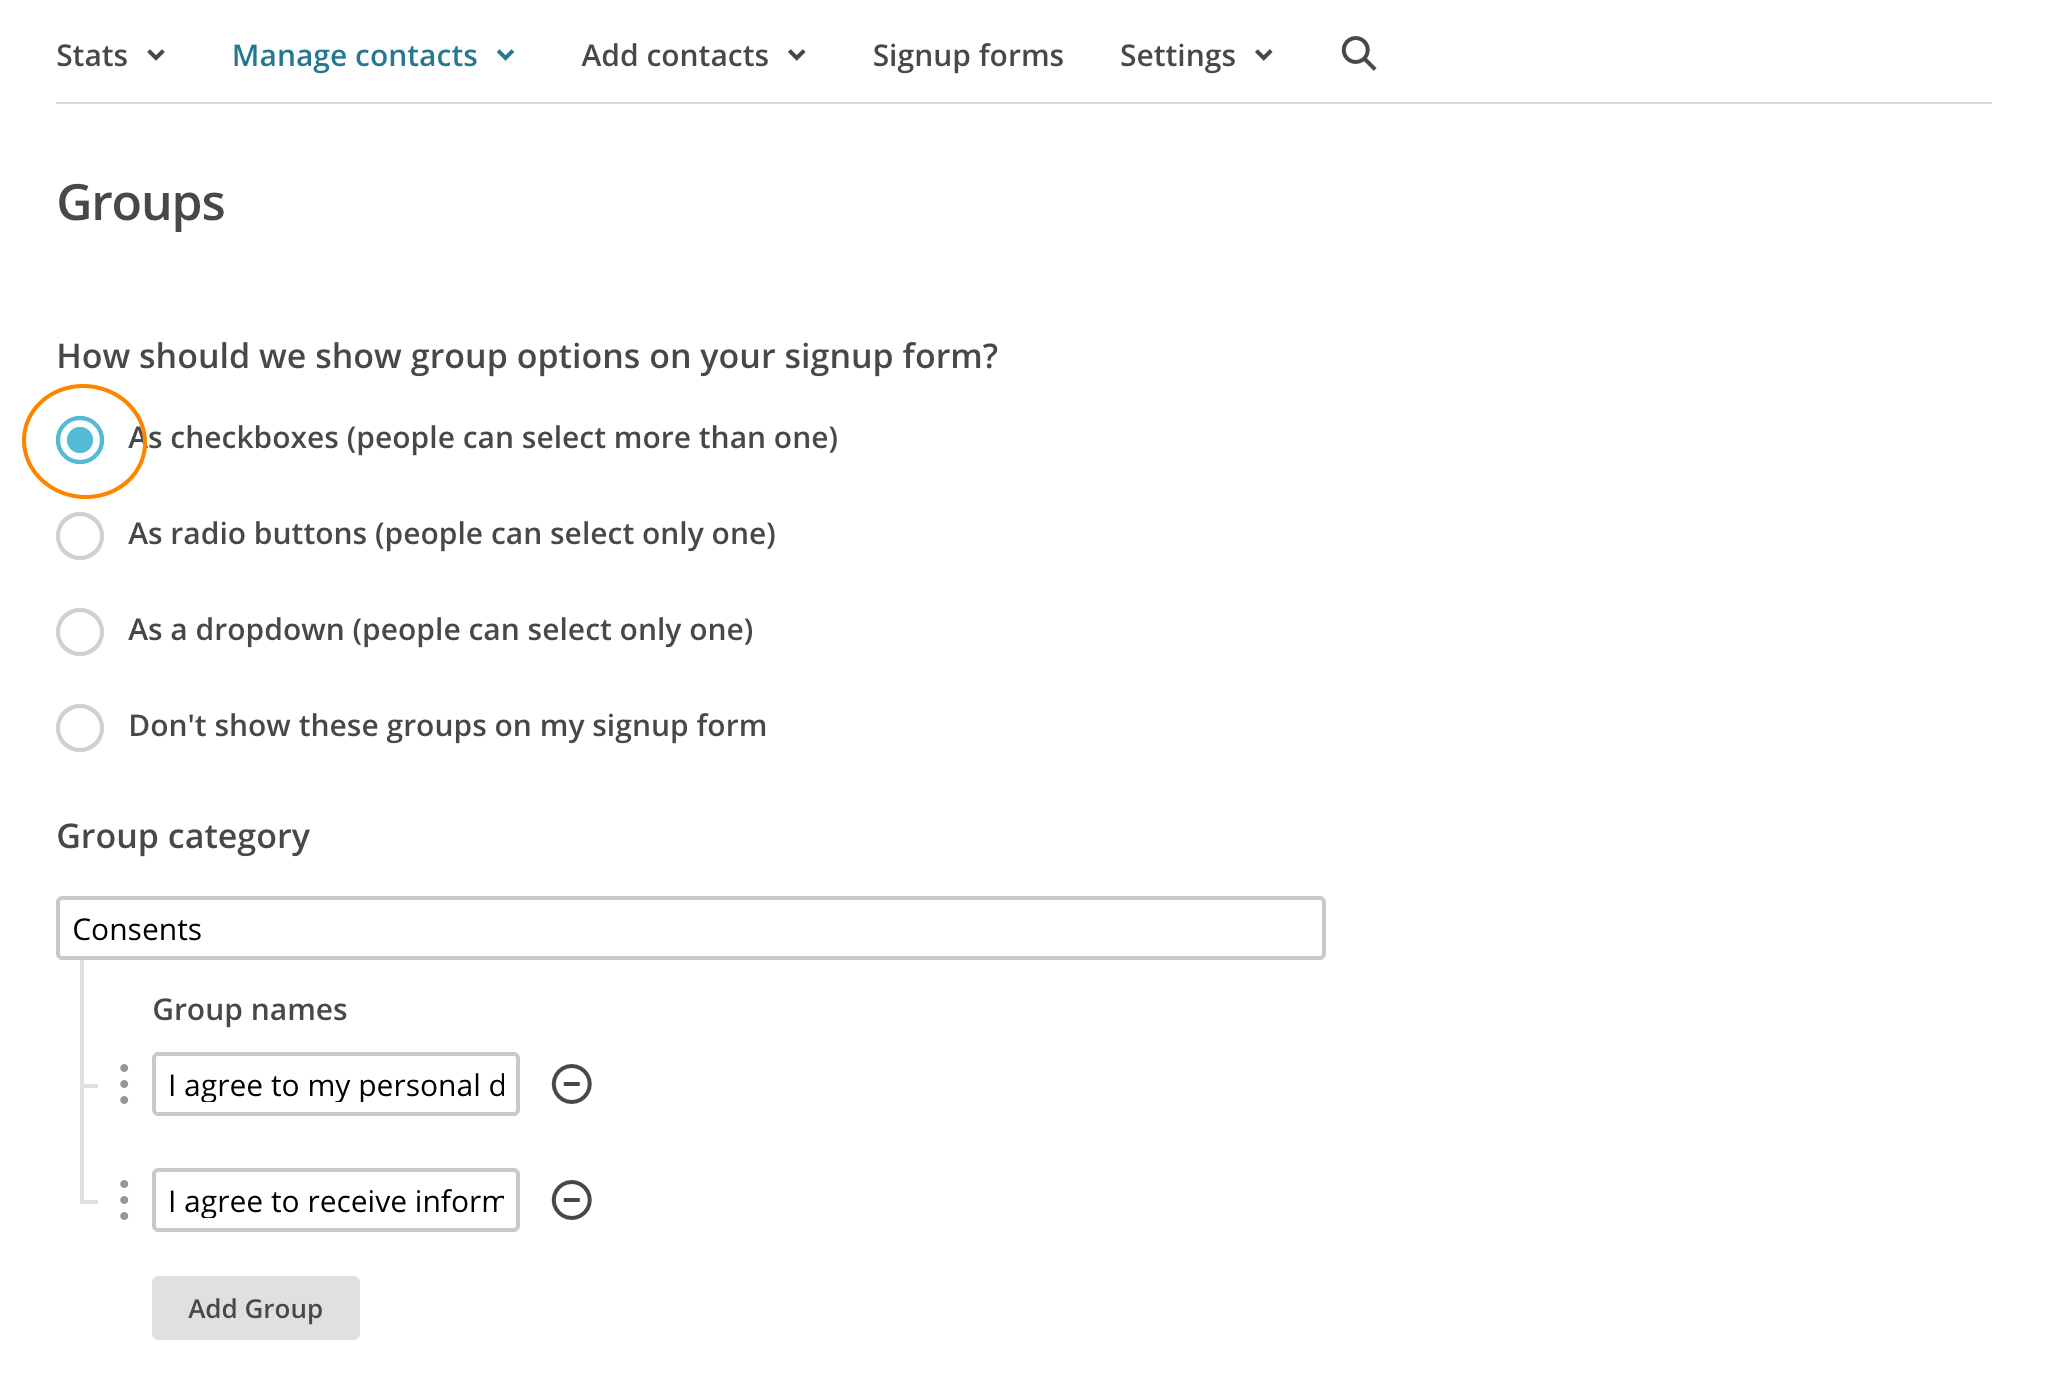
- Set the "How should we should group options on your signup form" option to As checkboxes, and create a name for the Group category field e.g. "Consent".
- In the Group names field, enter the consent statement's content. As previously mentioned, we need to have at last two consents: one with the consent that we can store the user's data that will be used to send them the newsletter, and a second one to agree to us sending them our newsletter with materials such as information on new offers, releases, new themes e.g.:
- I agree to my personal data being stored and used for distribution of the Publii newsletter.
- I agree to receive information and commercial offers about Publii.
Now we have to add the Consents to our newsletter form
- Navigate to your mailing list and from the drop-down menu choose Signup forms
- Make a selection from the available forms; you’ll see that the form includes the checkboxes for the consent agreements we created:
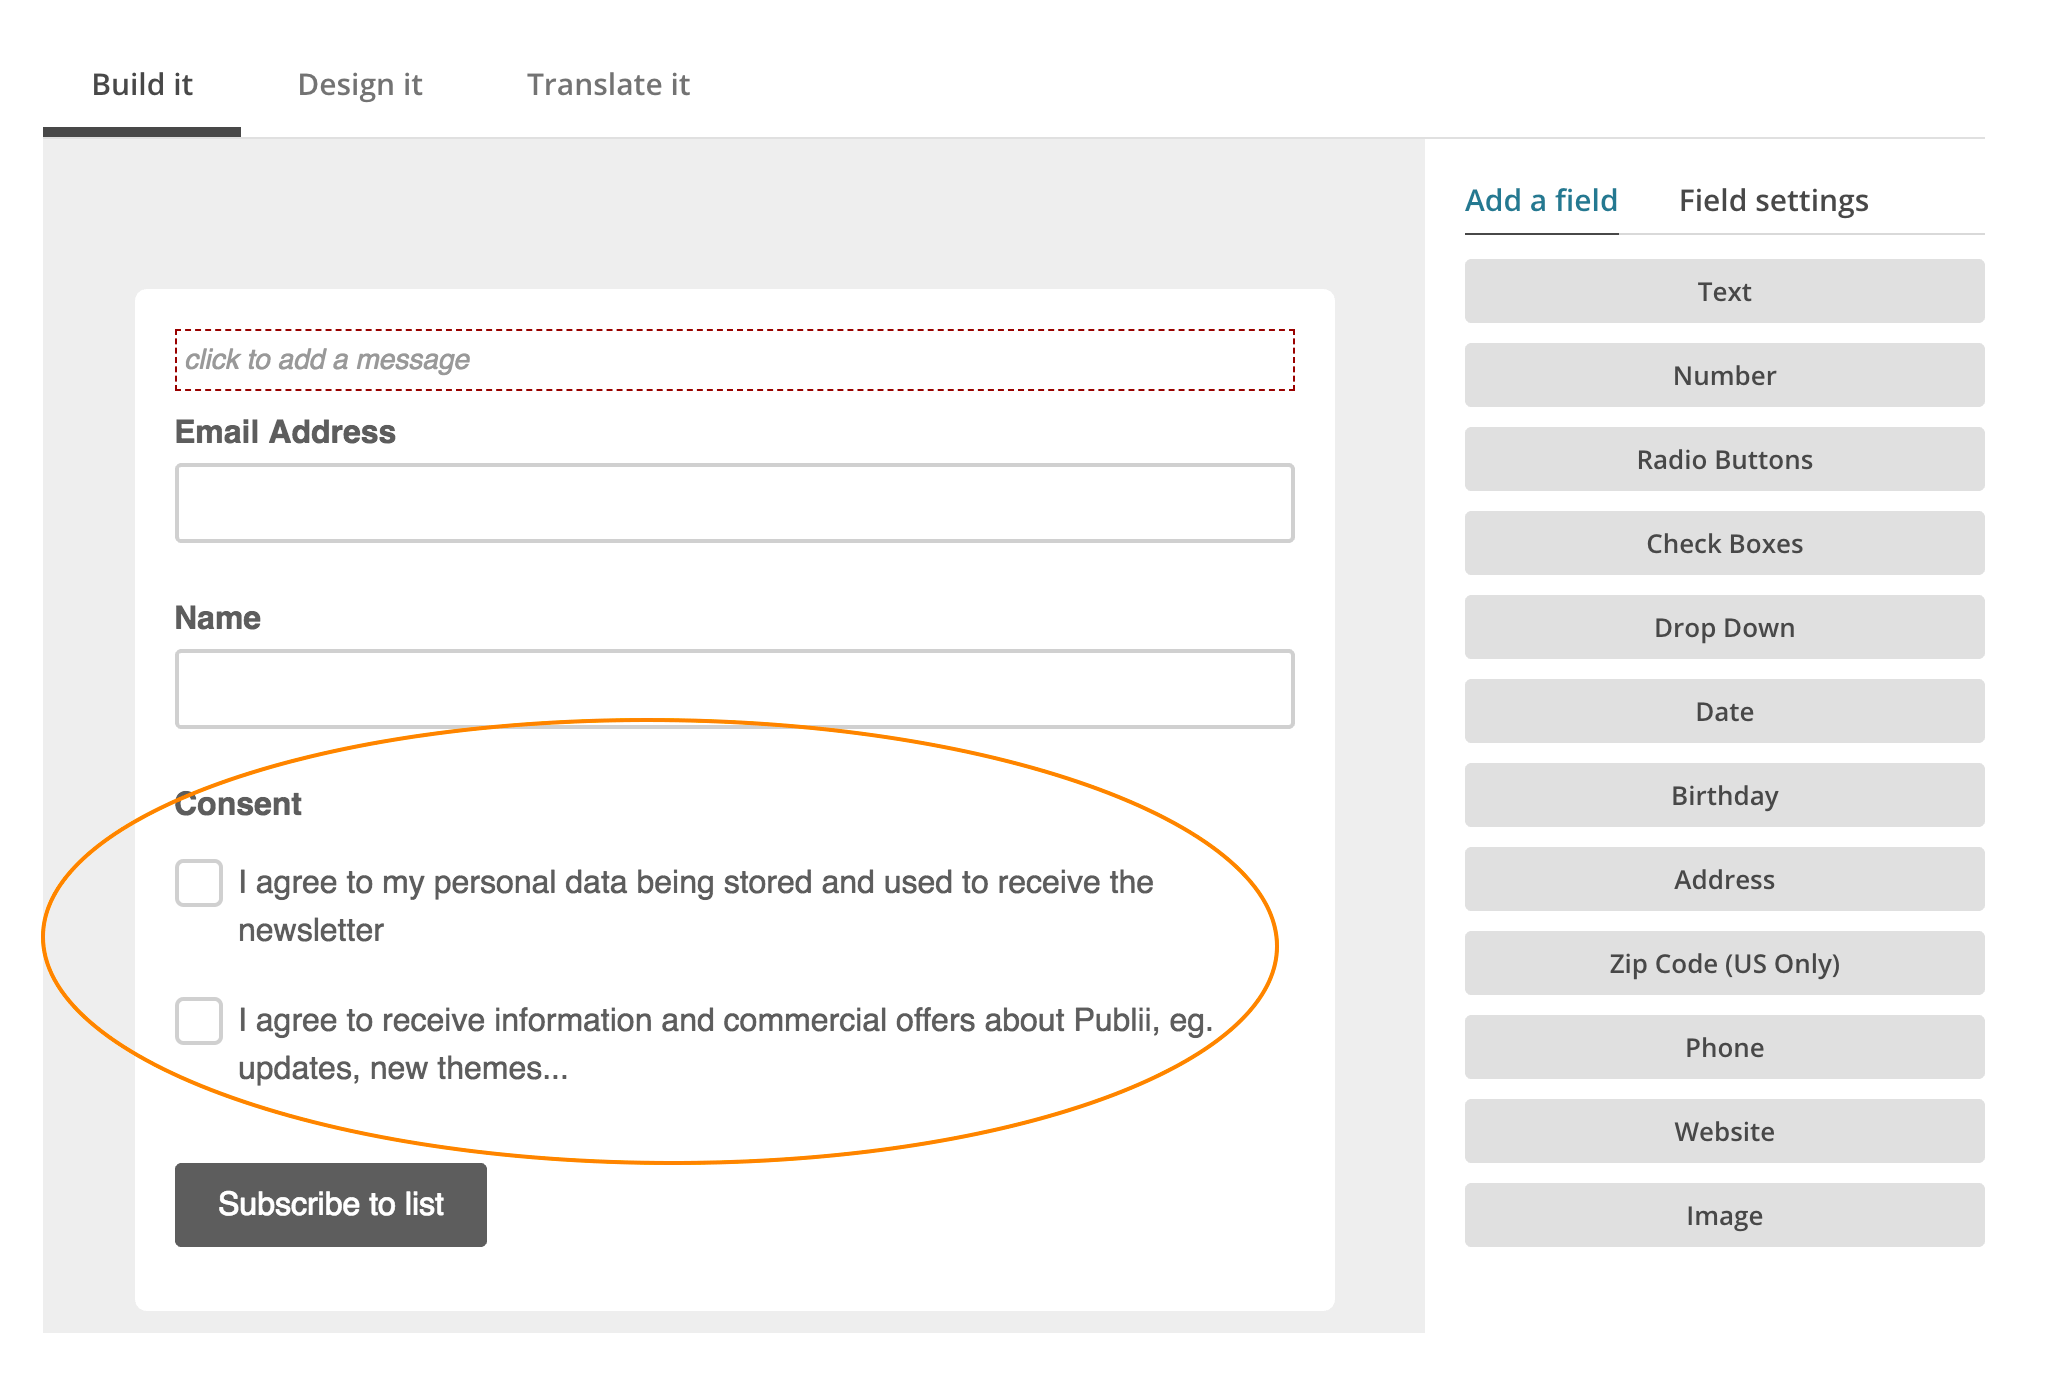
NOTE: The General form does not allow for checkboxes to be set as required; only popup forms have this option. For this reason we recommend using the Embed form and manually adding the required attribute to the checkboxes e.g.
<input required type="checkbox" value="2" name="group[3137][2]" id="mce-group[3137]-3137-0"> - We need to add a message informing our subscribers about the owner of mailing list and that they have the ability to update their consent or have their data deleted (unsubscribe) at their request, and provide further information regarding the terms of the consent.
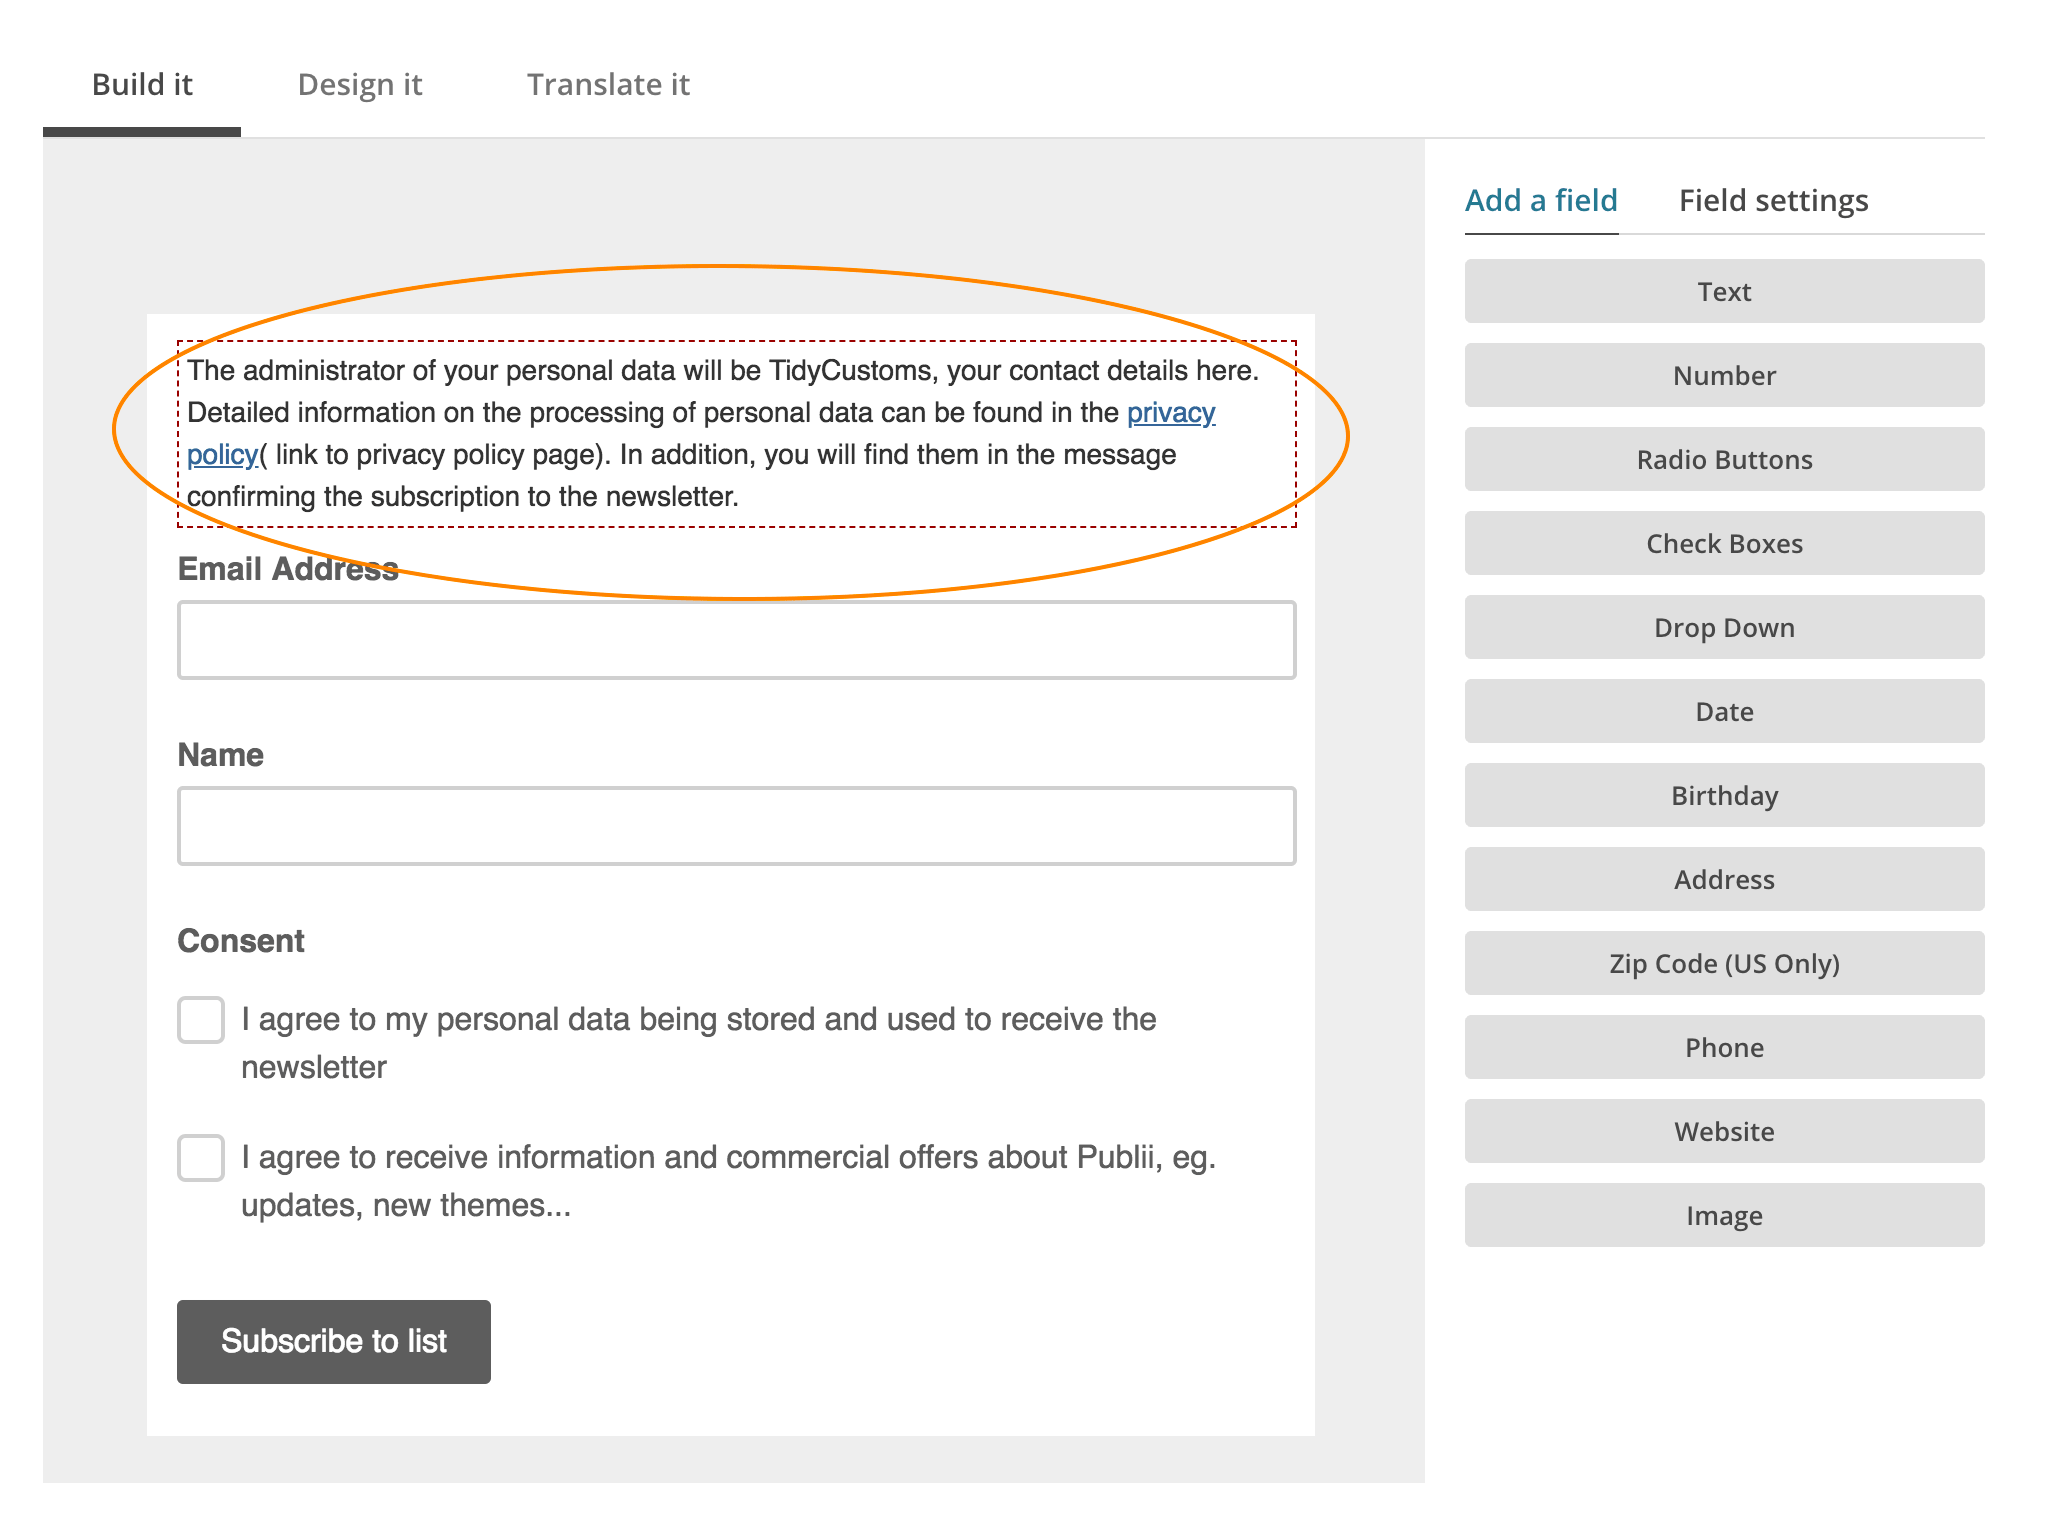
We can do it by adding a message field via the add a message option, and entering our information there. The message doesn’t need to be overly verbose, but it does need to be clear; for example:
The administrator of your personal data will be TidyCustoms, (add your address with contact details e.g. email address here.) Detailed information on the processing of personal data can be found in our privacy policy (link to privacy policy page). This information will also be provided to in the newsletter subscription confirmation email.
NOTE: As we have already enabled a double opt-in process we can if preferred add this message to the confirmation email sent to a subscriber after filling the form, rather than in the consent form if aesthetics are a concern, or you do not wish to have such information publicly accessible by bots, for example.
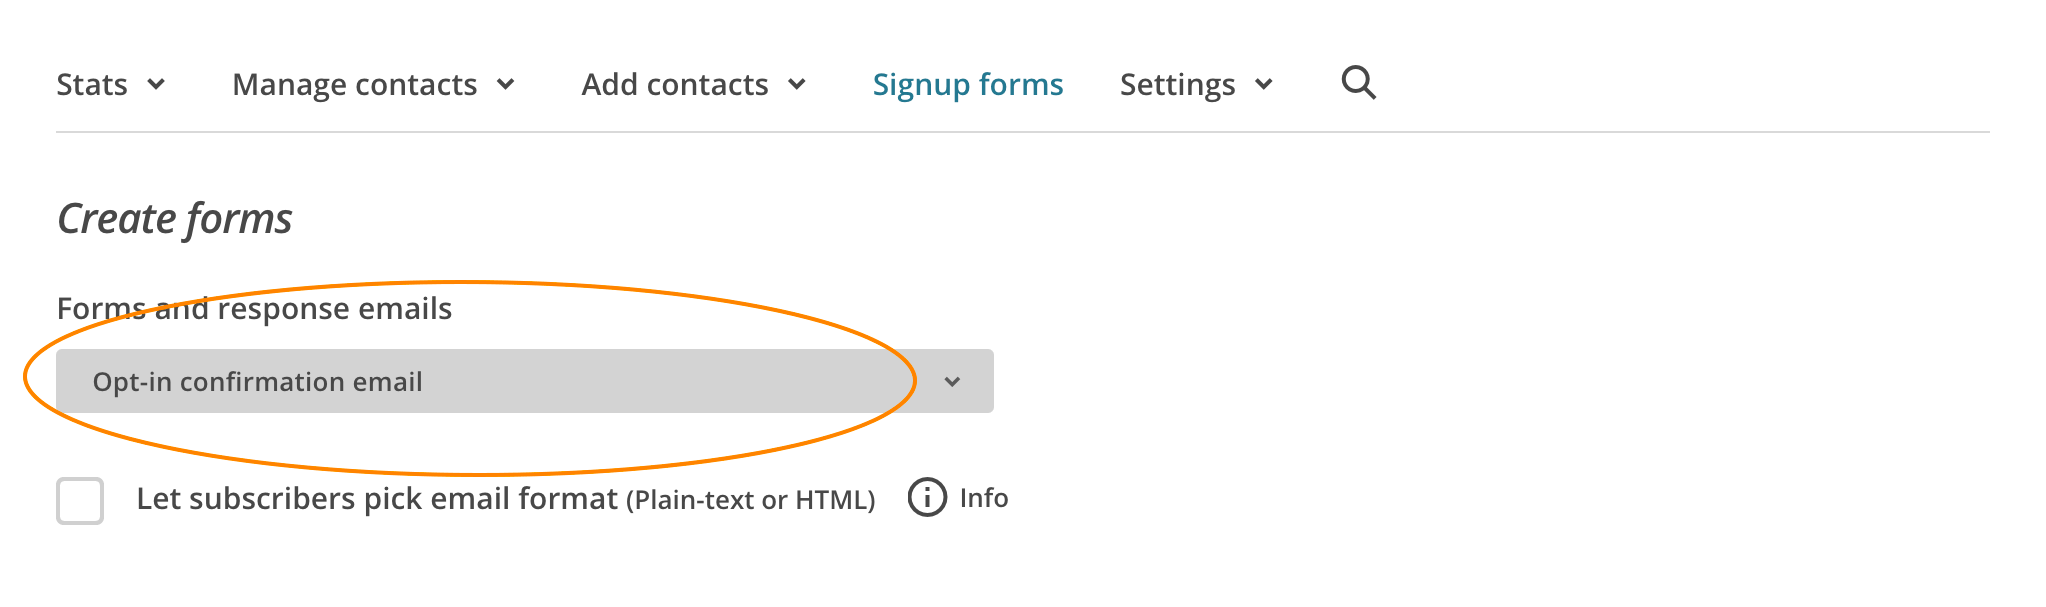
- We should also add the above information to the Opt-in confirmation email, Confirmation thank you page or Final welcome email too, which ensures that the user has been fully-informed wherever possible.
It can sounds something like this:
If you received this email by mistake, no further action is required and you may delete it. Your email address will not be subscribed to our newsletter until you click the confirmation link above.
The Administrator of personal data collected via GetPublii.com will be TidyCustoms (hereafter referred to as the "Administrator"), who operates a business under the name:TidyCustoms, Entered into the Central Registry and Information on Business of the Republic of Poland (PL- CEIDG) kept by the competent minister of economy, with a business address of: Street etc… Detailed information on the processing of personal data can be found in the privacy policy( link to privacy policy page)
For questions about this list, please contact:
email@tidycustoms.net
The last step is send our newsletter only to subscribers who have agreed with our privacy policy by clicking our checkboxes.
To make sure that only users who have consented will receive our newsletter, we will need to address our newsletter to the correct segment (that is, those assigned to our Consents group)
- Create a Campaign
- Click the Add recipientsbutton
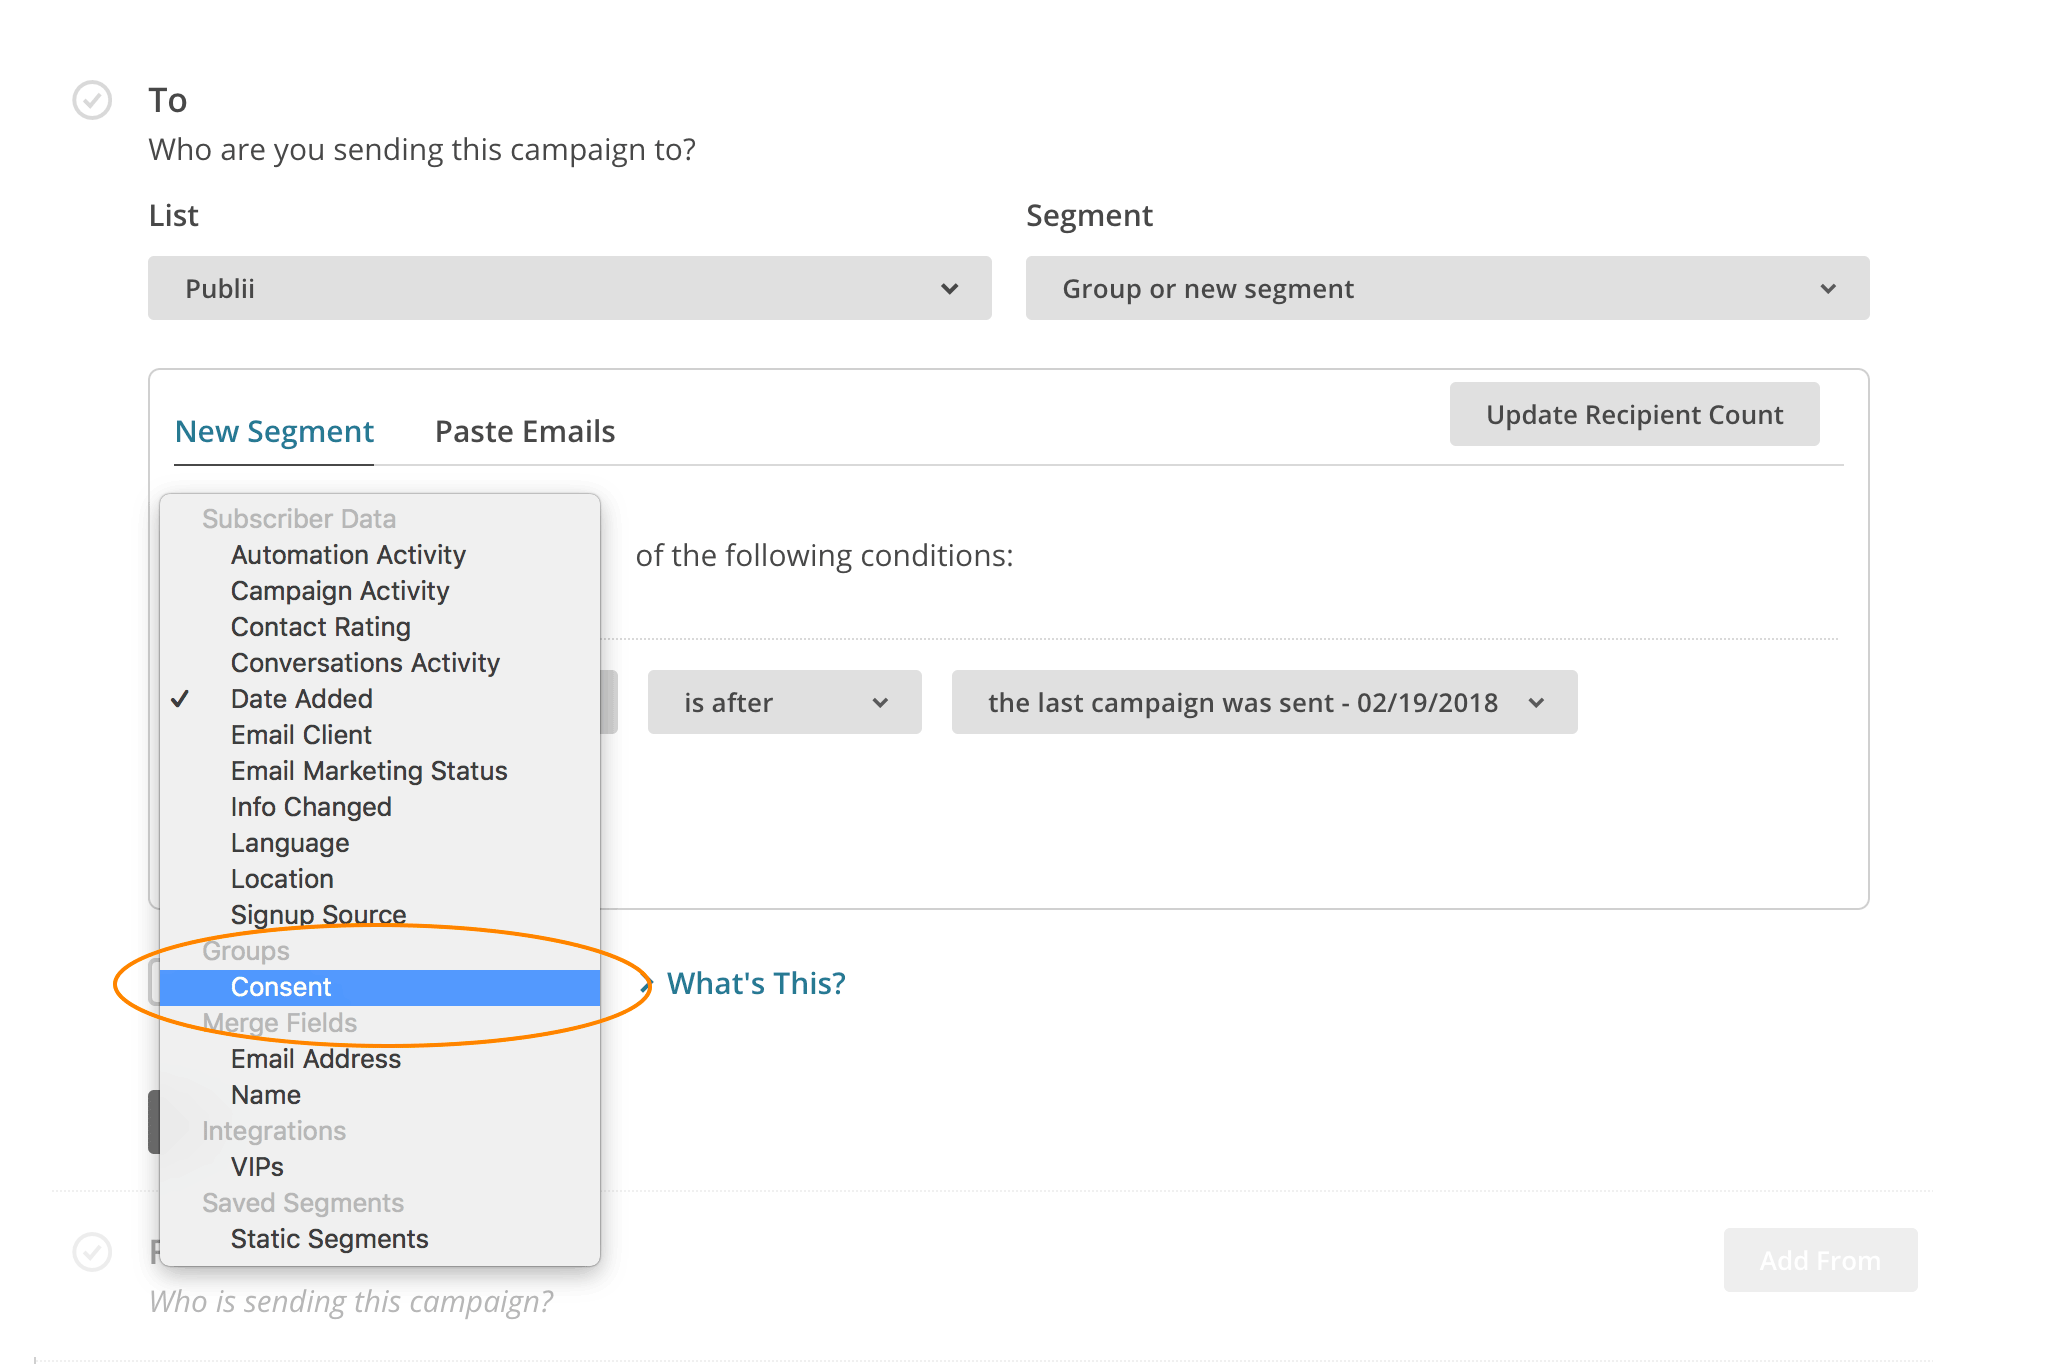
- Then select the List and, in the Segment field, select Group or new segment
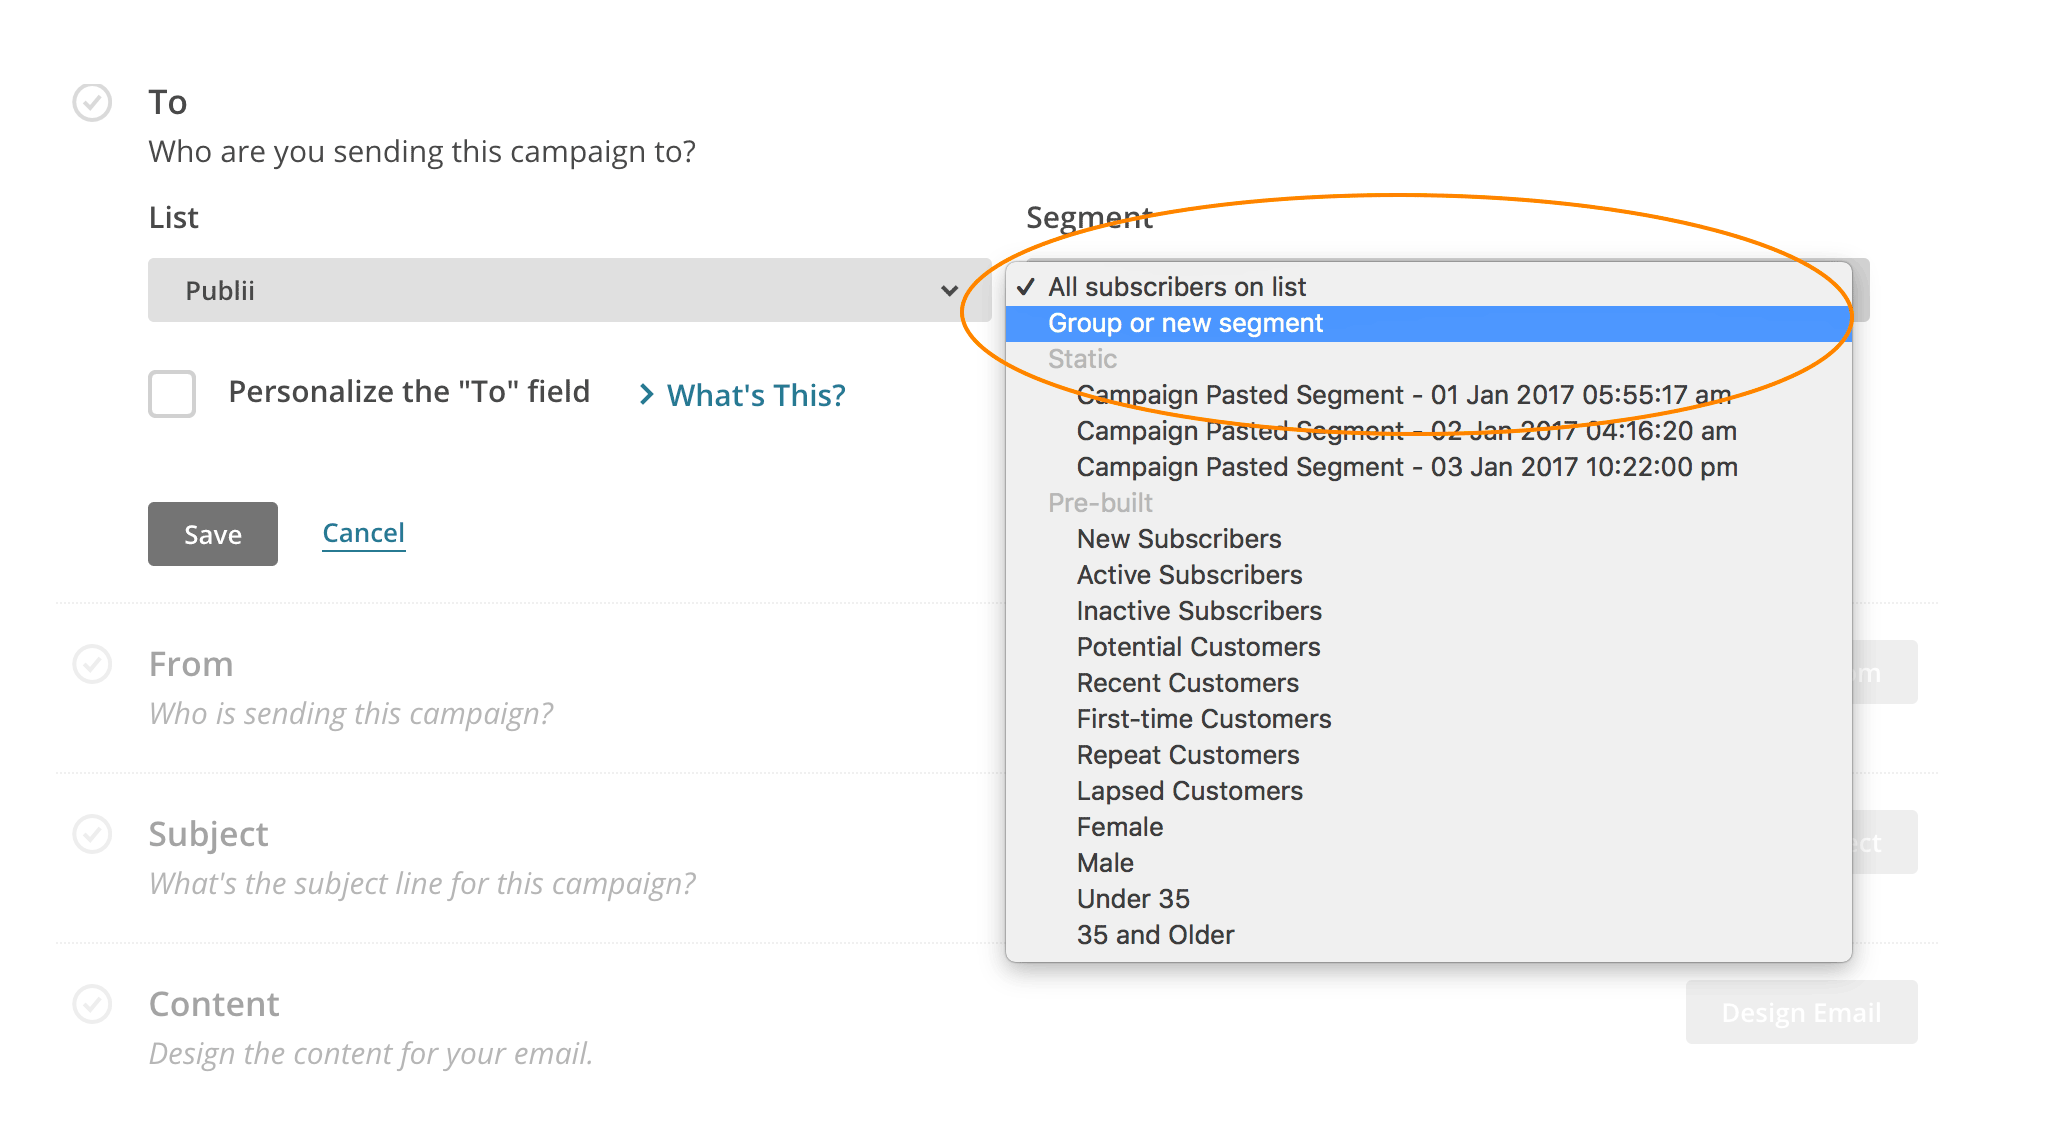
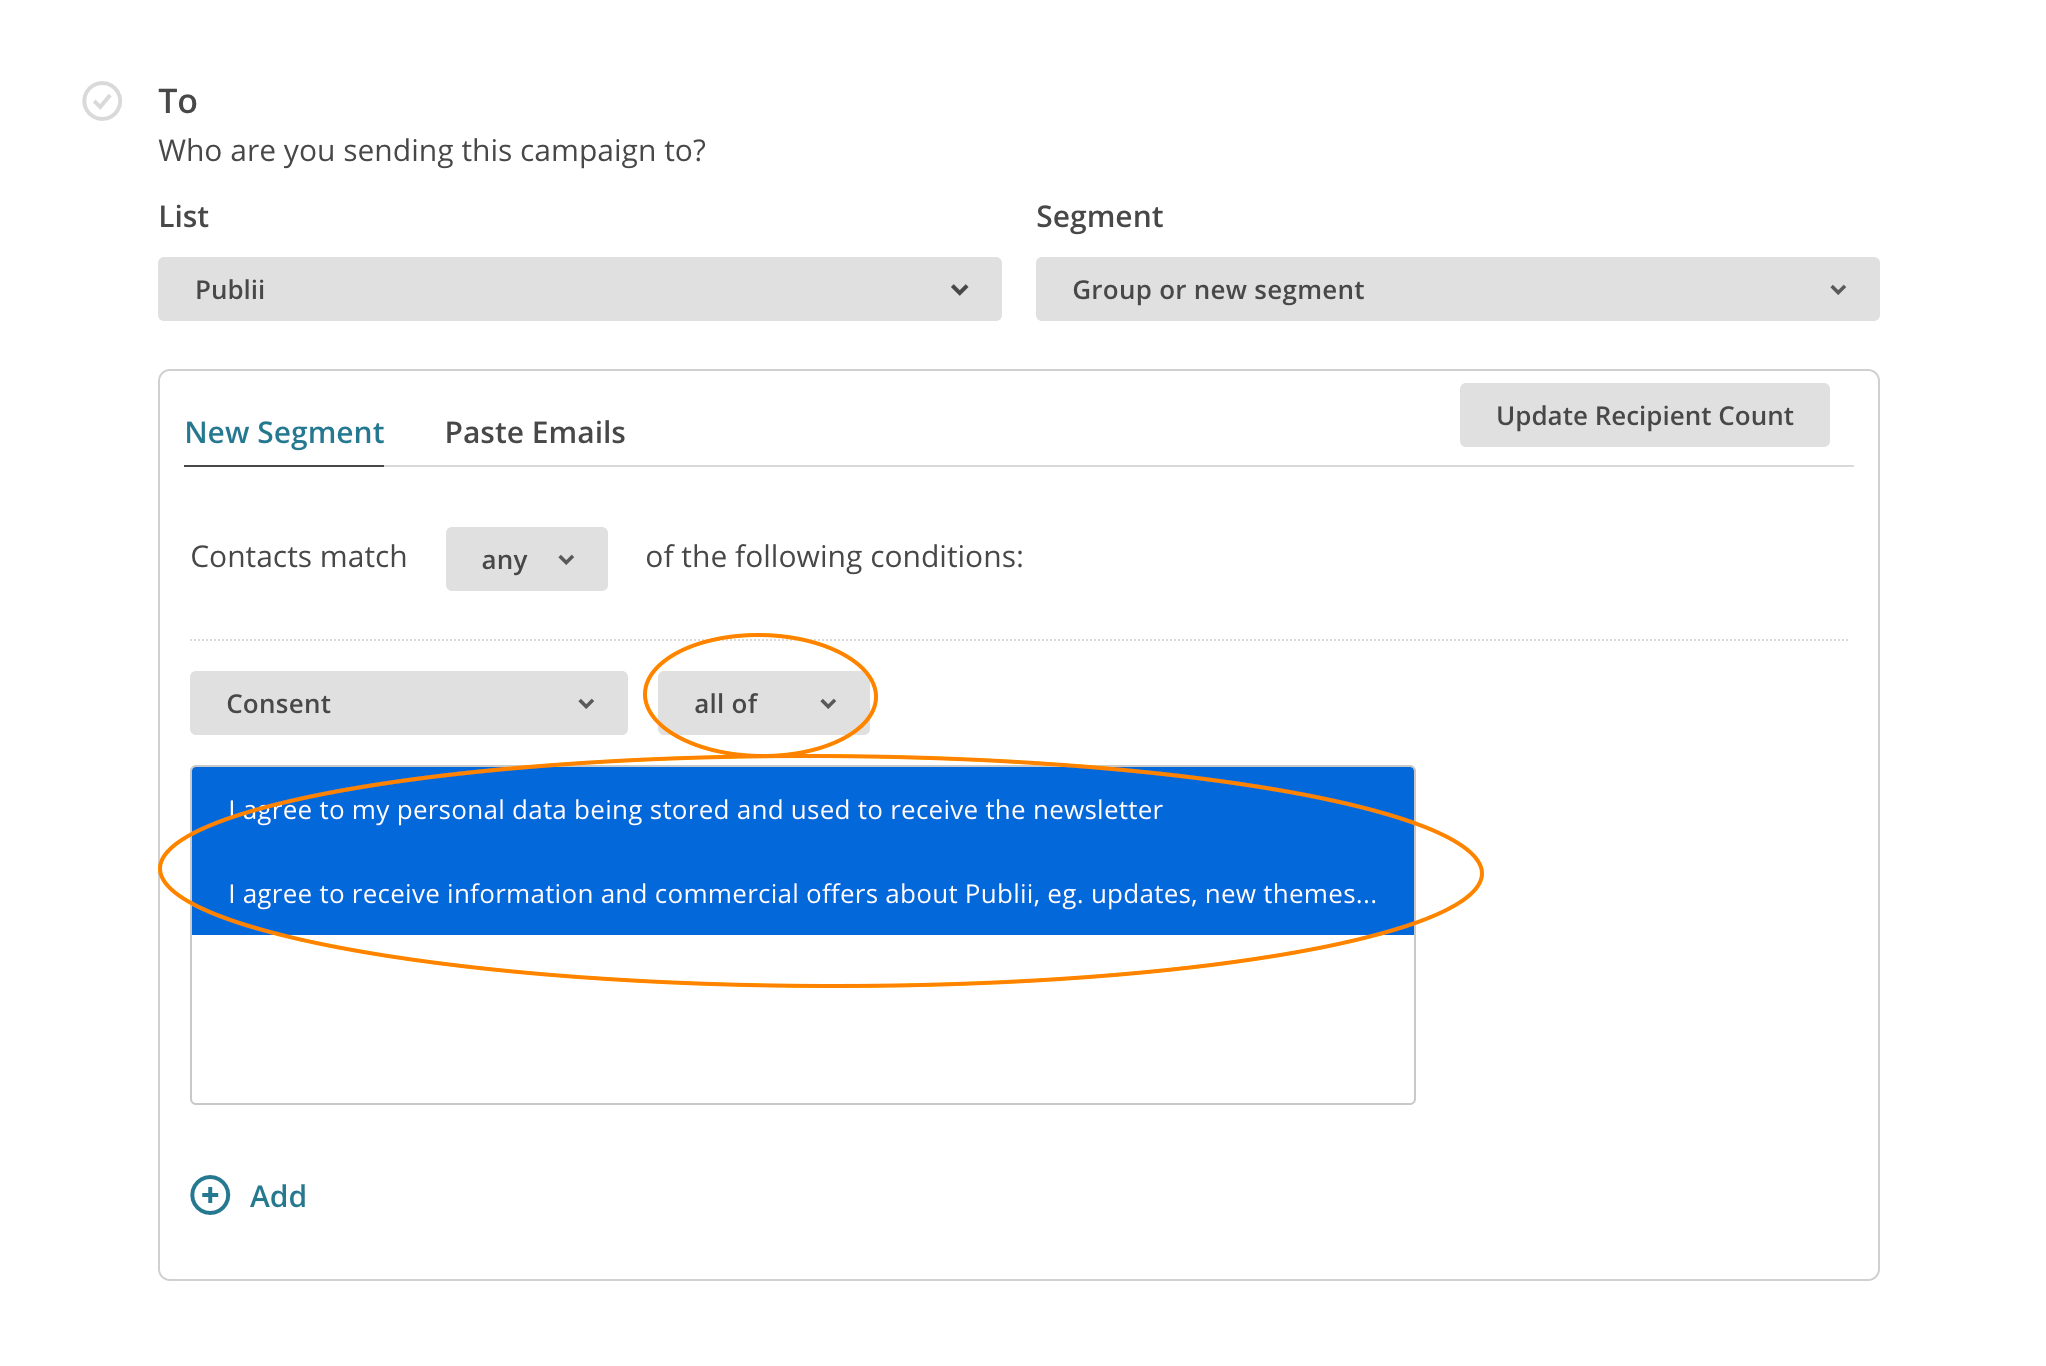
- Now we filter the recipients by selecting the Group created earlier:
- Finally, we set the match conditions to "Consent" and all of and click the Save button.
The process is now finished, and we can now create our newsletter content and send it to our subscribers, safe in the knowledge that we meet the requirements of the GDPR and our users’ data is protected.
Live examples: Technews (right sidebar section) or QF theme (footer section)
If security and GDPR-compliance are big concerns for your website, then Publii may be just the site-building tool you need. With it you can start building a super-fast static site that's near hacker-proof and GDPR-compliant, all from the comfort and safety of your desktop.
Download Publii
You may want to learn how to make your newsletter form functional and visually-appealing.