GDPR Cookie Banner Configuration
The built-in Publii cookie banner provides an easy-to-use solution for requesting and managing your visitor's cookie consent and preferences to keep your site GDPR-compliant. In this guide, we'll cover all the basics to get your cookie banner set-up for use, and demonstrate how to add specific consents for the cookies used by the features and services provided by Publii plugins.
Note: Multiple factors may negatively affect the performance of the Privacy Settings functionality, especially the Cookie Banner settings, such third-party scripts. We strongly recommend double-checking all your Privacy Settings to ensure that they are working correctly before using them in a live production environment.
Note: The information provided on this site does not, and is not intended to, constitute legal advice; instead, all information, content, and materials available on this site are for general information only regarding the Privacy Settings functionality built into the Publii CMS. Information on this site may not constitute the most up-to-date legal or other information. Readers of this article should contact their attorney for advice with respect to any particular legal matter. We hereby expressly disclaim all liability with respect to actions taken or not taken based on the contents of this article.
How the cookie banner works?
- The cookie banner blocks scripts that can add cookies to the browser and use the information contained therein, unless consent is given.
- If consent is later withdrawn, the previously added first-party and third-party cookies will not be deleted automatically; the Publii cookie banner does not remove them. For this reason, we recommended adding a note to the privacy policy providing details on how visitors may remove cookies from their browser directly after withdrawing consent.
- Due to the nature of static pages, records of consent are not collected; it is thus recommended that users document proofs of consent in any way. e.g. were able to prove that the visitors had to give their consent, otherwise they would not be able to, for example, use the comment system.
In general, GDPR rules do not require the collection of consent logs other than documenting that consent was given. However, if your local law has its own provisions requiring consent records, then you should consider using an alternative solution to the Publii Cookie Banner that provides said functionality.
The Basics
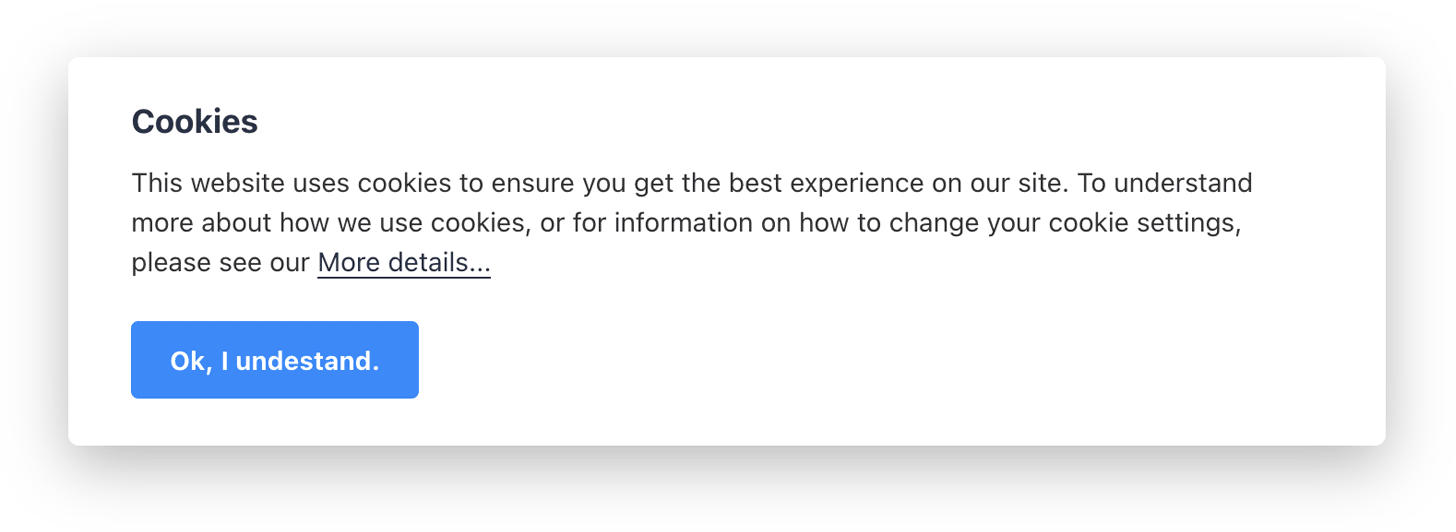
The cookie banner included with Publii offer two levels of functionality; a basic banner that simply informs visitors that cookies are used on the site, and an advanced mode that includes a separate pop-up where visitors can give specific consent to different types of cookies.
Before getting started, it's important to ensure that you are aware of what type of cookies your site uses, so that you can properly include consent requests where required. You should also make some preparations so that your site is GDPR-compliant from the moment it goes live. Consider the following points:
Which plugins does your site use?
The basic functionality of a Publii site may uses cookies only to store settings for each site visitors; no personally-identifiable information is collected. However, while the various plugins that Publii offers can be useful in improving functionality, many of the services that they include may require the use of more complicated cookies that require consent. For example, extensive analytics tools such as Google Analytics use cookies to provide in-depth usage data for your site, so this plugin's cookies would need to be added to the cookie banner to allow visitors to provide specific consent.
The same is true for most commenting plugins; plugins like Disqus and Hyvor Talk use their own system for logging-in and storing user details, which means that cookies are essential for their functionality.
Not all Publii plugins use such cookies though; plugins that add minor features such as Meta Tab Colors do not collect any personal information, and there are often alternative plugins that are designed to be GDPR-friendly, such as Plausible Analytics, which don't use cookies of any kind. However, such plugins will be much more limited in the scope of the data that they can provide regarding your site.
If in doubt, check the service's homepage that plugin include; if it specifically mentions that no cookies are used, then consent will not be required. However, please remember that 'GDPR-compliant' doesn't mean 'Doesn't use cookies'; it only highlights that the service treats the data it collects according to GDPR rules.
Does your site have a privacy policy?
It is good practice to have a privacy policy page on your site; though technically a privacy policy is not necessarily required when no personal information is being collected, it is still recommended so as to provide clarity to your visitors as to what data is collected and why, how it is stored, and what it is used for. It may also be of use should your site grow in popularity, or if you add new features that may require additional consents from your visitors.
There are many resources available online to help you with creating a privacy policy; once done, simply create a hidden post that you can then link to in your main menu (it is better to set it to hidden in order to prevent the post showing up in category or latest post listings).
Does your site use any external scripts?
The plugins offered by Publii include options for integrating with the Publii cookie banner to block their scripts (therefore also the cookies they serve).

However, if you are using other external scripts on your site (for example, if you are using an Analytics service by adding their scripts to your site code, rather than through a plugin), or a third-party plugin that wasn't downloaded from the Plugin Marketplace, then it may be necessary for these scripts to be manually added to the cookie banner. More details on this process can be found in the Manually Adding Scripts to Cookie Groups article in this guide.
Enabling the Cookie Banner
Whether using simply the basic cookie banner, or taking advantage of the advanced consent options it includes, we must start from the same place; enabling the banner. Once done, the basic banner that informs visitors that cookies are used on your site will be active.
Enabling the basic banner takes just a few moments; to do so, follow these steps:
- Open the Site Settings section of the Publii app by clicking on it in the left-sidebar then, in the Advanced Options section, click on the Privacy Settings option to open the Privacy banner settings tab.
- In the second section of this tab, titled Cookie Banner, click on the Enable Banner option; this will expand the available options to allow configuration of the banner.
- Enter a Banner Title and Banner Message if you want to change the defaults; this will define the title and message that appears in the cookie banner when it first appears.
- Next, choose whether to link to your site's privacy policy in the cookie banner; to include the link, enable the Show Privacy Policy Link option. You will need to enter a Link Label, which sets the text for the link, and point to either an Internal post or an External site, wherever your privacy policy is located.
- Finally, the layout and style of the banner can be configured. There are three options for this section; Open Banner By, Badge Label, and Banner Position, which work as follows:
- Open Banner By - Chooses whether the banner is displayed via a badge, or a custom link, or both. For most users, this can be set to Badge; more advanced users may wish to use a custom link by placing a link with the provided by their anchor into a website Privacy Policy arttile e.g.
<a href="#cookie-settings">Cookie preferences</a> - Badge Label - Sets the text for the title of the badge (used for the aria-label of the badge icon)
- Banner Position - Chooses where the cookie will appear when the page is loaded; it can be set to appear on the Left, Right or Center, or you can use the Bar option, which will display the cookie banner as a thin bar across the full width of the page.
- Open Banner By - Chooses whether the banner is displayed via a badge, or a custom link, or both. For most users, this can be set to Badge; more advanced users may wish to use a custom link by placing a link with the provided by their anchor into a website Privacy Policy arttile e.g.
- With all the options configured, you can finish by clicking the Save Settings button at the bottom of the page; this will save the changes and your cookie banner will be ready to go.
Advanced Configuration
If you are using plugins that require cookie consent from your site visitors, then we'll need to take some additional steps:
- Enable the cookie consent pop-up form.
- Decide which cookie groups the plugins that we have enabled should be added to.
- Add our enabled plugins to the provided cookie groups so that they do not function until consent has been given.
We'll look at each of these steps below.
Enabling the Cookie Consent Pop-up
Enabling the consent pop-up is incredibly easy, and the default options will usually be enough for our needs. However, it is a good idea to check through the settings just to make sure that all is in order. To enable the consent pop-up, follow these steps:
- In the Advanced section of the Privacy Settings, click on the Enable Advanced Cookies Configuration option to enable it. This will expand the options associated with the pop-up.
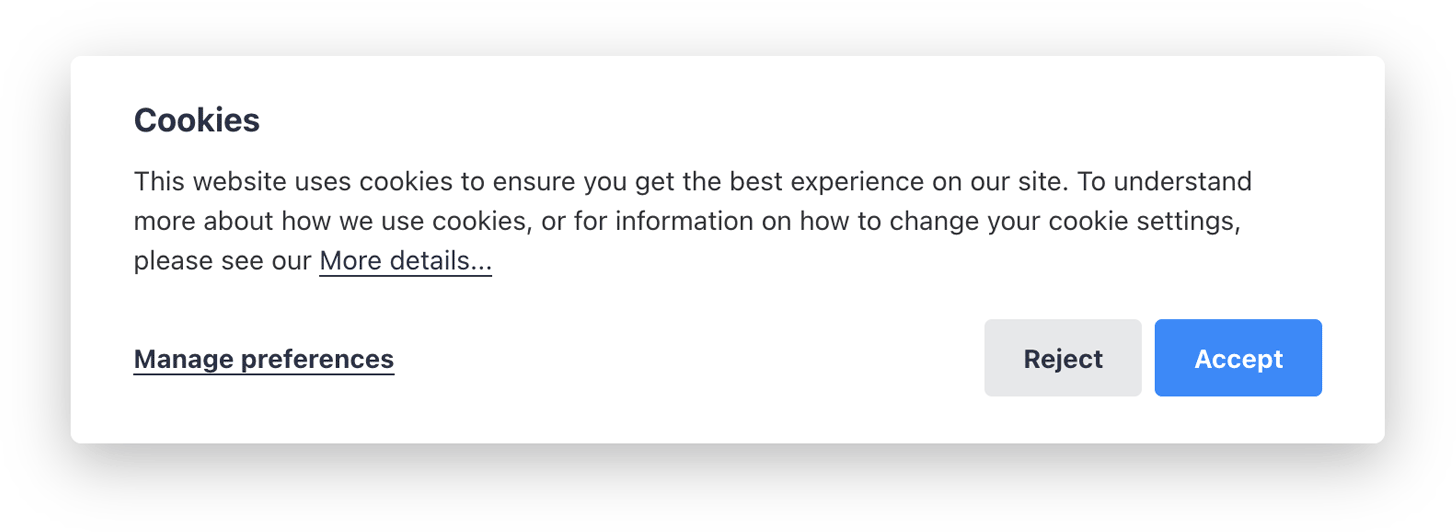
- As before, set a Banner Title and Banner Message; this title and message should specifically advise visitors to choose which cookies they wish to consent to.
- Double-check the Accept, Reject and Save Button Labels; the buttons that these options display will allow visitors to immediately accept or reject All cookie groups, or Save consent only for the selected cookie groups.
- Choose whether to display a link to the privacy policy page.
Note: The privacy policy link must be enabled in the basic banner first before it can be enabled in the advanced configuration i.e. it is not possible to display the privacy policy link in the advanced pop-up only.
- Finally, we need to check the Cookie Groups section to ensure that we have the correct cookie groups that we need. More information on this feature is covered in the next section of this guide; Cookie Groups.
- Hit the Save button at the bottom of the page to save changes; now the cookie banner is enabled, we will need to ensure that any plugins that use cookies on our Publii site are attached to the correct cookie group; this information will be covered in the Adding a Plugin to a Cookie Group section of this guide.
Cookie Groups
Cookie groups allow us to group all cookies that perform a particular function together e.g. if we are using two different analytical plugins, we can group their cookies into a singular Analytics cookie group so that our visitors only need to give consent to a single cookie group, rather than to each plugins' cookies individually.
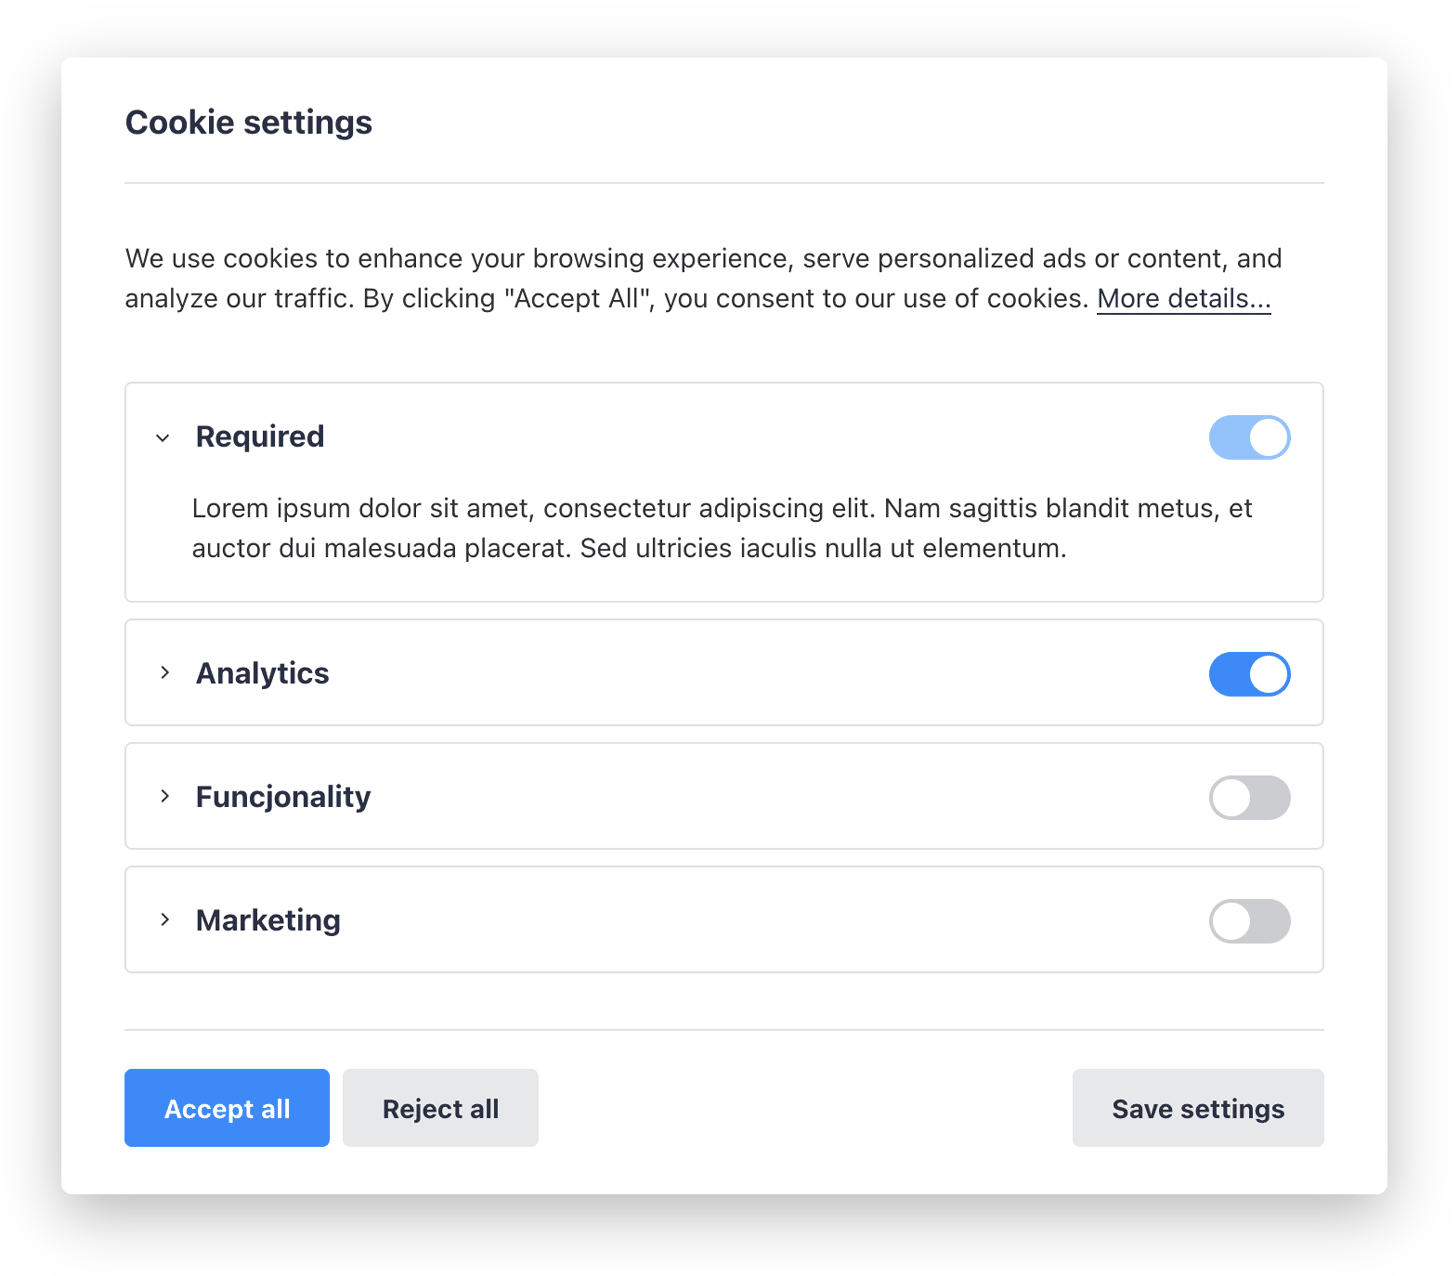
You can define the most used cookie groups as: Required, Functionality, Analytics, or Marketing. You can add an unlimited number of groups; if you are only using the plugins available from the Publii Plugin Marketplace you will not need to do this. If you are interested in creating your own cookie groups, check out the next article in this guide, Customizing the Cookie Banner.
Each plugin that uses cookies needs to be assigned to a group, depending on what their function is. Let's see how it can be configured. Create a four cookie groups which can be briefly described as follow:

- Required - Cookies included in this group should be essential for the basic functionality of the site, but do not collect any personally-identifiable data. This group can be marked as a required (read the note below on how to do this).
- Functionality - This group is for cookies that add functionality to the website, for example, cookies from Disqus or other commenting solutions which allow visitors to add comments to posts.
- Analytics - This group refers to any cookies that collect analytical or tracking data for the purpose of providing statistics to the site owner; for example, to show how many visitors came to the site, how much time they spent on each page, what links were clicked etc...
- Marketing - This group is for cookies that collect data that will be used for marketing purposes such as showing specific adverts to visitors, or allowing them to sign-up for newletters or other communications.
For each cookie group there are three elements to be aware of before we start adding plugins to them:
- Group Name - The group name is the name that will be displayed in the cookie consent pop-up, so it should be clear at a glance what the cookies are for.
- Group Description - In this section we can add a description to provide further details as to which cookies are in this group, what they collect, and how they are used.
- Group ID - The group ID is an essential, internal name for the group; it is the ID that we will use when adding a plugin to a specific group, and is used by Publii to determine which cookies have received consent.
Note: To set a cookie group as Required, meaning that it will be automatically ticked when opening the cookie consent pop-up, leave the Group ID blank, or insert a dash instead of a piece of text.
Before we can start adding each plugin to its respective cookie group, we should check which plugins we are using on our site, and decide which cookie group they will belong to, so we don't get confused when making the changes in the plugin's settings.
Adding a plugin to a Cookie Group
The hard part is over; with all our cookie groups set up, the only thing we need to do is add our plugins to their respective cookies groups. This step is as easy as can be:
- In the Publii main menu, click on Tools & Plugins to open the Tools screen, which displays all your currently-installed plugins.
- Find the plugin that you wish to add to a cookie group and open its settings screen.
- Scroll to the bottom of the plugin settings screen and, in the Cookie Banner Integration section, click on the switcher button to enable banner integration in the plugin.
- A new option will appear; Cookie Banner Group Name. Here, enter the Group ID of the cookie group that you created earlier in the Cookie Groups section and to which you want to assign the plugin, for example: if you want the user to consent to the use of the Google Analitics, enter the Analytical Group ID (analytics)
- Click the Save Settings button at the bottom of the screen. The plugin's scripts will be blocked now, which also means its cookies, and you're ready to go!
Adding external scripts to a Cookie Group
Once you have your cookie groups set-up, you will need to add each 'script', which can basically be thought of as a block of code that powers a particular feature on your site, that uses cookies to collect or store personal data to the group. This requires some additional steps compared to other features as you will need to modify the theme's code to add the group name. A guide for doing this can be found in our developer documentation; How to make your theme GDPR-compliant.
If you're having trouble following that guide, then you may use the following as an example; these steps show how to add a "Type" attribute to the Disqus script, which powers the comment system in Publii and uses cookies to identify visitors and allow them to post:
- Make sure that your theme has been updated; older versions of the theme do not include the extra little bit of code that allows scripts to be added to the cookie popup.
- Take a note of the group ID of the group you want to add Disqus manually to; we will use the default "Functionality" group, which uses the "functionality" group ID.
- We need to open the file that contains the script we want to add to the popup, so we'll need to open our Publii/sites/site-name folder, where site-name if the name of your site (the location is set in the Global Setting, if you're not sure where you keep them).
- Now we need to get to the theme file that is being used by your site; continue navigating to the input/themes/theme-name folder, where theme-name is the name of your current theme.
- This folder contains all the files for the theme your current site is using; now, to put the Disqus Universal Embed Code open the post.hbs file (use any text or code editor to edit this file - you can use something specifically for code editing such as Sublime Text, but even Notepad will do its job too).
- Now paste the Disqus embed code here, and to add our Type attribute we must modify <script> tag ass follows:
<script type="{{ gdprScriptBlocker "functionality"}}"></script>The
{{ gdprScriptBlocker }}helper does all the heavy work of sorting the script and blocking it if it is not consented to by the user, and the "functionality" text assigns it to the "Functionality" group's ID. - Save the changes to the file, and you're done.
Note: Changes made to the theme files in this manner will be overwritten should you later update the theme, so the process will need to be repeated. More advanced users can take advantage of file overrides to apply a more permanent change, if required. More about overriding the files you can learn by visiting our documentation.
Customizing the Appearance of the Cookie Banner
The basic cookie banner will work fine on most sites, but if you would like to modify the appearance of the banner to better fit your site's aesthetic, then you can do so via the Custom CSS Tool, which can be found in the Tools & Plugins section of the Publii main menu.
Below you will find a list of CSS values relating to the appearance of the Cookie Banner that may be copied to the Custom CSS tool and modified; through this method, you may change colors of all aspects of the banner, resize the pop-up window, and change font weight.
Note: The standard cookie banner can automatically operate in both light and dark mode, depending on the visitor's browser setting; there is no need to make any changes to the CSS if you only wish to use a dark-mode compatible color-scheme.
Available CSS Parameters
Copy the following code to your Custom CSS tool, then make any required changes.
:root {
  --pcb-width: 42em;
  --pcb-popup-height: 36em;
  --pcb-font-base-size: 17px;
  --pcb-font-weight-normal: 400;
  --pcb-font-weight-bold: 700;
  --pcb-border-radius: 4px;
  --pcb-badge-border-radius: 100%;
  --pcb-link-transition: all 0.12s linear;

  --pcb-bg: #ffffff;
  --pcb-overlay: rgba(12, 13, 16, .8);
  --pcb-text-color: #343435;
  --pcb-headings-color: #283149;
  --pcb-border-color: #e1e1e1;
  --pcb-bg-light: #f6f6f9;
  --pcb-btn-primary-bg: #e7e8ea;
  --pcb-btn-primary-bg-hover: #cbcdd2;
  --pcb-btn-primary-text: #283149;
  --pcb-btn-primary-text-hover: #283149;
  --pcb-btn-secondary-bg: #1089ff;
  --pcb-btn-secondary-bg-hover: #0079f2;
  --pcb-btn-secondary-text: #ffffff;
  --pcb-btn-secondary-text-hover: #ffffff;
  --pcb-btn-link: #283149;
  --pcb-btn-link-hover: #0079f2;
  --pcb-badge-bg: #1089ff;
  --pcb-badge-bg-hover: #0079f2;
  --pcb-badge-color: #fff;
  --pcb-badge-color-hover: #fff;
}
@media (prefers-color-scheme: dark) {
  :root {
    --pcb-bg: #191a1f;
    --pcb-overlay: rgba(10, 10, 12, .8);
    --pcb-text-color: #a5a7b7;
    --pcb-headings-color: #d9d9e0;
    --pcb-border-color: #393a47;
    --pcb-bg-light: #f6f6f9;
    --pcb-btn-primary-bg: #32343e;
    --pcb-btn-primary-bg-hover: #3c3f4b;
    --pcb-btn-primary-text: #d9d9e0;
    --pcb-btn-primary-text-hover: #ffffff;
    --pcb-btn-secondary-bg: #1089ff;
    --pcb-btn-secondary-bg-hover: #0079f2;
    --pcb-btn-secondary-text: #ffffff;
    --pcb-btn-secondary-text-hover: #ffffff;
    --pcb-btn-link: #d9d9e0;
    --pcb-btn-link-hover: #42a0ff;
    --pcb-badge-bg: #1089ff;
    --pcb-badge-bg-hover: #0079f2;
    --pcb-badge-color: #fff;
    --pcb-badge-color-hover: #fff;
  }
}
When modifying the color values above, it doesn't necessarily need to be using hex values; you may also use the CSS variables that are specific to your theme. For example:
:root {
  --pcb-text-color: var(--text-color);
  --pcb-btn-link: var(--link-color);
  --pcb-btn-link-hover: var(--link-color-hover);
}
Note: If you are overriding a CSS value with a theme value as in the example above, please be aware that if your theme includes a dark mode these values will also need to be overridden, as the example above will use the theme's dark mode colors in this situation.