Managing your Publii static website on multiple computers
 Lee Batten
When the first Publii beta dropped, it was surprisingly complete considering it was, y'know, a beta. Right from the start it was possible to pick a theme, create posts, tags and author pages using the built-in text editor, and create a functional static website with virtually no hassle. This was good for beginners like me who just wanted to get a website running without all the technical know-how that even relatively user-friendly CMSs such as WordPress demand.
Still, there was definitely room for improvement; little things that would make using Publii even more flexible. There's been a steady stream of new features coming along with each subsequent beta, and in this article I'll be trying out one in particular; managing Publii sites from multiple locations.
Getting more authors in
The earlier beta versions of Publii included support for a single author; when creating website a site owner name had to be entered, and that was automatically used as the author name too. An author page was created, and it was possible to edit the bio or even change the name of the author, but every article posted would have the same author.
For many users one author was enough, but if a website is going to grow then it will almost inevitably need to post content from multiple authors, if only to keep up with demand. Thankfully, the Publii team quickly added support for additional authors, but this threw up another question; how would multiple authors be able to post to a single website if each website was tied to a particular Publii install?
This question wasn't just for sites with multiple authors though; for users that travel frequently updating a site from a single location isn't always possible. It's fine if your main computer is a laptop, but what about users who have a desktop at home and a Windows tablet for travelling, or people that work in multiple locations during the week?
Publii file location options
The answer to these questions wasn't as straightforward as it may first appear. Because Publii creates static sites it doesn't actually need to connect to the internet until it is told to sync with a server; it's perfectly viable to create your website without ever going online with Publii. This means that a password or online login system wouldn't work; Publii needs to be able to work offline.
Instead, a simple yet effective solution was added; the ability to set where the files for your website are stored by Publii on your local machine. This could be used just for convenience's sake, but it can also be a solution for multiple authors or computers; by setting the file location to a cloud storage folder and doing the same on any other computers that will be used to edit the website, any changes made in Publii will be uploaded to your cloud storage and then downloaded to your other locations, overwriting the old files.
Putting cloud storage to the test
Well, that's the theory anyway. The thing about theories is that they really need to be tested vigorously to make sure that they actually work, and to show that even a beginner can get Publii working across computers the team have nominated me to test run it. First, a little background; I'm not a complete beginner at using CMSs such as WordPress, Joomla! and the like, but my experience only deals with the surface of such tools; I can create a basic website, but if things get technical I'm going to get a bit lost.
So I don't know much, which means if I can get Publii working on multiple machines, pretty much everyone can! Now let's get started by first picking our storage solution:
Picking the cloud to sit on
The very first thing I'll need is a cloud storage solution. There are plenty of options out there that can range in scale and price, but for testing we'll only need a small, storage-focused option such as OneDrive or Dropbox; I'll use Dropbox because I'm lazy and it's already installed!
The default functionality of Dropbox, and of most cloud storage, is to always prioritize the latest version of any given file. This means that once changes are made and uploaded on one computer, then when you login to another computer with the same file Dropbox will see that the file it has stored is more recent than the pre-existing one, and will replace it. This way, as long as we're connected to the internet everytime we mess around with Publii, we'll be able to work on it from multiple locations.
If you've never setup Dropbox before, you'll find it super-easy:
- Head over to the Dropbox register page; fill out your name and surname, email, and create a password, then click the Create an account button. Alternatively, you can login with your Google account.
- You'll see a simple screen with a Download Dropbox button; click this, then run the downloaded file to install the Dropbox app.
- Like many modern apps, the .exe file will now start an installer to download and install Dropbox; this might take a little while depending on the speed of your connection.
- Once installed Dropbox will start automatically; you can then go straight to the Dropbox folder that is created when the app is installed, or you can click on Advanced Options and change the folder location. Set the folder to be something unique and easy-to-find, just in case you need to make manual modifications to your Publii files later.
Pointing Publii in the right direction
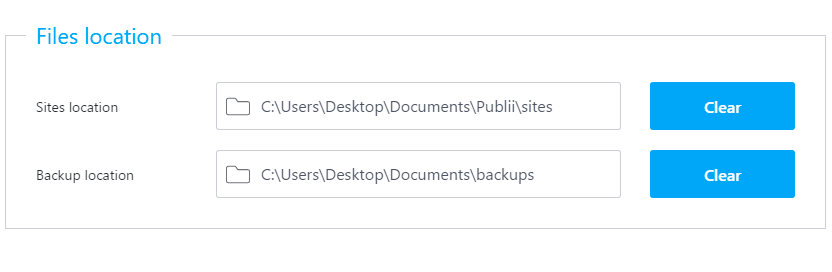
So Dropbox is ready to go, now I need to get Publii to use my Dropbox folder as the storage space for its files. Just like most things with Publii this is easy to do; just open Publii and head to the Global Settings, where you'll find a section called Files Location; here I just changed the path to point to my Dropbox folder (don't forget to create a separate folder for the files if you're going to add other things to the Dropbox folder).
With that done, I can repeat the process on my other computer. Now, I personally tend to do all my work from a single workstation, but for the purposes of testing I'll commandeer the family Windows 10 tablet to make sure that everything is working as expected with Publii.
Uploading the site files
With a test site already present on my Publii install, I was surprised at how quickly my site files appeared on Dropbox. I mean, obviously the files for a Publii static-site aren't going to be particularly huge so this is to be expected, but it was more the efficiency of the action that impressed; the instant I saved the file location in Publii it moved the files and Dropbox started uploading them.
It highlights the benefits of Publii running as a desktop app rather than server-side; usually moving and changing files is a slow and tedious process depending on the speed of your connection, but since Publii is running locally it does every action near-instantly. And with the files all uploaded, all that I need to do is install Publii and Dropbox on my other computer to see if the site files will be recognised.
Overcoming obstacles and sharing the site
Getting Publii and Dropbox set-up on the secondary machine wasn't difficult, and I loaded up Publii to set the site files location. Here, I hit my first snag that I didn't plan for; when Publii starts for the first time you are prompted to create a site. Without a site, the app won't start. Of course, I do have a site from the original install, but I can't access it until I get into the Global Settings to change the file location, which I can't do until I have a site!
As a workaround I simply created a random name and author, figuring that I could just delete it later. And so, without ceremony, the super-original asafgd site was born. Now I could access the Global settings to modify the file location.
Here, i hit my second snag. After entering my Dropbox folder as the new file location, I found that Publii was encountering an error every time I tried to save the changes. This issue was quickly fixed; I'd like to say that I used my incredible IT skills to figure out what I'd done wrong, but the truth is that I simply fell back on that old tech support mainstay of closing and reopening the app! I'm not sure if this was an issue caused by it being the first time that Publii was run on the machine in question, or if it was something to do with my OS or settings, but if you run into similar issues just considering restarting the app, it might just work!
After restarting the app I was quickly able to change the site file location to my Dropbox folder, which by now already contained the files for my existing site. From my testing it seems that Publii only checks for site files on startup, so after changing the location and saving the changes I couldn't immediately switch to my existing site; instead, I had to restart the app once more. Once this was done, the original site appeared in the list of available sites like it had never left.
At this point my two instances of Publii were good to go; whenever changes were made to my site the modified files were automatically uploaded to Dropbox, and then downloaded to the other machine. Something to bear in mind here is that, if my previous guess that Publii checks for site files on startup, it's important that if changes have been made in one of your other Publii instances then you should always ensure that your chosen storage solution has finished syncing the changed files before starting the app; failing to do this may well cause some changes to be lost or overwritten, or new content to fail to display.
The conclusion
Given my relatively small amount of technical knowledge it was really rather easy to get Publii running in multiple instances. There were a few missteps along the way, but nothing major, and each time a restart was quick to get things back on track. And of course, once it was all set-up I never needed to dive into the settings again; all the files were transferred and changes displayed automatically.
So if you're looking to run your Publii site on multiple machines, or are toying with getting one of your friends to help you create content as a separate author, consider using cloud storage as your solution; it's easy to get started with, and provides a safe, convenient solution to developing your site across computers. Just remember to be patient and make sure file syncing from the cloud is finished before you open Publii, and your site will be just fine!